Swapping material shaders in toolkit might sound intimidating, but it's actually really easy with the right resources.
Let's start with the basics: why might you want to swap out a shader?
- You need a material that isn't vertcut to be vertcut
- You need a material that isn't dyeable to be dyeable
- You want your material to be sheer
- You need a two-sided material
I think you get the idea. So let's get started…
First, we're all familiar with the basic Toolkit layout:
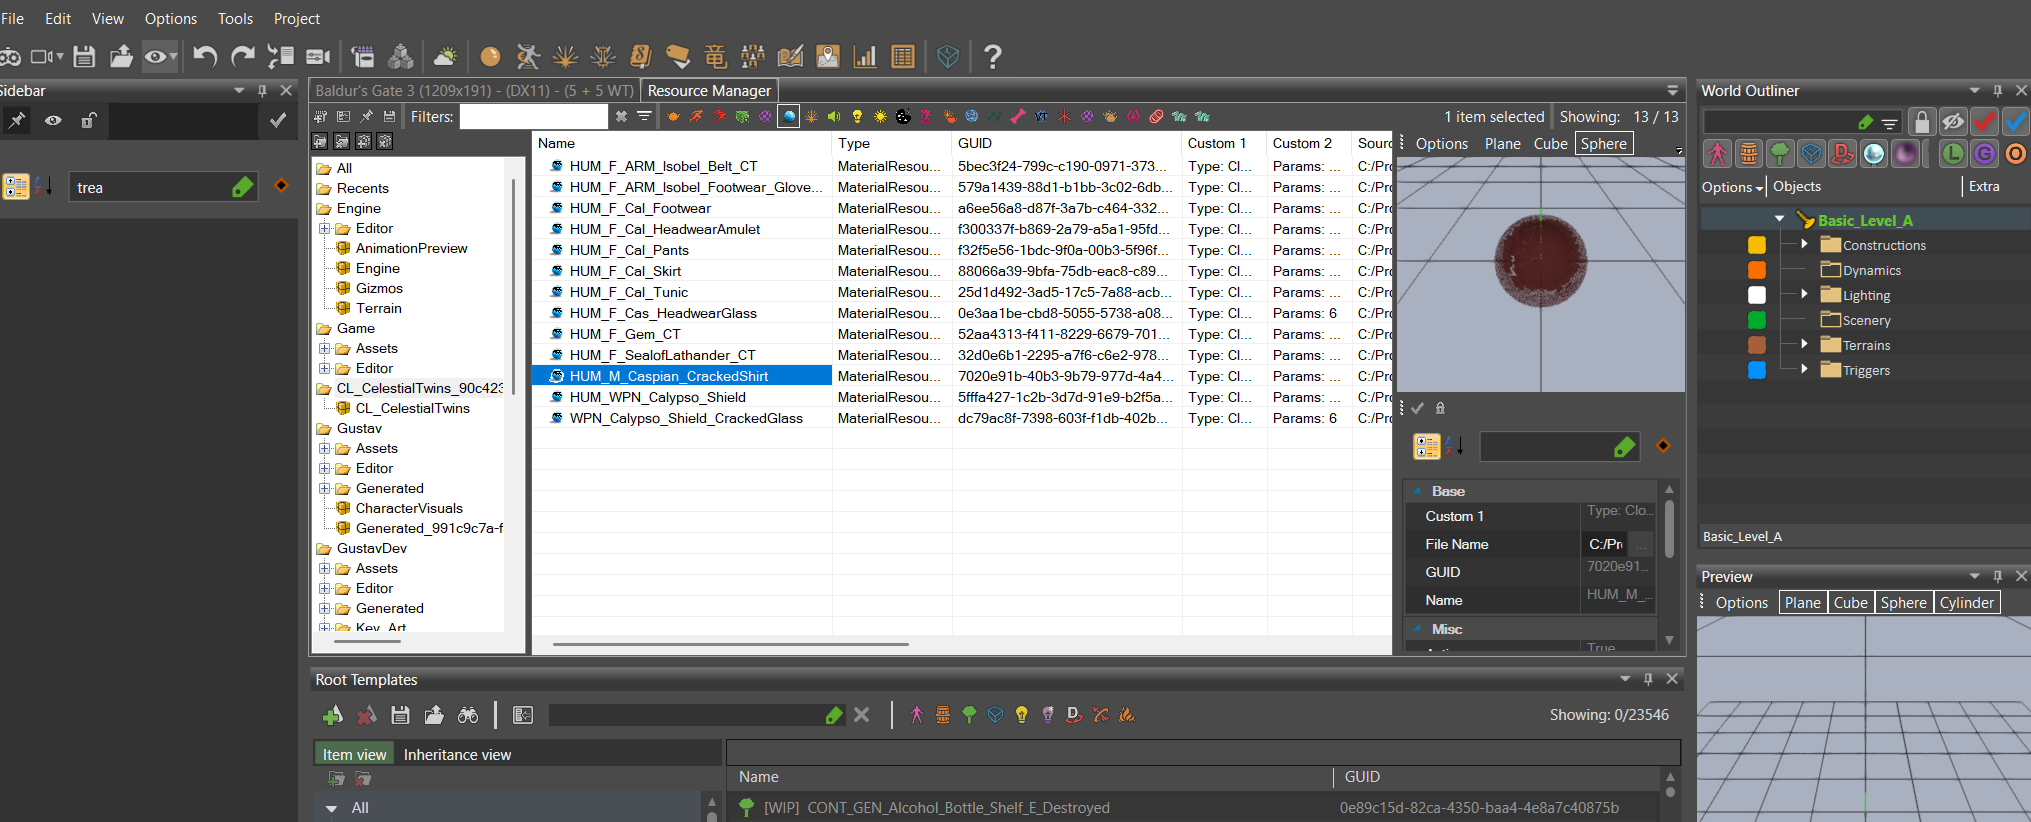
You can see I've selected a material I've previously uploaded, HUM M Caspian CrackedShirt. To the right you have your info panel about that material, including its GUID and other important information. Including your shader file…
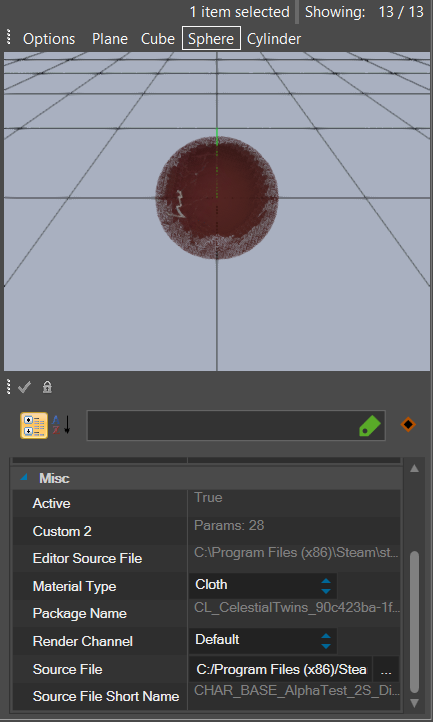
If you scroll down just a bit in that panel, you'll see the Source File address. That's your shader! Source File Short Name lists the actual shader name so you can see what shader your material currently uses.
You can consult the Wiki Shader Page for a list of (nearly) every shader in the game. Scroll until you find one that fits your needs, then cut and paste your Source File address into a txt document. You don't want to try to type your new file name into the box there it just goes wild.
Next, cut and paste the shader name into the address, replacing the current shader. So:
Current:
C:/Program Files (x86)/Steam/steamapps/common/Baldurs Gate 3/Data/Public/Shared/Assets/Materials/Characters/CHAR_BASE_AlphaTest_2S_Dither.lsf
New:
C:/Program Files (x86)/Steam/steamapps/common/Baldurs Gate 3/Data/Public/Shared/Assets/Materials/Characters/CHAR_BASE_VertCut.lsf
Now cut and paste your New address into the Source File box and hit Enter.
That's it! The shader will change, and your material will now take on any characteristics the shader provides.
¶ Important Caveat!
This might seem obvious, but it's a mistake I've made so I'll mention it: ONLY USE A VT SHADER IF YOU'RE USING A VT MATERIAL! If your material isn't designed to be used with a VT shader, you'll just cause yourself a headache and have to redo it.