¶ BG3 TOOLKIT CUSTOM SPRING PHYSICS
This tutorial will cover how to add new spring (bone) physics in the BG3 Modding Toolkit, e.g. for hair armatures. This guide assumes you have basic familiarity with the Toolkit and how to browse it.
¶ 1. Setup
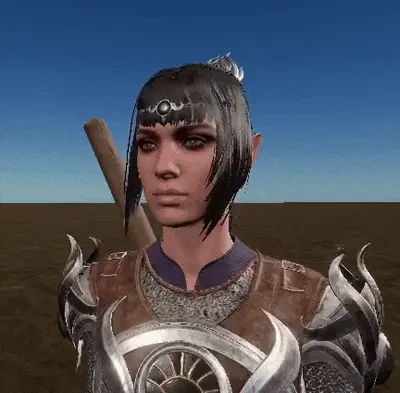
For the purposes of this tutorial, we will be adding extra spring physics to the bones of the side bangs of Shadowheart’s hair:

Create a project in the toolkit and load a level. In the Resource Manager, find the Skeleton Resource we will override (the one used by the hair). Right click and “Override in the Active Mod”.

Each vanilla hair that has spring physics also has a Physics Resource associated with it, which holds the actual information about the springs in a .bin file. It is assigned to the Skeleton Resource under “Spring Resource ID”.

If you are editing the physics of existing hair, you need to find and override that Physics Resource as well. (If you are creating a new custom skeleton, you will create its own new Physics Resource in the skeleton editor).

¶ 2. Adding Springs
Go back to your overridden Skeleton Resource and double-click on it to open it in the skeleton editor. Here you can see all of the spring capsules and constraints that Shadowheart’s hair already has on the back braid.

The basics:
Hair0_M is the start (at the top of the head) of the spring chain here. Clicking on the spring (green capsule) in the outliner, you can see in its properties that its Rigidbody Type is set to Kinematic. The first spring in the chain must always have this type, while the rest have Dynamic to have physics. If your starting bone has Dynamic as the type, the entire chain will be affected by gravity and fall through the floor once simulated (and we don’t want that). Constraints (the red triangles) between spring capsules are necessary for the same reason, and they also govern the limits of motion of the simulation (e.g. how far the springs can twist or swing).


Let’s add new spring capsules to the side bangs. Select the bone you want to start the chain at (in this example, Hair1_R), right click in the outliner, and select “Add Spring”. A new spring capsule will be added on this bone. Remember to set the Rigidbody Type on it to Kinematic.

Repeat with the rest of the bones in the chain, keeping the Rigidbody Type as Dynamic. Capsules are not necessary for endBones.

Now right click the spring (green capsule in the outliner) of the first bone in the chain that is Dynamic, i.e. the one that follows the Kinematic bone. In this case it is Hair2_R. Select “Add Constraint”. It will add a constraint that is automatically set to between Hair1_R to Hair2_R. Repeat this with any other springs down the chain.


Constraints have their own properties, and some of the more important are the Motion Limits, which govern how much the bone will twist/swing when simulated. The default twist limits of -30 to 30 are usually too great (more twisting around the bone’s primary axis), so it’s best to set them to smaller values.

If you feel lost in all of the settings of individual spring capsules/constraints, copying the values (particularly the motion limits/stiffness/mass) from vanilla spring/constraint chains is always an option. The radius/length of the spring capsules does not seem to have much effect beyond how the springs react to the spring colliders (e.g. how it will interact with the body spring colliders and how much the hair will therefore clip through the skin).
File > Save to save your edits in the skeleton editor. Your changes should now reflect in the level.