¶ WIP
¶ Overview
This level creation guide aims to cover the basic knowledge needed to create a new level using MoonGlasses (the unlocked toolkit). It is written for virtual photography / screen archery in mind, and it will not cover things you need to know to create actual gameplay levels.
Please let us know if you have any useful tips or keybinds to add!
Some sections have been copied from Larian’s wiki.
¶ Project setup
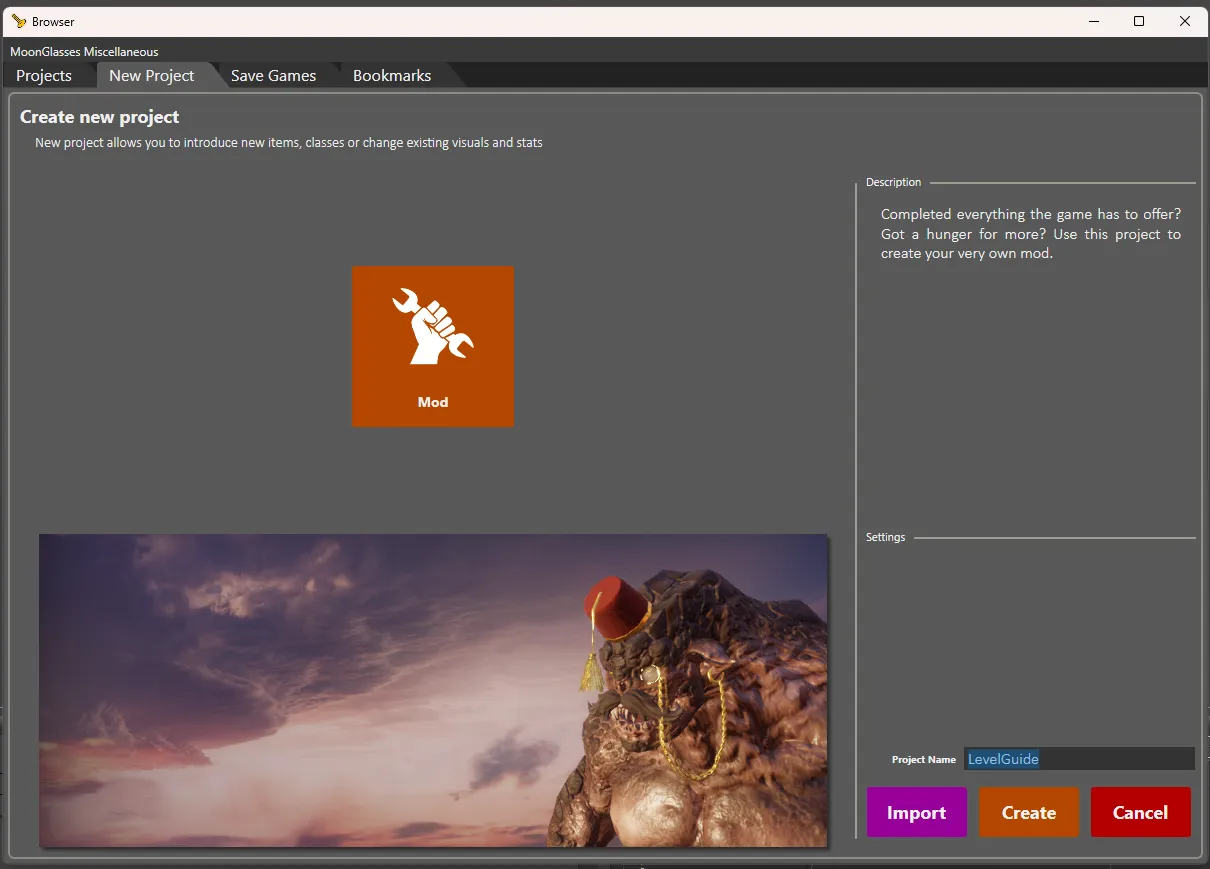
First, Create a new project and name it. We’ll name this LevelGuide (LG).
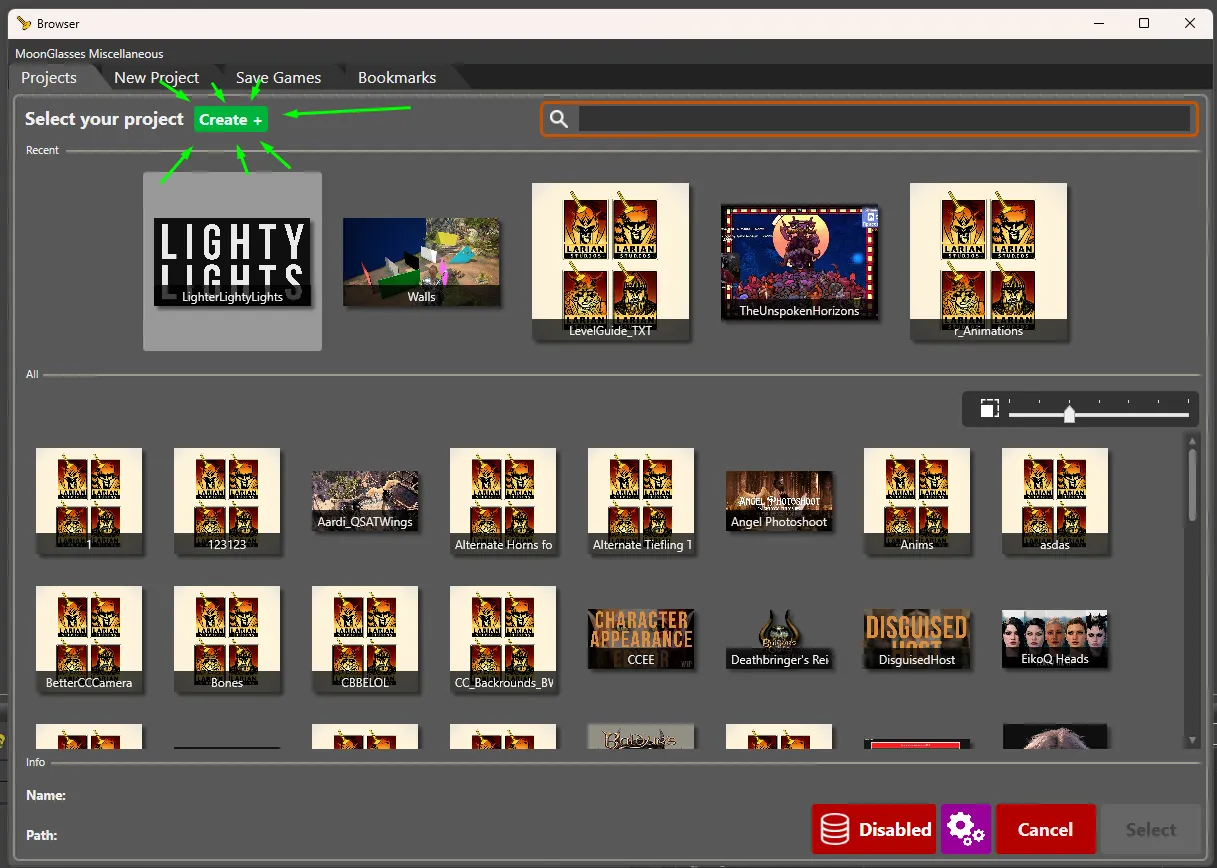
Name it whatever you want, and then press Create.
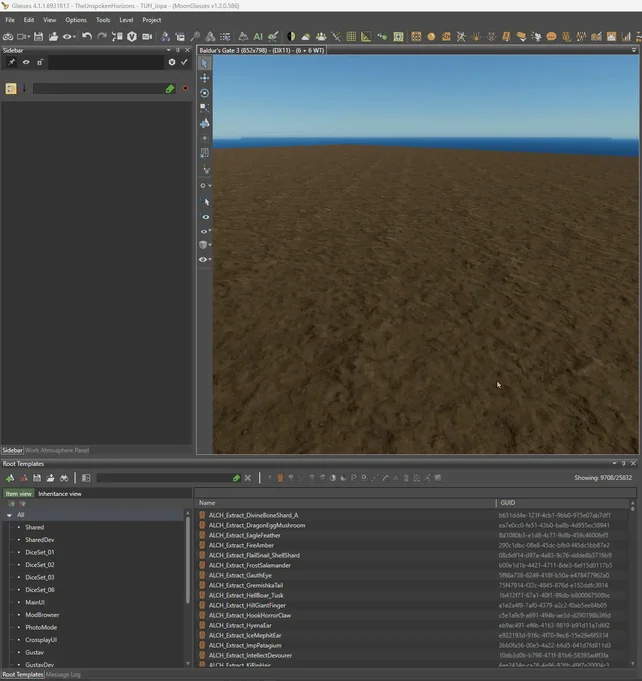
After some time, the toolkit will finally open the Level browser, where you will see the option to create a new level if you’ve properly installed MoonGlasses. Press Create to create a new level.
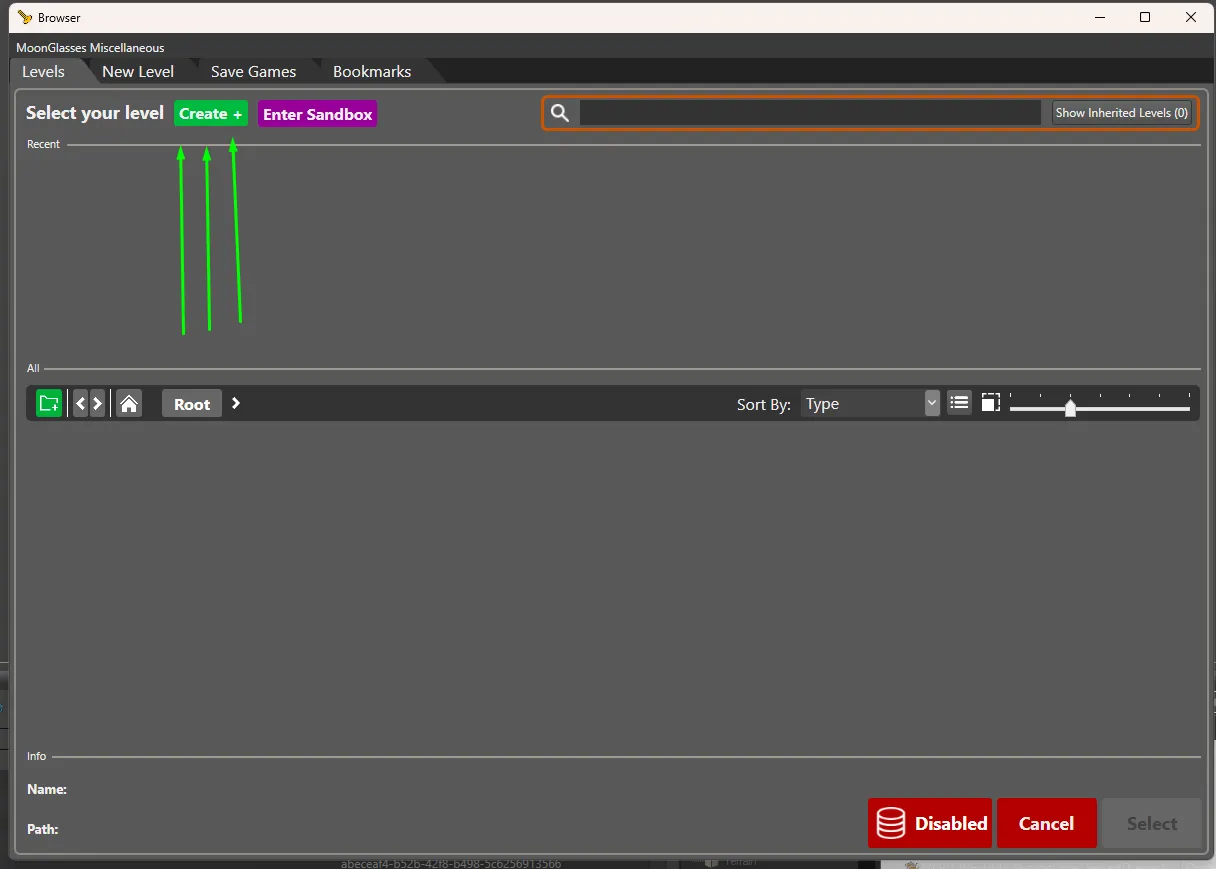
Choose a template: we suggest Basic_Level_A, which has a basic terrain map, lighting and atmosphere triggers, start points, an AI seeder, and a light probe.
Name the new level. As a good habit, you should follow some sort of a naming convention. We’ll use something similar to Larian’s — but, instead of starting with the region (e.g. WLD_Main_A, SCL_, BGO_, etc.), we’ll start with our project name. So we’ll call this LG_MyNewPrettyLevel.
Press Create one more time.

¶ UI
In this guide, we’ll use Rakor’s UI layout:
Drag Root Templates to the bottom on Message log, open Resource Manager, and drag it near the Root Templates window

You can now save this layout by going to Options > Save Layout:
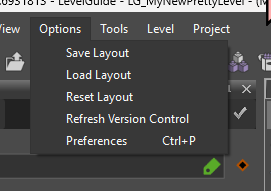
If you accidentally close a window, go to Options > Load Layout or Reset Layout or go to View and re-open it there.
You can also drag windows outside of the toolkit (this might make it easier to see things if you have multiple screens). However, they will end up re-docked the next time you re-open the toolkit.
¶ Settings
WIP
¶ Controls
There are some important keybinds and hotkeys you should know:
Camera Movement
W/A/S/Dto move the camera around.Q/Eto move the camera up or down.- Scroll
up/downto move the camera forward/backward. - To speed up camera movement, hold
Shiftwhile using these controls. To slow down camera movement, holdCtrl.
Hotkeys
1for the pointer (select object)2to translate objects (move objects on an X / Y / Z axis)3to rotate objects4to scale objects5to enable “Create object on click”Cto deselect objectsCtrl + Alt + Sto Save everything.- And, of course, basic keys and shortcuts, such as
Ctrl+C/V,Ctrl+Z,Delete, etc.
There are many more hotkeys and shortcuts for specific tools; you’ll find them in Preferences.
Changing Initial Camera Speed
To change initial camera speed, go to Editor Camera Setting.
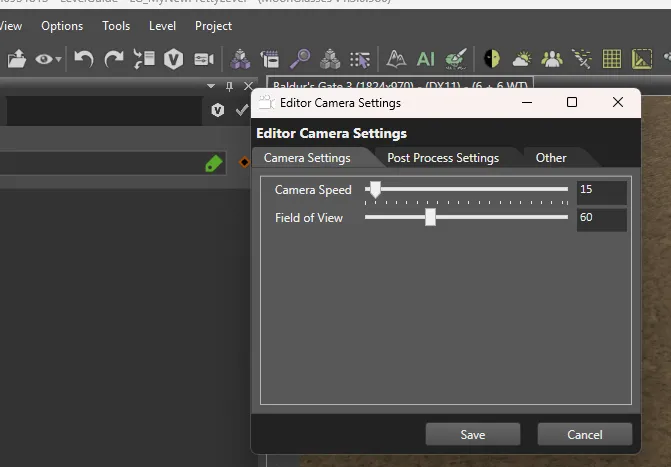
Different camera modes
You can use the Scroll keybind with Shift + W/S to “speed up” the camera even more without changing intial camera speed.
¶ UI
¶ Top bar

We won’t cover all of the basic buttons and editor buttons (you can hover over each one to see the tooltips). But the buttons you need to know are:
Terrain Panel- to create, manipulate, and paint terrain.AI Grid- to create walkable areas on your map.Instances/Mesh Painter- to “paint” using objects (e.g. vegetation).Work Atmospehere panel- to change and edit the lighting and atmosphere.
¶ Windows
-
Resource Manageris where all game meshes/textures/sounds/materials are located.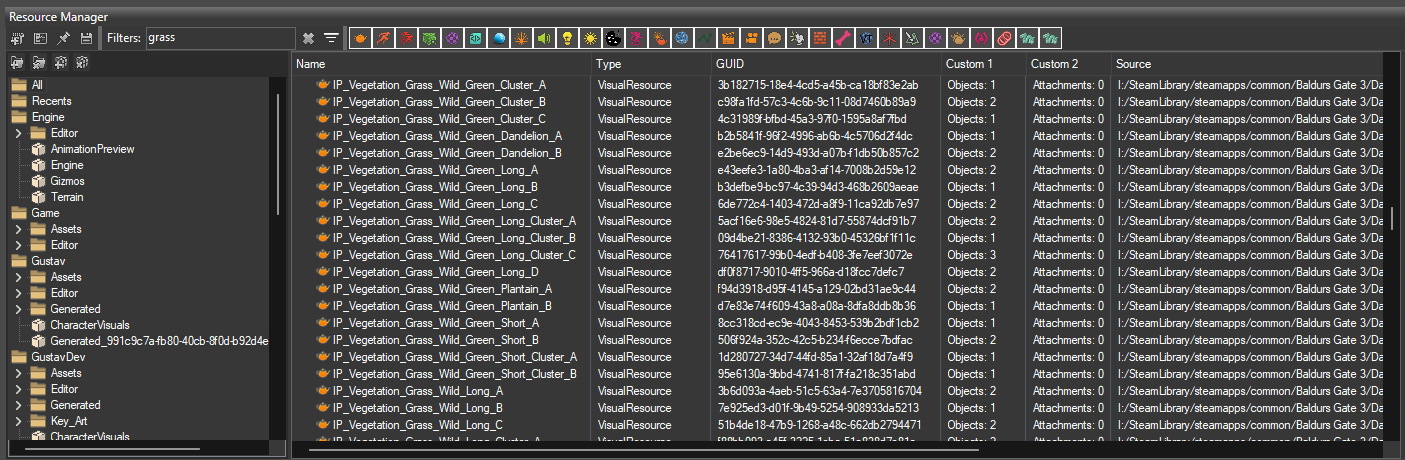
-
Root Templatesand itsPreviewis where all “interactable” objects are located.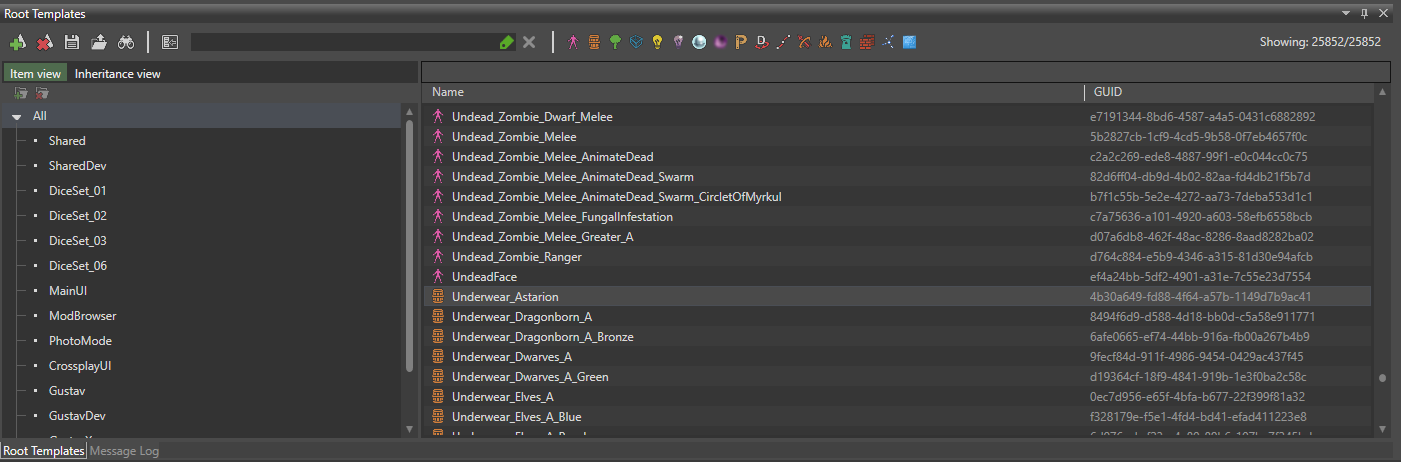
Basically, the difference between
Resource Managerresources andRoot Templatesones is that before you can place an object on the level, you need to create aRootTemplatefor it; you create your level usingRootTemplates. You can’t just drag and drop an object fromResource Manager.Further in the guide we will refer to
RootTemplateasObjectand vice versa. -
Sidebaris where all selected object’s parameters are.You can see parameters for selected
RootTemplatein either theRoot Templatewindow or in the level/World Outlinerwindow. Changing parameters for selectedRootTemplatein the window will change them globaly for allRootTemplateson the level; changing parameters for selectedRootTemplateon the level orWorld Outlinerwill change them for selectedRootTemplateonly.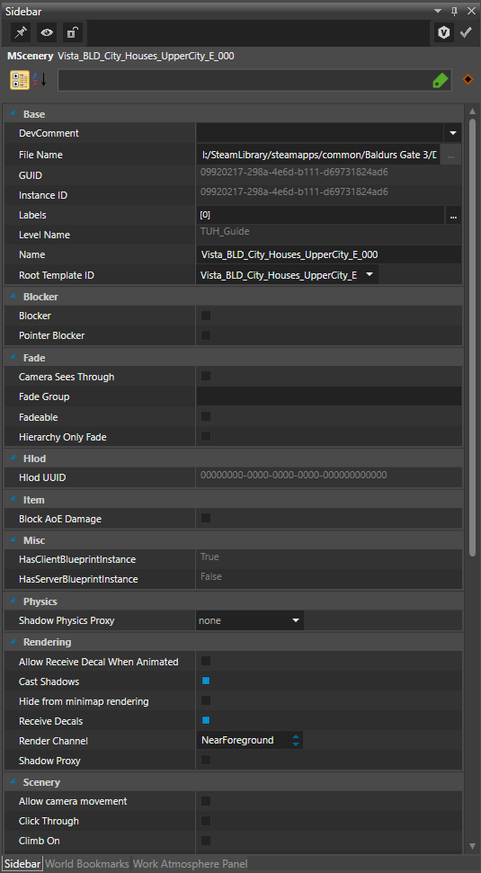
-
World Outlineris a list with all placed objects on the level.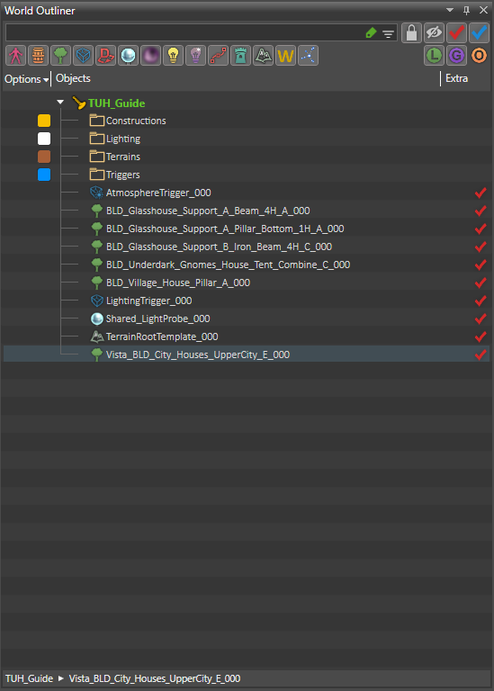
¶ Additional object controls
In the bottom right corner, you’ll also see more ways to manipulate selected objects with Pos: X Y Z, Rot: X Y Z, and Scale XYZ, plus toggles for different modes (hover over them to see tooltips). You can use these tools to manipulate selected objects more precisely: for example, you can easily rotate an object by typing the new angle (e.g. 90 for 90 degree) in the Rot: Y box.

¶ Root Templates
There are several RootTemplate types, which are denoted by different icons. When you search for objects in the Root Templates window, you’ll see the icons next to the search box.
The ones you need to know:
item (orange barrel)
scenery (green tree)
lightProbe (shiny blue-white sphere)
TileConstruction (two red bricked walls)
Prefab §
Trigger (blue outlined box)
fogVolume (misty purple sphere)
light (yellow light bulb)
character (purple Astarion)
To filter your results: Left-click on an icon to de-select it from the results list (will show all types except that type). Right-click on an icon to select only that type (will show only that type); right-click on it again to re-select all types.
¶ Item
An item is an object you can pick up or interact with, such as books, loot, doors, signs, chairs, etc. This is not always the case, as some items and scenery objects intersect, but it’s generally true, so don’t worry about it.
¶ Scenery
Scenery objects are things you can’t interact with or hover over in-game, such as rocks, plants, trees, walls, most furniture, etc. Again, some scenery objects intersect with items, but this is generally true.
¶ Light Probe
The game doesn’t have any form of dynamic global Illumination, so Larian uses LightProbe to capture HDRI map around itself and then calculate and “bake” indirect lighting.
There are 2 types of light probes:
- Distant probes are used to account for far away lighting information: the sun and sky.
It uses the information of the surrounding atmosphere to apply an approximation of sun and sky light bouncing and color to everything in that atmosphere.
Since the probe contains lighting information, it applies to everything in that LightingResources. You only need one distant probe per Lighting trigger. - Local probes are used to simulate color and reflections related to nearby lights and objects.
Local probes only gather information within a defined area around them and thus, only apply to objects in that same area.
Contrary to distant probes, you can place as many local probes as you want. Even probes inside other probe areas are allowed.
The lighting of the smallest probes always gets priority over the lighting of a larger probe that covers the same area. With local probes, you fine-tune illumination and reflections where the distant probe, or a larger local probe proves to be insufficient.
Since I make levels mostly for one picture, I always use Distant one and then move it around to tune the lighting for my needs.
You should use Local for interiors and stuff, or to adjust some specific parts.
A level must have at least one
Distantlight probe
Not going to explain each parameter, they all have a tooltip in the Sidebar, just read them.
Do not edit
Intensity. I think it does nothing in the actual game, haven’t really tested though
Don’t forget that you can also change its size using Edit shape bounds tool (square with dots with a rhombus shaped square inside) in the tool bar
To render them, you need to select LightProbe and toggle forth and back Inifinite Capture or Enabled (I haven’t figure out a better consistent way) to update the lighting; you should see the changes immediately, and then you can save your level.
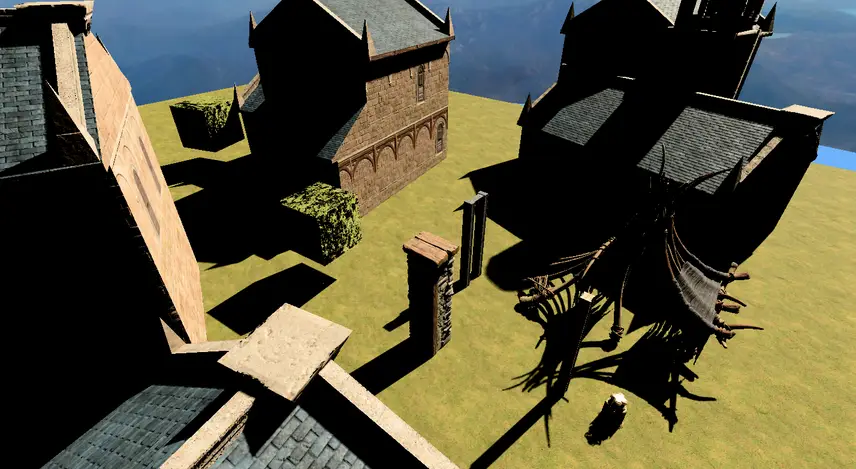
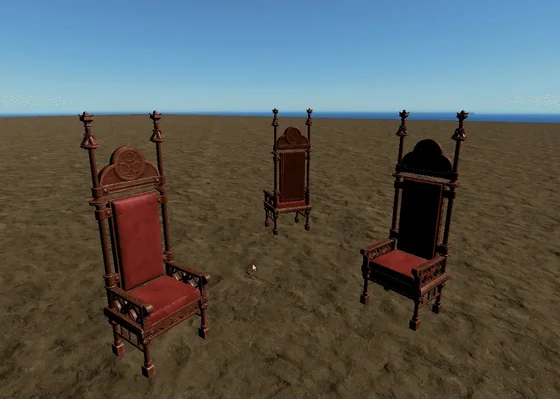
The difference between a level with correctly rendered LightProbes and one with incorrectly rendered:
Incorrect
Correct
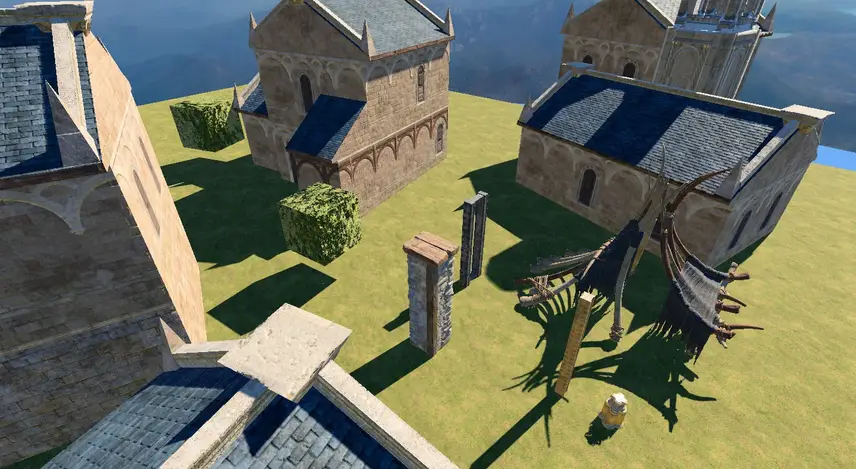
In the incorrectly-rendered level, there’s no indirect lighting, which results in harsh shadows.
Whenever you make changes with a probe, you need to save your level in order for the
LightProbeto save the renderedHDRImaps
!!! If you have a lot ofLightProbes, EACHLightProbewill render the map for EACHLightingResourcesin theLightingTrigger, so rendering will take some time !!!
You should mainly focus on 1-4LightingResources, and when you are finished with the level, only then add additionalLightingResources, and make the final render.
https://docs.larian.game/Light_probes (In BG3 Larian split Atmosphere to Atmosphere and Lighting)
¶ TileConstruction
You build walls, roofs, floors, and other repetitive things with this thing.
Here is a video guide to constructions.
¶ Prefab
A saved group of objects. To save your own prefabs, select the objects you want to save (hold Ctrl and click to select multiple objects), right-click, and click Create Prefab.
¶ Trigger
In our case, we only need a few triggers:
LightingTriggersets theLightingResourcesfor the current trigger area.AtmosphereTriggersetsAtmosphereResourcesfor the current trigger area.StartPointsets the starting point where characters will appear when they enter the level.- Maybe `` #crowd.
- Maybe .
¶ Fog Volume
You can create fog areas with this thing.
¶ Light
Just a light.
Most of you probably use Lighty Lights, but you can place them to preview the lighting.
¶ Character
I only use Astarion for size reference.
¶ Level Template
Saves the whole level as a RootTemplate that you can paste on any other levels
¶ Important
Each of these
RootTemplatetypes has different additional tools.
For example: if you click on a trigger that has itsPhysics Shapeset to Sphere or Box, you can change size of it usingEdit shape bounds tool. Or if you click on aLevelTemplateit will show youEdit LevelTemplatebutton
¶ Sources
https://docs.larian.game/Entity_types
https://docs.larian.game/My_first:_Item
¶ Resource Manager
There are even more resource types. Here are the ones you need to know:
Visual (utah teapot)
Texture (missing texture sphere)
Material (blue spehere)
Effect (sparkles)
Lighting (bulb)
Atmospehere (sun with face)
Terrain Brush (a brush and a mountain)
¶ Visual
Meshes and stuff.
¶ Texture
Textures.
¶ Material
Materials.
¶ Lighting
A resource that contains Lighting parameters: sun/moon position, sun/moon color, fog, etc.
¶ Atmosphere
A resource that contains Atmosphere parameters: overall color correction, light shafts, different effectrs environmental effects (like rain, ashes, etc), etc.
¶ Terrain Brush
A resource, similar to a material, used to paint terrain.
¶ The Tools
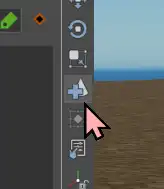
There are 5 main tools:
Pointer/Cursor- to select objects.Translate- to move objects.Rotation- to rotate objects.Scale- to scale objects (make them larger/smaller).Create- to create and place objects.
Each tool has its own parameters, which you can access by right-clicking on the tool. A new window will open with that tool’s parameters. For example, you can enable Snap to grid in the Translate tool’s window.
¶ Finally placing objects to unleash your abstract vision
Enable Create tool, which allows you to create objects on click (5 keybind) — without dragging them from the Root Templates window.
Find an object in Root Templates and place it by clicking on terrain.
You can also hold left click to rotate the object before placing it.
Now you can move it however you want by selecting it and using the keybinds I mentioned earlier.
You can make the Sidebar inactive by opening a different window (I always open Atmosphere panel), so you can scroll through the list of objects with arrow keys faster.
(Basically whenever you select an object, you also load all its parameters in Sidebar, by making Sidebar inactive, you stop loading the parameters).
¶ Terrain XDDDDDDDDDDDDDDD
The Terrain panel is for adding new terrain or editing the existing terrain. When you first open the panel, you’ll see a list of available terrains in your level. To start editing a terrain, select it by clicking on it in the panel or by clicking directly on the terrain in the viewport.
¶ Changing Shape and Size
To change size of the terrain, you can use the Edit shape bounds tool.
¶ Terrain Painting
First, you’ll need to select a material in the terrain panel. If you created a new level, the terrain panel will already have four materials loaded in. You can find more materials in the Resource Manager: Filter by terrain brush (a brush with a mountain icon). Select the new material and add it to the terrain panel by clicking the sphere with a plus sign.
To start using the material, select it in the terrain panel and click the paint brush to start painting. Use the left mouse button to paint and the right mouse button to erase; you can use [ and ] to change the size of your brush. Right-click the terrain paint icon to open up additional brush parameters (e.g. size, strength, etc). Each material also has additional parameters, which you can adjust in the terrain panel.
¶ Terrain Painting Tips
- You can (and should) layer different materials while painting.
- Removing a material from the terrain panel will remove all instances of that painted material from the terrain.
- Unfortunately, there’s no convenient way to preview what terrain brushes actually look like without trying them, but you can filter by terrain brushes in the resource manager.
¶ Add new terrains
XD WHY?
¶ Instances
Brush - Parameters
IPs
¶ Work Atmosphere panel
Triggers
Modes
The Work Atmosphere Panel has three modes: Follow Camera Mode (camera icon), Editor Mode (light bulb), and Override Mode (wrench).
- Follow Camera Mode - Game lighting mode. This will show your level with the lighting / atmosphere you’ll see in game.
- Work Mode - Fully-lit. So you can see what you’re doing while you work on your level.
- Override Mode - If you want to use a new lighting / atmosphere resource or you want to edit an existing lighting / atmosphere resource and have it show up in game, you will need to do that here.
Lighting
Atmosphere
LightProbe
LightyLights support
¶ Other triggers
Start point
AiSeeder
¶ Interaction mode options
¶ AI grid
¶ “Recolor” of RootTemplates/VisualResources
VisualResource
Material
RootTemplate
¶ VisualResources as RootTemplates
Batch convert with the tool
¶ New IPs, TTs
¶ Getting to Your Level in Game
Console Command
The easiest way to get to your level without setting anything else up is to use the following console command:
TeleportPartiesToLevelWithMovie("YourLevelName","","")
- YourLevelName is the name of your level, not your project.