¶ Overview
This is a tutorial for adding a custom origin into Baldur's Gate 3 and is considered to be of advanced difficulty since it will require the Moonglasses (unlocked) version of the toolkit to complete. Making mistakes using this guide could corrupt your install of BG3. Follow it very carefully! You have been warned! As such, this guide assumes you already know your way around the vanilla toolkit's many features. To make it a little easier on your first time doing something like this, I will be taking you through a sample project - Mystra as an Origin character.
If at any time you get a Microsoft.Net Framework error, just press Continue. It's a Moonglasses feature.
Special thanks to lizardphunk, whose YouTube videos helped me immensely while figuring out this process! See the bottom of this guide for a link!
Looking for the non-toolkit guide? Here it is! https://www.bg3.community/en/Tutorials/General/Custom-Origin-Creation
¶ Why make a custom origin instead of a simple preset?
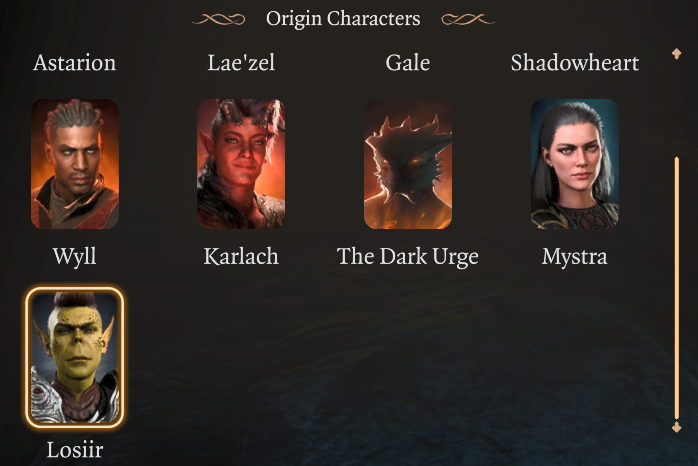
Presets are great, but you can't have multiples active at the same time. There's also the little issue of how easy they tend to be to override in the character creator. One misclick could require exiting out to the main menu to reset the preset's appearance. You can also use it as an “easy” button if you like to replay the game with the same Tav repeatedly without needing to painstakingly recreate them every new campaign.
It should also be known that what's covered are relatively the same steps you'd go through to make a custom companion show up in game for recruitment, but is outside the scope of this guide.
¶ Requirements
Moonglasses - BG3 Extended Toolkit - download and install following the steps on the Nexus download page
If you want your Origin to have custom equipment, get it into the game and set up on your equipment table before beginning this tutorial. Make sure your table includes typical Player items like revivify scroll, keychain, etc.
¶ Project Setup
Create a new package named origin_Mystra. Click on “Show Inherited Levels” and load into Character_Creation_SYS_CC_I.
In Project Settings, click over to the “General" Tab, click the “…” on Photo Booth Level, then select SYS_PortraitGeneration_A.
In this guide, we won't be bringing in any external assets, but if your Origin requires them, make sure to set the Source Asset Data Path in the Options menu under Preferences as well.
¶ Creating the Root Template
We will actually be dealing with two types of templates in this guide. The first is the Root Template which you should be familiar with from Vanilla Toolkit. This will be the toolkit the game uses for creating your Origin's photo.
Since Mystra is Human, we will make an inherited tempate from Humans_Female_Player. Inheriting from a _Player template will save you some time in Stats / Common Player actions arena. Make sure your Mod is selected, then name it something like Origin_Mystra.
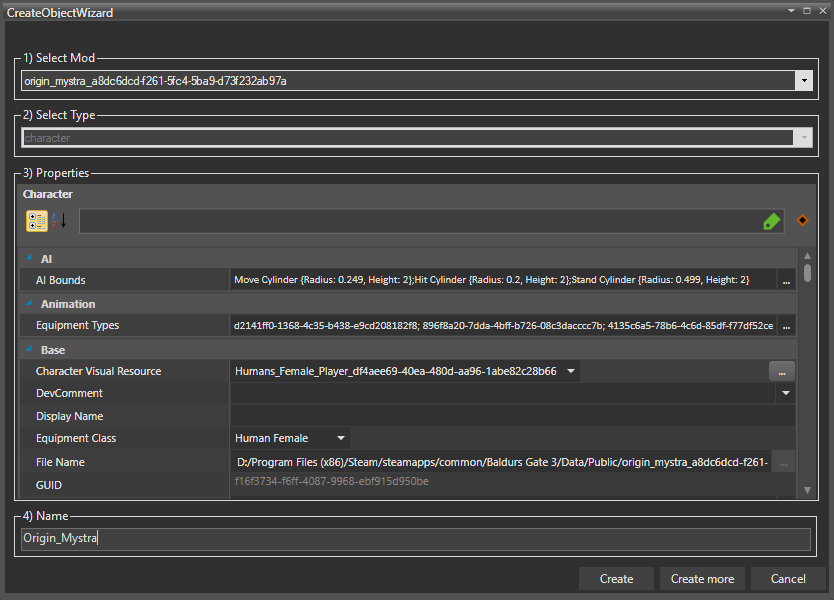
Open “Character Visual Resource” in the sidebar and style Mystra however you'd like. I opted to load the preset. Make sure to set “Display Name” to Mystra as well.
Clear the portrait visual reference.
Save your work.
** If your Origin needs custom stats, this is NOT the place to do it. You'd need to add any bonuses as passives. I'll mention it again in the Origins table section of this guide.
Exit the toolkit and come back in with Wilderness_WLD_Main_A loaded. You'll get some errors about MissingMetaData when you do. Just click through them.
¶ Creating the Global Character Template
Alright, this is where the magic happens and something you can't do without Moonglasses. Click on and off Switch Game / Editor to get the starting point of the level loaded correctly in toolkit. Here's a reminder of the button I'm talking about.

Now we want to drag the Origin_Mystra Root Template into our scene. Click once to place her, then click the blue arrow in the upper left corner of your scene preview to get out of place object mode and stop dropping Mystras. If it tries to load in a dummy character with 1 hp, you may need to exit the toolkit and come back in.

Take a minute to open the “Characters” panel by clicking on the blue man icon at the top of your screen.

It will open a new window that lists all the characters in the level. When I was creating this guide, my new Mystra showed up at the top of the list as “Origin_Mystra_000.” If she doesn't, you can use the search box to find her. Click on her to open her Character template. The Character template, not the Root will be the thing we reference for the rest of this guide to set values in other tables required for the game to recognize Mystra as an Origin character. With the Character Template selected, complete the following steps:
- Set her Character Visual Resource to look just like the Root Template's. Simply load a preset and set it to the Origin_Mystra visual already present in your mod.
- In the Sidebar, check “Global” this is extremely important and what makes it a Global Character Template.
- Set the Name (not Display Name) to S_Player_Mystra, following BG3's naming conventions for playable Global Character Templates. The S at the beginning denotes there's scripting involved with the character which we'll get to.
- Save the Global Character Template then Reload the Level and Story to see the updated Character template show up in the Characters window.
¶ Creating the Voice Table
We now need to set which one of the generic Tav voices we want to use for our Origin.
Open the UUID Object Editor and create a voices table in your mod.
Enter “Mystra's Voice” in the DisplayName. This will generate a UUID.
Copy the UUID to the TableUUID, then regenerate a new UUID.
Assign a valid Speaker UUID. Here's a guide.
| Speaker | UUID | Tags |
| Voice 1 (Masculine) | 15ead9db-7a73-4681-8848-5f1487ad4c68 | GENERIC_VOICE_1_MALE |
| Voice 2 (Feminine) | e527b684-2499-4eda-84ab-239cf0f5d442 | GENERIC_VOICE_2_FEMALE |
| Voice 3 (Masculine) | 2fade686-a5cb-4ed7-a5a0-7bf0067212fa | GENERIC_VOICE_3_MALE |
| Voice 4 (Feminine) | c2fe5e77-b870-463d-ae6b-25b033b72b54 | GENERIC_VOICE_4_FEMALE |
| Voice 5 (Masculine) | f5b335b2-9cd9-4b38-a4c1-458b846ab499 | GENERIC_VOICE_5_MALE |
| Voice 6 (Feminine) | b9b26a44-943b-4427-9890-d81c7e81a75b | GENERIC_VOICE_6_FEMALE |
| Voice 7 (Masculine) | 2d206fda-0d4f-457f-b4ea-0fc18866f5dd | GENERIC_VOICE_7_MALE |
| Voice 8 (Feminine) | fb6b5353-8d14-4507-9222-ceaec990fce9 | GENERIC_VOICE_8_FEMALE |
¶ Creating the Origins Table
Open the UUID Object Editor window and under Origins within your mod, create an Origins table and open it up. (If you want to see the Companion Origins Table for reference in the next bit, it lives in Gustav) Set up your Origin table in the following way:
- Name - Mystra
- Unique - Yes
- AvailableInCharacterCreation - Available
- DisplayName - Mystra
- Description - Mystra is a greater goddess of the Faerûnian pantheon and the second incarnation of the Goddess of Magic after her predecessor Mystryl sacrificed herself to protect the Weave from Karsus' Folly. Originally known as the wizard Midnight, she accepted the position of Goddess of Magic from Ao themselves after the conclusion of the Godswar and reluctantly took the name Mystra to smooth the transition between goddesses after so much chaos.
- BodyType - Female
- BodyShape - Standard
- LockBody - Yes
- RaceUUID - 0eb594cb-8820-4be6-a58d-8be7a1a98fba (this is the UUID value for Human in the Races[Shared] table)
- [SubRaceUUID is sometimes used, but does not apply in this example.] If needed they're also located in the Races[Shared] table.
- LockRace - Yes
- BackgroundUUID - 8807a6c6-d8cf-494b-aec2-cc01d7517a56 (this is the UUID for Sage. You can find other choices in Backgrounds[Shared] and/or EA backgrounds in Backgrounds[GustavDev])
- [GodUUID is used for classes who utilize them, but not used in this example] if you need to find them, they're located in Gods[Shared] and Gods[SharedDev]
- ClassUUID - a865965f-501b-46e9-9eaa-7748e8c04d09 (this is the UUID value for Wizard as found in ClassDescriptions[Shared] and/or ClassDescriptions[SharedDev], ClassDescriptions[GustavX])
- SubClassUUID - 46d31950-6917-444e-ac87-706702825215 (I chose to make her an Enchantment wizard, but other options are found in the same previously mentioned ClassDescriptions tables)
- LockClass - No
- Global Template - To get this value, tab back over to the Sidebar with the S_Player_Mystra Character template selected and copy the value present in the sidebar in “GUID” it will be different for everyone, so I'm not going to paste mine here.
- Passives - DeathSavingThrows (And any additional passives for custom stats, separated by a semicolon)
- ReallyTags - REALLY_HUMAN (Unless you're going deep with your mod, this will likely always be set to REALLY_[Race])
- AppearanceLocked - Yes
- ClassEquipmentOverride - EQ_Mystra (This is the equipment table we needed to set up before following this tutorial) If you don't want custom equipment, just leave this blank.
- VoiceTableUUID - Set it to the UUID of the voice table you created earlier.
¶ Inserting the Origin into the Story
⚠️ Warning: This is the riskiest part of the tutorial to a Vanilla game. Take your time and you'll be fine!
Open the StoryEditor. If you're following along it should look something like this. All the Scripts in white are base game scripts. Once we copy a script to our mod, it will turn orange in the list. Do not edit a script unless it's orange. You could corrupt your game.
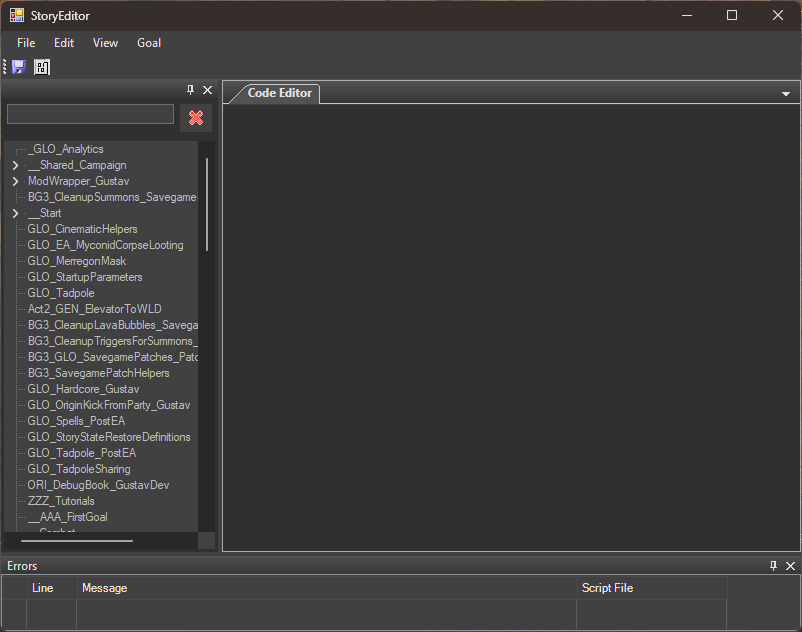
Click on the > next to ModWrapperGustav. It's the second from the top. Then click on > Start. Here's a highlighted picture of what I mean.
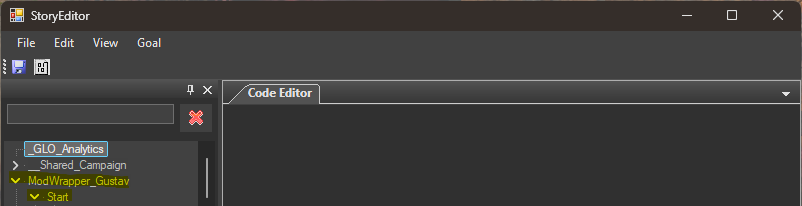
Right click on Start and select Copy to my Mod… wait for the Toolkit to do it's thing, then close out of the StoryEditor and come back in. If done correctly, ModWrapperGustav→Start will now be orange. Double-click Start to open it. You'll see a list of other origins in the (top) INIT section. Make an entry that looks like them with the trailing UUID being the same UUID as you put into your Origins table as Global Template. You can do this the easiest way by selecting the Character template, right clicking on it, and selecting Copy “Name_GUID” to the clipboard.
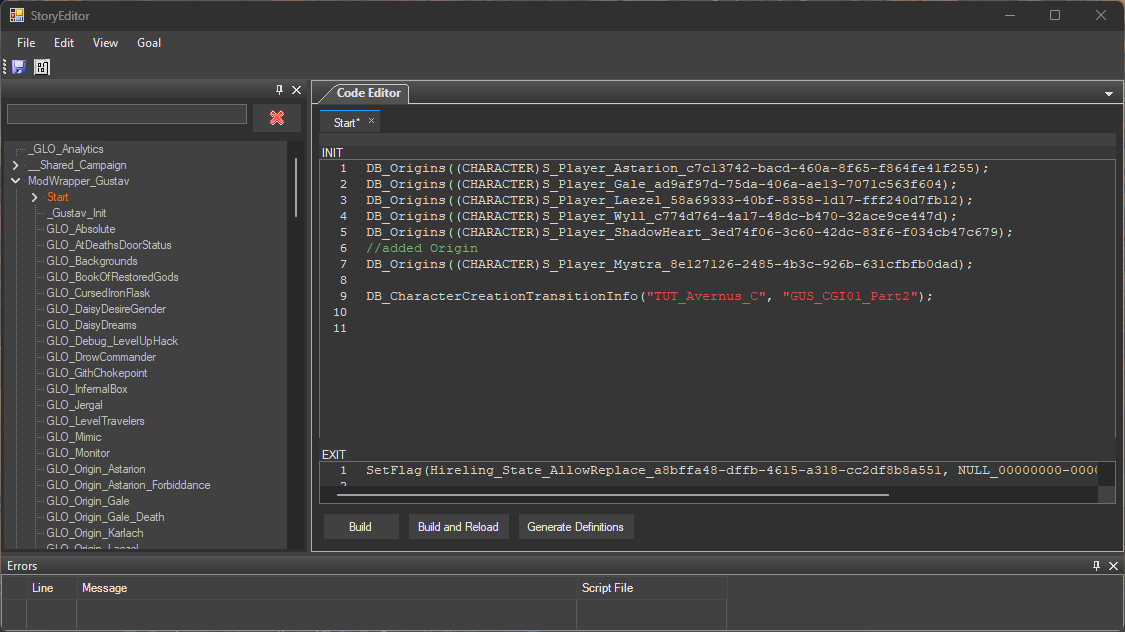
To finish everything off, go to File→Generate Definitions, Build, and Reload. We're looking for BUILD SUCCESS. If you get anything other than that, it means something went wrong. You can close out the StoryEditor now. You can feel free to close any other windows other than the main Toolkit window as well.
¶ Creating Origin Portraits
Go back to the original Root Template you created. Make sure the portrait visual reference is empty!
Save your work.
Assuming you set your Project up like mentioned in the beginning of this guide and are ok with the default backdrop for the photo, go into Project→Render Character Portraits. That will open another menu that lists ALL of your installed mods.
Select the mod you're working on so that there's a checkmark beside it.
Scroll all the way down the list until you can't anymore and select “Render Portraits.” Select Yes when it asks if you want to load the booth and start a render. Let the toolkit do its thing.
Save everything, exit the Toolkit and come back in, this time into Character_Creation_SYS_CC_I.
Note: If you use a non-race-standard portrait trigger, like Icon_Origin_Shadowheart, for example, the portrait generation system often creates two portraits and will pick the “vanilla” triggered one out of the two. You may have to navigate into the portrait folder and play around with filenames until the correct one displays in game. The fix should be as easy as setting the name of your custom portrait to the bland race-specific one's name that's currently working. They will be located in the Data/Mods/[Your Mod]/GUI/Assets/Portraits folder. That will fix the issue in the CC. Your changes should show once you exit the toolkit and come back in. There will still be a decent probability that you end up with the infamous Shadowheart portrait bug. I haven't figured out a reliable way to fix it.
¶ Fixing MetaData
When you came back into the Toolkit, you should've seen a warning message about your mod missing MetaData. This is normal. To fix it, go to Project→Generate UI Textures Metadata→[Select Your Modname]→Generate UI textures metadata
It will seem like nothing happened, but it did. Exit out one more time and come back into Character_Creation_SYS_CC_I. The MetaData warning about your mod should be gone.
¶ Load in Fresh and Look Around
Load into the level and look around. See if everything appears as you think it should. Click through the CC and load into Avernus. Check to make sure your Origin has a voice. If everything's good, load into Wilderness WLD_Main_A and see if everything continues to function ok. Save everything, exit Toolkit, load back into Wilderness WLD_Main_A.
¶ Hide the Body!
Click the binoculars. There should be a Mystra hanging out in this level. If you don't see one, try reloading the level and story. If she still doesn't show, click the blue man and select S_Player_Mystra from the Character menu. Double-click to zoom to her. If she's stuck in the terrain, click on the Translate tool to move her around the scene. Its icon looks like this.

Now, for a final, odd step of this process. You know that instance of Mystra we made just sure was visible? Well, we actually need to strip her clothing and hide her in the level. Having a copy of her in game with only her private parts, modesty leaf, and nipple covers tells the game all it needs to know to render her without clothing while also making her presentable for folks who have modesty settings on. With S_Player_Mystra selected, remove her clothing and set her Character Visual Resource appropriately. Save the appearance and close the Character Editor. Save the project.
Note: If you can't find the Character template when clicking on the blue man, that means you're not in WLD_MAIN_A.
Now, use the Translation tool referenced above to move her into the river behind the player spawn point and hide her under the surface of the water. Save all again. The mod should now be ready for full testing.
I'd recommend doing one more short playtest here, ensuring that now Mystra looks like she should when you remove her clothing.
If her clothing persists, you may need to drag the S_Player_Mystra CharacterVisualResource from the Resource Manager onto Character Visual Resource. That should fix it.
¶ Publishing to Mod.io
If you try to publish right from Moonglasses, it won't work. This is because it knows it's been tampered with. Luckily the fix is simple.
- Save your work and exit out of the toolkit.
- Navigate to your Toolkit installation folder and remove the folder Moonglasses and dxgi.dll
- Enter the toolkit again. It's back to Vanilla!
- Use the Vanilla version of the Toolkit to push to Mod.io
¶ Further Resources / Inspiration
If you want to dig even deeper into this subject like how to set up custom recruitment parameters, I highly recommend lizardphunk's video on Origins. It helped me get unstuck several times when trying to figure this process out. https://www.youtube.com/watch?v=DZEdVCnVveA&t=1914s