¶ KAVT User Manual - How to Use, Customize, and Troubleshoot KAVT & KAVT NVP
This user manual covers everything there is to know about Kazstra's Virtual Tav x Tattoo, Makeup & Scar Extender. It covers both the primary version (KAVT) and the non-virtual port (KAVT NVP).
The manual was written primarily with beginners in mind, and thus is rather in-depth and detailed. However, specific sections may require users to have some baseline knowledge on how to use image editing software (such as Photoshop or Gimp). We have attempted to keep this manual as simplistic as possible, but if there are questions you have that are not covered, you struggle following the guides, or you have any kind of feedback on the content covered here or the way these guides are written or constructed, please don't hesitate to let us know on our mod page!
A video guide covering basic KAVT usage will be available at some point down the line. It is being worked on by the wonderful Poesielibre. :)
¶ What is KAVT?
KAVT is an updated and expanded variant of Unique Tav and Kaz' Virtual Tav.
All three of these mods detach your Tav from the remainder of the games' characters, which by default share Tav's body meshes, textures, makeup, and tattoos, allowing your Tav to be customized further than what's possible in Vanilla BG3 without these changes also affecting NPCs or companions. Unique Tav is a very widely used mod that serves as the foundation for many BG3 customization mods. Unique Tav's author has since stepped back from modding this game and is no longer actively maintaining the mod; thus, they've provided permission for us to create this derivative that expands on Unique Tav's and Kaz' Virtual Tav's features.
¶ User Manual Overview
This is a list of topics covered in this article. You can find links to each section in the page content panel on the right side of the wiki page.
- General Information
- Glossary - Brief Definitions of KAVT Terms
- KAVT vs KAVT NVP - Features & Differences
- KAVT vs Unique Tav - Comparison
- What this Mod doesn't do
- Compatibilities & Conflicts
- Baseline Usage
- Quickstart Guide - Plug & Play Installation
- Swapping from Unique Tav to KAVT or KAVT NVP
- KAVT Load Order Information
- Customization
- KAVT Glowmap
- KAVT Customization Patch
- What's Where & How Does It Work
- KAVT Face Customization
- KAVT & KAVT NVP Body Customization
- KAVT Body Customization
- KAVT NVP Body Customization
- Texture Editing
- BG3 Image Editing Basics
- Tattoo & Makeup Atlas Editing
- Scar Atlas Editing
- Common Issues & How to Fix Them
- Misplaced Tattoos and/or Makeup
- New Tatttoo and Makeup options show in CC but not on Heads
- Issues when KAVT is disabled
- Other Guides, Credits, & Thanks
¶ General Information
¶ Glossary - Brief Definitions of KAVT Terms
In this section, we’ll briefly define words you might come across within these guides that might be unfamiliar to users who don’t have experience with Unique Tav, haven’t created mods themselves, or aren’t well-versed with technology.
Atlas/Texture Atlas - An atlas is a texture consisting of multiple smaller images. In the case of tattoo, makeup, and scar atlases, these smaller images are arranged in a grid pattern, and each individual image is the same size.
Channel - A specific section of an image (in this case typically a texture) storing only image data of one color - Red, Green, or Blue.
(KAVT) Glowmap - Within KAVT, Glowmap refers to the texture containing the glow tattoo, the additional body/face tattoo, and the opacity feature, each within their own channel. In other contexts, a Glowmap is generally only used for glow (hence the name) and only features one channel, but we’ve adjusted its use within KAVT to allow for additional features.
KAVT - Kazstra’s Virtual Tav x Tattoo, Makeup and Scar Extender. The primary version of the mod using virtual textures.
KAVT NVP - Kazstra’s Virtual Tav x Tattoo, Makeup and Scar Extender. The secondary version of the mod using traditional textures.
LSLib - A tool made by Norbyte used to access and manipulate BG3 game files and for mod creation. In the context of KAVT, LSLib is primarily used to pack virtual textures (and mods, if so desired).
Loose File - Most commonly used in the context of “loose file replacers”. Mod files that are not loaded via mod manager but rather placed “loosely” within the game files themselves. Loose files always take priority over packed mods.
Mesh - The 3D model of objects, for example the body.
Modder’s Multitool - Also referred to as simply multitool. A tool made by ShinyHobo and based on LSLib, providing similar utilities to LSLib with a simpler UI. In the context of KAVT, BG3MM may be used to pack mods, such as the KAVT customization patch.
Packing - This term may refer to packing a mod, which turns the file structure of a mod project into a .pak file readable by the game, or packing virtual textures, which bundles a set of three textures together.
Path - The specific location of a file or folder within a computer system.
Tav - The player character.
Textures - A texture is a 2D image that is applied to a 3D model. In the context of KAVT, this will primarily refer to tattoo, makeup and scar atlases, body tattoos, the KAVT glowmap, and body textures.
Tile/Atlas Tile - Within these guides, we may use the term “Tile” to refer to one individual image within a tattoo, makeup or scar atlas, meaning one tattoo, makeup or scar design.
Traditional Textures - Within KAVT, we may use this term to refer to non-virtual textures. These are individual 2D images stored as individual files.
Virtual Textures - A way of storing textures that is used to decrease file size and thus increase performance. A set of three traditional textures is bundled together and stored in this packed format instead of individually.
¶ KAVT vs KAVT NVP - Features & Differences
At their core, KAVT and KAVT NVP are the same mod with some internal changes to the way textures are stored. This means you’ll be using one version at a time, as they generally do the same thing.
There are a handful of differences when it comes to features due to the differences in how textures are stored. We won't dive too deep into the details as they aren't relevant to this guide, but in short, KAVT allows for additional face customization that isn't possible when using KAVT NVP, as swapping over to virtual textures gives us enough space within the shader to add these additional features.
¶ Features Available within both KAVT & KAVT NVP
‼️ The following features are part of both KAVT & KAVT NVP. They function identically for both mods.
- Unique appearance for Tav that does not affect companions or other NPCs
- More tattoo, scar and makeup slots with their own custom CC Icons
- Body tattoo (via body tattoo file also used by Unique Tav)
- Body glow, additional tattoo, and body opacity (via KAVT Glowmap)
- Traditional textures editable via loose file replacement:
- Face tattoos, makeup and scars
- Body Tattoo (body tattoo file)
- Body tattoos, glow and opacity (glowmap)
- Head textures
- Meshes editable via loose file replacement:
- Bodies
¶ Features Available only within KAVT
‼️The following features are only available within KAVT. You cannot use these features if you are using KAVT NVP.
- Virtual body textures (editable via loose file replacement)
- Virtual head wrinkle map (editable via loose file replacement)
- Face glow, additional tattoo, and opacity (via KAVT Glowmap)
- This is a traditional texture editable via loose file replacement
- Genital glow, tattoo and opacity (via KAVT Glowmap)
- This is a traditional texture editable via loose file replacement
¶ Features available only within KAVT NVP
‼️The following features are only available within KAVT NVP. You cannot use these features if you are using KAVT.
- Traditional body textures (editable via loose file replacement)
¶ Key Differences between KAVT & KAVT NVP
This is a brief summary of the differences between KAVT and KAVT NVP.
- Body Textures
- KAVT uses virtual body textures
- KAVT NVP uses traditional body textures
- Head Customization
- KAVT features a head Glowmap, allowing for head glow, an additional tattoo, and opacity to be used for customization
- KAVT NVP does not have these features
- Head Wrinkle Map
- To allow for additional head customization, KAVT uses a virtual texture wrinkle map. This has little to no impact on users
- KAVT NVP does not change the format of head wrinkle maps
- Genital Customization
- KAVT features a genital Glowmap, allowing for genital glow, a tattoo, and opacity to be used for customization
- KAVT NVP does not have these features
- Requirements
- KAVT requires Script Extender
- KAVT NVP has no requirements
For users, this is primarily going to be noticeable in these ways:
- The way body textures are replaced (different texture format)
- Addition or lack of additional head customization
- Script Extender requirement yes/no
¶ KAVT vs Unique Tav - Comparison
KAVT and KAVT NVP do everything Unique Tav does and only add to Unique Tav's features. No existing Unique Tav features are removed. The following features are added:
- Body Glowmap, allowing additional customization
- Head Glowmap, allowing additional customization (KAVT only)
- Genital Glowmap, allowing additional customization (KAVT only)
The following things are going to be the most noticeable differences between Unique Tav and KAVT or KAVT NVP for the average users.
- Download & Installation
- Unique Tav requires separate loose Data files in addition to its .pak
- KAVT & KAVT NVP only require their .paks
- Requirements
- Unique Tav requires a separate shader mod
- KAVT requires Script Extender
- KAVT NVP has no requirements
- Body Texture Differences
- These differences only apply to KAVT, not KAVT NVP
- Unique Tav uses traditional body textures (individual files)
- KAVT uses virtual body textures (bundled sets)
- This changes how body textures are replaced, but has no impact on KAVT usage if either a) using an already compatible body texture edit, or b) not customizing body textures
- Tattoo and Makeup Atlas Differences
- KAVT & KAVT NVP increase tattoo and makeup atlas size
- This increases the number of unique designs available in CC
- Unique Tav compatible tattoo and makeup atlases need to be adjusted to the new size to work correctly
- Some mod authors provide KAVT compatible versions
- KAVT & KAVT NVP use a different name for atlases
- KAVT & KAVT NVP increase tattoo and makeup atlas size
- Unique Tav Compatible Content
- Most Unique Tav compatible content inherently works with KAVT:
- Heads
- Body Edits
- Animation Edits
- Tiefling Tails
- Most modded races only require a minor edit to function
- Some modded races have already been updated to include this edit, making them fully compatible
- This edit can be made by the mod author and does not need to be made by users themselves
- Most Unique Tav compatible content inherently works with KAVT:
Swapping may be a good option for you, if:
- KAVT: You are interested in the new customization possibilities
- KAVT NVP: You want Unique Tav with additional tattoo and makeup slots
- KAVT NVP: You want Unique Tav with no requirements
¶ What KAVT and KAVT NVP don't do
As there has been some confusion, here is an exhaustive list of things this mod doesn’t claim to do (and also just doesn’t do):
- Add body tattoos to CC
- Add its own body tattoo designs
- Add any of the additional Glowmap features to CC
- This includes extra face and body tattoos
- Allow you to select more than one CC tattoo/makeup/scar option
- Add any additional menus via MCM
¶ Compatibility and Conflicts
This section provides information on which mods may or may not be compatible with KAVT and KAVT NVP. Please note that this list isn't exhaustive, meaning it doesn't cover every single mod that may or may not be compatible.
If you're unsure whether something is compatible or not, assume things will work fine unless confirmed otherwise - just give it a try. :)
¶ Unique Tav Compatible Content
The majority of Unique Tav compatible content is inherently compatible with KAVT and KAVT NVP. There are some exceptions that might require some additional editing (on either the users or authors side) and they will be marked as such.
- Unique Tav-compatible head mods
- Innately compatible; no edits required
- Unique Tav-compatible body mesh edits
- Innately compatible; no edits required
- Unique Tav-compatible body texture edits
- Innately compatible with KAVT NVP; no edits required
- Body textures will need converting into VTs unless already specifically compatible with KAVT (or its predecessor, KVT)
- Unique Tav-compatible body tattoos
- Innately compatible; no edits required
- Unique Tav-compatible face tattoo and makeup atlases
- Atlases need their size and name updated unless already specifically made compatible with KAVT and KAVT NVP by the author
- Unique Tav-compatible Races
- Requires a minor edit to the races’ CharacterVisuals entries for Glowmap functionality to function correctly; other features will work as intended even without this edit
- This edit is best made by the author; details can be found here
- Miscellaneous other mods requiring Unique Tav
- Animation Edits are inherently compatible
- Tiefling Tails are inherently compatible
- Freckle and Vitiligo edits are inherently compatible
¶ Other Compatible Content
The majority of other mods will not cause conflicts with KAVT or KAVT NVP. To name a few mod categories that can be used alongside KAVT and KAVT NVP without causing problems:
- Armor, clothing, weapon and other equipment mods
- Gameplay mods such as classes, spells and improvements
- CC colors such as skin, eye, and hair colors
- CC assets such as horns, hair styles, and accessories
- Dialogue and cutscene edits
- Utility mods, e.g. “mark books as read” or “auto use soap”
- ReShades
¶ Conflicts
This mod is expansive and touches many vanilla files and entries. Because of this, there are a lot of possible points of conflict, but luckily there aren’t that many hard conflicts right out the gate, and most can be alleviated with patches.
However, the following mods are outright incompatible:
- Mods that include edits to the same shaders we edit to achieve similar features, e.g. additional slots for makeup and tattoos:
- Lemon’s Makeup & Tattoo Non-Replacers
- Jawstarion’s variety of similar content, including
- Character Creation Overhaul
- More Makeup and Tattoos
- Extra Scars for Everyone
- More Makeup, Tattoos and Scars
The following specific mod examples will need patches to function correctly. If the mod page already contains a Unique Tav patch, this patch is also suitable for compatibility with KAVT or KAVT NVP.
- Eyes of the Beholder by Labotor (Patch available)
- Astralities’ Glow Eyes (Patch available)
‼️ Please note that when using either of these mods, you’ll need to make any edits you’d make in the KAVT customization patch inside these mod’s patches instead! They edit the same files and will thus override one another. You can find more information on this further down on this wiki page alongside the load order related information.
¶ Baseline Usage
¶ QuickStart Guide - Plug & Play Installation
This section of the guide only applies if you’ve either never used Unique Tav before, or are installing KAVT or KAVT NVP on a clean game installation that does not contain Unique Tav. For information on how to transfer from Unique Tav to KAVT or KAVT NVP, please see the section providing information specifically about transferring from Unique Tav to KAVT or KAVT NVP instead.
This guide also does not contain information on how to customize KAVT or KAVT NVP. It only covers basic, plug and play style installation.
¶ How to quickly get started with KAVT or KAVT NVP
Download the mod from the mod page, and install it using your mod manager of choice (we recommend the BG3 Mod Manager by LaughingLeader).
You’ll want to position KAVT or KAVT NVP relatively close to the bottom of your load order. If you want more detailed instructions on load order in general, we’d recommend checking out this guide.
The only things you should be loading below KAVT or KAVT NVP and it’s associated patches (e.g. Eyes of the Beholder or Glow Eyes Unique Tav patches) are the following types of mods:
- Compatibility Framework mods
- Major patches, e.g. Padme’s patches
- Compatibility Framework itself
For example, within my personal load order containing 204 mods, KAVT is located at load order spot number 197.
For basic installation, either as the baseline for customization or in order to solely benefit from the additional tattoo, makeup and scar slots, this is it. :)
¶ Swapping from Unique Tav to KAVT or KAVT NVP
Both KAVT and KAVT NVP are set up to replace the Unique Tav pak within your mod folder. This means that importing the KAVT or KAVT NVP .pak file via the BG3 Mod Manager (or alternatively manually placing the .pak in your mod folder) will overwrite the Unique Tav .pak file automatically.
However, KAVT will not remove the Unique Tav Data files within your game files. Those files will remain unless you manually remove them, but keeping them in place will not cause problems.
This guide will assume you are installing mods via the BG3 Mod Manager by LaughingLeader. The process would be similar when using the in-game mod manager instead, but not exactly the same.
¶ Swapping the .pak File
Download the .pak file of your choosing from the KAVT mod page. You will be using either KAVT or KAVT NVP - you cannot use both at the same time as they do the same thing.
Next, import the .pak file into your Mod Manager as you usually would. You can do this by either dragging the .zip file you downloaded into the Mod Manager window, or by unzipping the file and placing the .pak file inside within your mod folder manually. Your mod folder is located at the following path by default:
C:\Users\(YOURNAME)\AppData\Local\Larian Studios\Baldur’s Gate 3\Mods
The KAVT or KAVT NVP .pak file will override the Unique Tav .pak file, as they share the same name.
¶ Adjusting your Tattoo and Makeup Atlases
This section applies to both KAVT and KAVT NVP. You will only need to do this if you have installed loose file tattoo or makeup atlases when using Unique Tav and would like to continue using them.
¶ If you want to use KAVT or KAVT NVPs included options instead
If you aren’t looking to continue using your custom tattoo and/or makeup atlas and would like to use KAVT or KAVT NVPs included options instead, you theoretically do not need to make any changes.
KAVT and KAVT NVP use different file names for tattoo and makeup atlases than Unique Tav does. This means that by default, the mod will not read your Unique Tav atlases and instead use the atlases inside the KAVT or KAVT NVP .pak instead. However, if you want to keep your Generated folder tidy, we would recommend deleting the atlases currently in place (remember to back them up if they're custom and not available to download anywhere else!).
¶ If you want to use a custom Tattoo or Makeup atlas
If you would like to use the custom atlases you already used with Unique Tav, you will need to make two types of changes to your atlases for them to work alongside KAVT or KAVT NVP.
‼️ Some creators have made KAVT compatible versions of their tattoo and makeup mods available. If the modded options you use have been made compatible already, you can download those versions instead and won’t need to make any changes yourself.
Re-Sizing your Atlases
For this step, we recommend using the “Tattoo, Makeup and Scar Atlas” resource available under “Optional Files” in the file tab on KAVTs mod page.
To briefly explain why we recommend this - .DDS files are compressed, similarly to a .jpeg. Opening a .DDS file, making edits, and then saving it once more will degrade the quality of the image, similarly to how .jpeg files may appear “crunchy” - Lines will be less crisp and designs may become blurry or artifacted. The resource we’ve made available is in the form of a .psd file, which is not compressed. This will ensure things aren’t compressed multiple times, keeping your tattoos and makeup as crisp as possible.
The process is the same for both the tattoo and makeup atlas. You will need Photoshop or Gimp to do this. For this guide, we will be using the files “KAVT Tattoo Atlas - Merged” and/or “KAVT Makeup Atlas - Merged”. We will only cover adding your existing Unique Tav atlas to the bottom half of the larger KAVT atlas - if you want to modify where specific designs are located or assemble a fully custom atlas, we recommend checking out the more in-depth guide included in the Resources file that goes over working with the “Working File” instead. :)
When opening the file, you’ll see the larger tattoo or makeup atlas on the screen. You will also want to open the atlas you have used alongside Unique Tav at the same time.
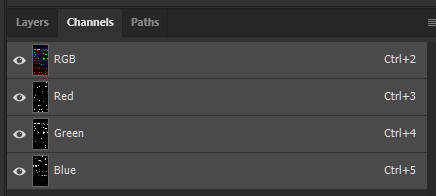
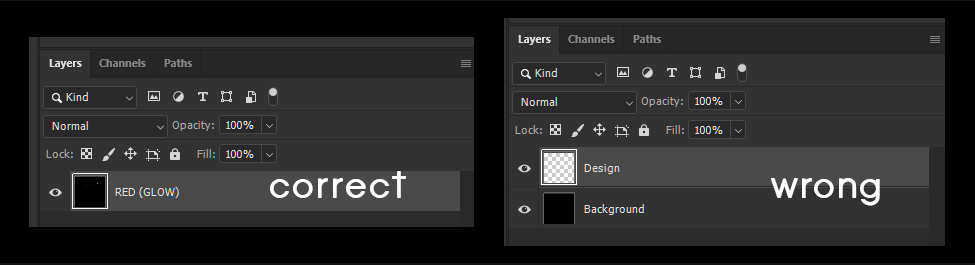
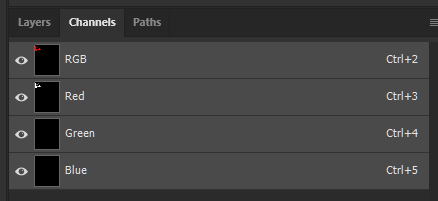
Inside your Unique Tav atlas file, open the “Channels” tab. Within Photoshop, this tab is located next to the “Layers” tab - this’ll be similar with other image editing software.
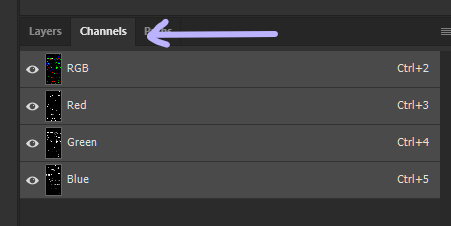
Select the “Red” channel from the list. The appearance of your image will change, and only the red tattoos will be visible. Select the entirety of your canvas using the selection tool, and copy it (ctrl+c, or navigating to Edit > Copy in the top bar).
Now, swap over to your KAVT atlas.
Similarly, navigate to the “Channels” tab and select the red channel. Paste (ctrl+v, or navigating to Edit > Paste in the top bar) the “Red” channel you just copied from your Unique Tav atlas into the “Red” channel of your KAVT atlas. Re-position it by dragging it downwards until it covers the bottom half of the atlas.
Now, you’ll repeat this same process for the “Green” and “Blue” channels of your atlases. Once you’ve done this for all three channels, you’ve successfully added your Unique Tav atlas to the bottom half of the KAVT atlas.
Next, we will save our atlas. Navigate to File > Save As, then choose the location for your file. You can either save it directly to the correct location, or save it to a different location and then copy it over to the correct path:
YOURGAMEFOLDER\Generated\Public\Shared\Assets\unique_tav\FACE
You will want to choose the following names for your atlases:
Tattoo: KVT_Head_Atlas_Tattoo.DDS
Makeup: KVT_Head_Atlas_Makeup.DDS
Capitalization and spelling are important here! Your game will not read these files correctly if there are spelling mistakes, capitalization differences, or the file is placed at the wrong location.
These are the export settings we will use to save our atlases:
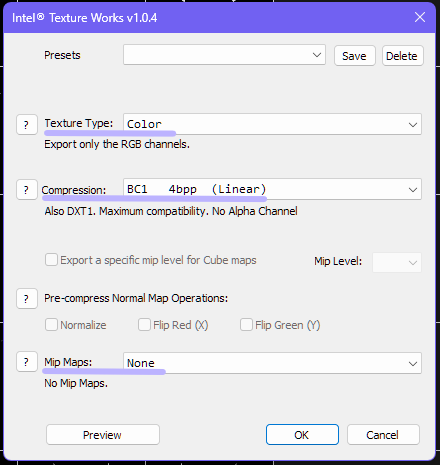
Please note your menu might look slightly differently if you use the NVIDIA dds plugin for Photoshop instead of the Intel one, or you are using another image editor to make these changes.
Now, your atlas has been re-sized and re-named and will work with KAVT.
Why do we need to re-size the atlas?
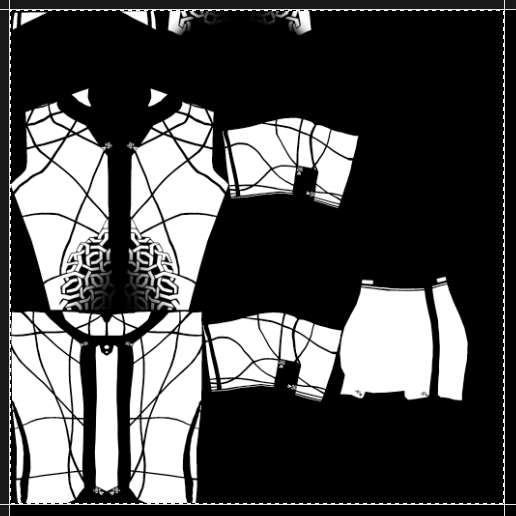
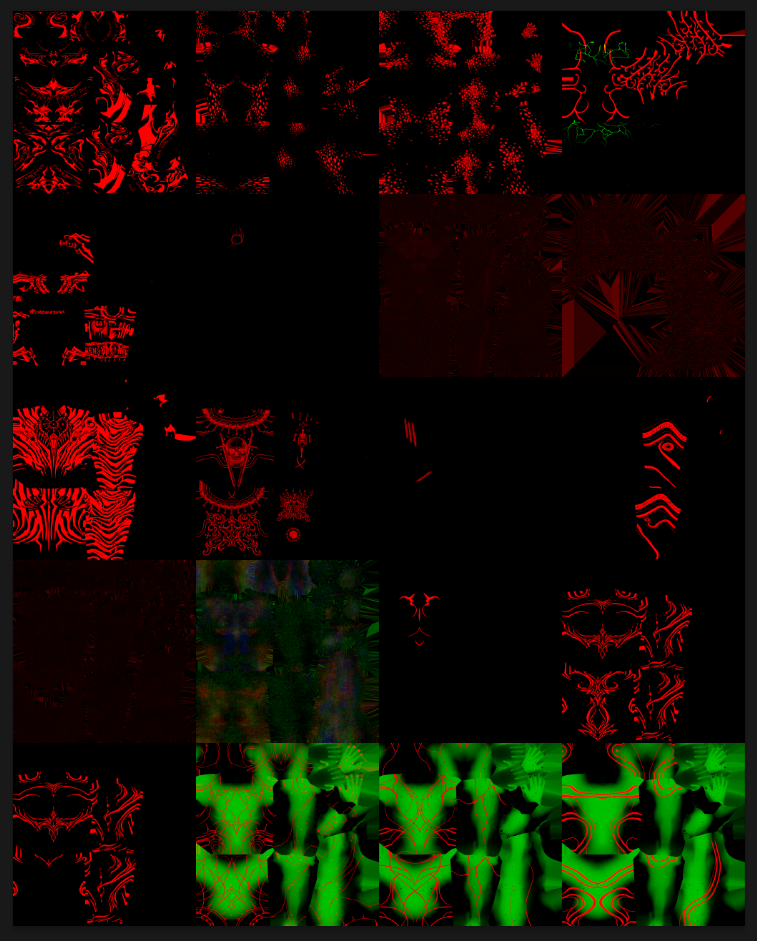
The changes allowing for the larger atlas to work are made within the shader we edit within KAVT. Inside the shader, we have told the game to look for an atlas that is 4 tiles wide and 8 tiles tall - the game will always treat the atlas as if it is that size, even if the atlas you’ve added is only 4 tiles tall.
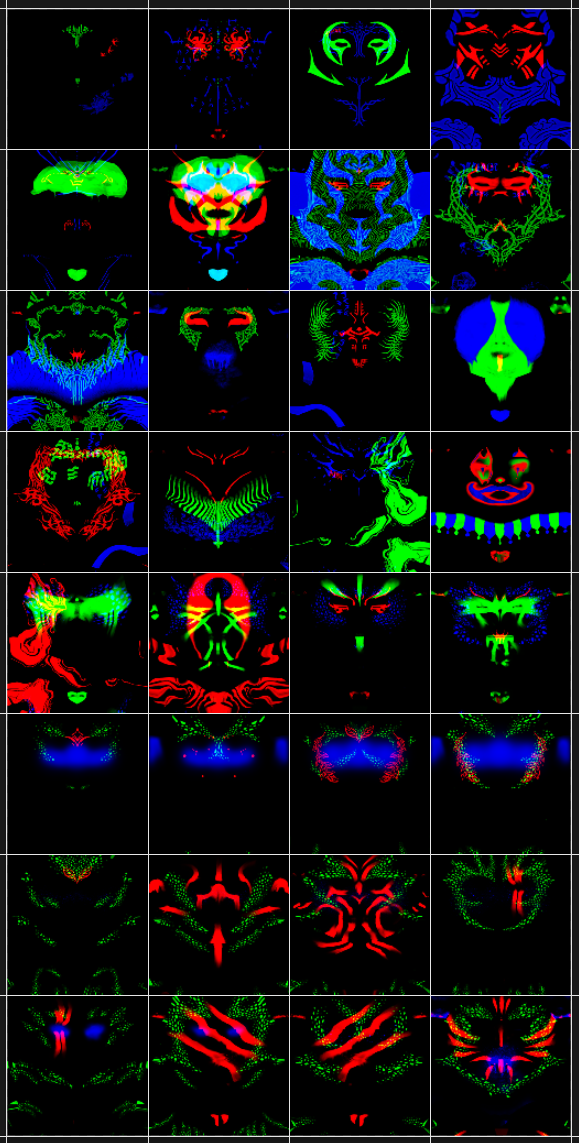
This image illustrates what issues that might cause:

As you can see, the left atlas contains one tattoo neatly within each tile. The atlas on the right, however, is cut up into more sections than there actually are tattoos, resulting in each tattoo getting cut in half. In-game, this results in misplaced and awkwardly cut tattoos.
This is why you’ll want to re-size your atlas. :)
¶ Swapping Unique Tav Body Mesh Edits
If you’ve installed body mesh edits as loose files within your game files, you won’t need to make any changes for these body meshes to also with with KAVT or KAVT NVP.
¶ Swapping the Unique Tav Body Tattoo
If you’ve used a body tattoo with Unique Tav by placing the body tattoo file as a loose file within your game files, you will not need to make any changes for this body tattoo to also work with KAVT or KAVT NVP.
¶ Swapping Unique Tav Body Texture Edits
If changes are necessary depends on whether you are using KAVT or KAVT NVP.
You only need to do this if you are using custom body textures! This is not a requirement for body tattoos, or head tattoo or makeup atlases.
¶ If you are using KAVT NVP
If you’ve used custom body textures with Unique Tav by placing your replacement body textures as loose files within your game files, you will not need to make any changes for these body textures to also work with KAVT NVP.
¶ If you are using KAVT
Because KAVT uses virtual textures instead of traditional ones, you’ll need to convert your body textures to virtual textures to continue using them. We have tried to make this process as simple as possible for users, but if you struggle doing this, please feel free to reach out!
‼️ Some creators have made KAVT compatible versions of their body texture mods available. If the modded options you use have been made compatible already, you can download those versions instead and won’t need to make any changes yourself.
Setting Up to convert Body Textures
For this step, we recommend using the “Virtual Texture Workspace” resource available under “Optional Files” in the file tab on KAVTs mod page.
Requirements
- Norbyte’s LSLib
- The KAVT Virtual Texture Workspace available in the Files tab on the mod page
- Your body textures of choice, including CLEA, NM, and HMVY
Please note that you’ll need to use LSLib to pack Virtual Textures. You cannot do so with the Modder’s Multitool.
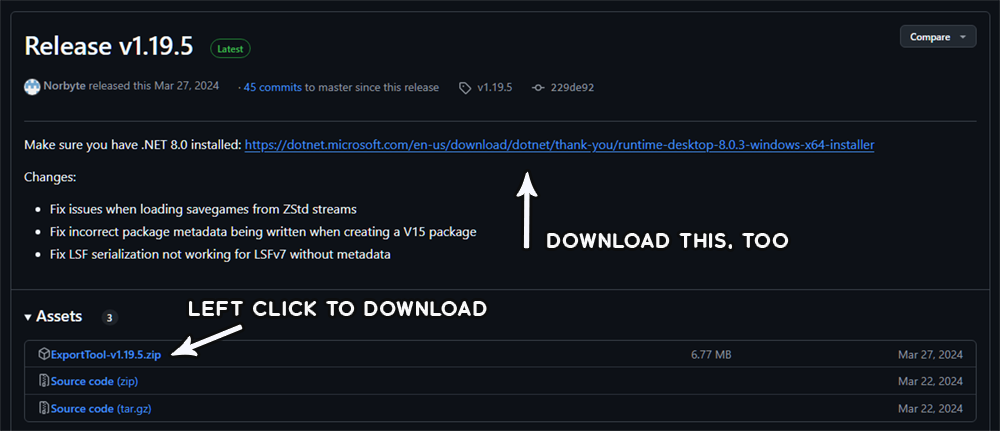
Step 1 - Acquiring LSLib
If you haven’t used LSLib before, acquire it from the link above. All you’ll need to do to set up this tool is download it from the link available above and unzip the files in the location of your choice. Make sure you have .NET 8.0 installed, as it is required for this tool to function - You can find the download link on LSLib’s release page linked above.
Step 2 - KAVT Virtual Texture Workspace
Download the KAVT Virtual Texture Workspace from the optional files in the File tab on this Mod page. Using this workspace will make this process significantly easier as all configuration files required for packing Virtual Textures using LSLib have already been created for you.
Similarly to LSLib, you’ll want to unzip the folder inside this .zip wherever you’d like it to be - Ideally somewhere you’ll find it easily, as we will be using the files within throughout this process. There is no setup required for any of the configuration files within the workspace, they’ll function as is.
Step 3 - Inserting your Textures
Next, we’ll be adding our new Body Textures to the workspace. For this guide, I’ll be using the feminine Githyanki textures as an example - the process will be the same for every Race and Bodytype, only the exact names of the files used in the process will change according to which Race and Bodytype you’re looking to edit.
You’ll place your body textures within the following folder of the workspace: …\unique_tav\Conversion\Textures\(TEXTURES GO HERE). When you open this path, you’ll find it’s already filled with textures. These are the vanilla versions of all Body Textures, and whichever ones you’re not interested in changing can simply remain - we will not be touching them.
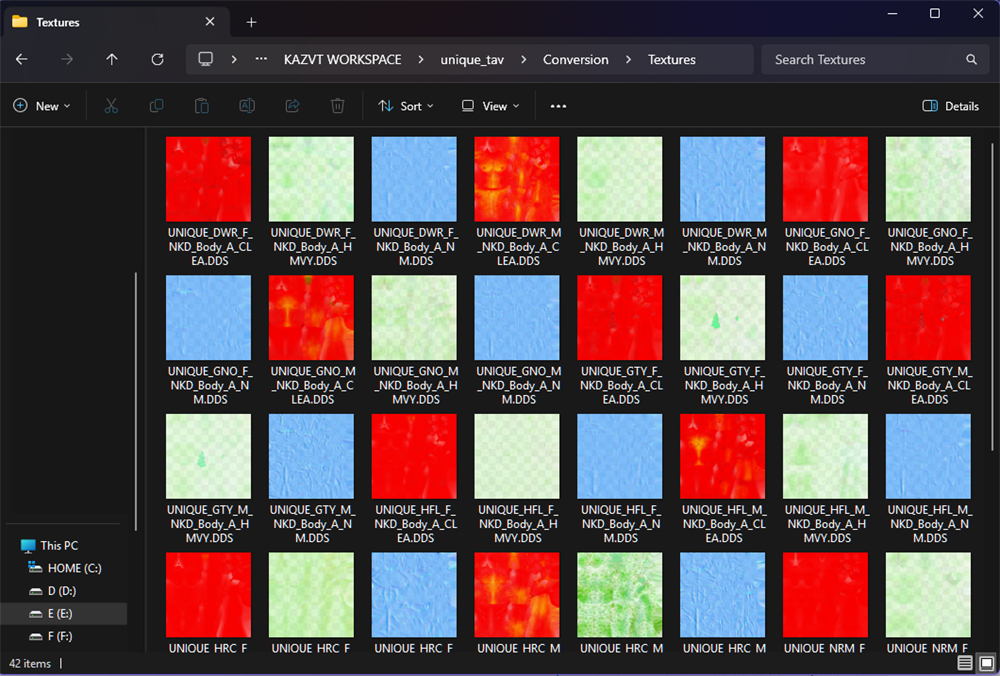
Take note of the naming convention of the textures in this folder. You’ll need to match these names when adding your textures to this folder. These textures follow the following naming convention, with content not in brackets being consistent between all races and body types:
UNIQUE_(RACE)_(M/F)_NKD_BODY_A_(TEXTURE TYPE).DDS
For the sake of our example, we will be adding our textures to this folder after re-naming them as follows:
UNIQUE_GTY_F_NKD_Body_A_CLEA.DDS
UNIQUE_GTY_F_NKD_Body_A_NM.DDS
UNIQUE_GTY_F_NKD_Body_A_HMVY.DDS
If you’re asked if you’d like to overwrite these files, select yes. Do not delete any of the other textures in this folder, even if you aren’t using them. Please keep in mind that for Virtual Textures, all three of these textures will need to use BC3/DXT5 compression. This is a distinct difference between Virtual Textures and Traditional ones, as for Traditional Textures, all three textures require different compression types.
Step 4 - Using LSLib
Now that our texture edits are in place, we’ll be packing our Virtual Textures using LSLib. Launch the tool and navigate to the “Virtual Textures” tab towards the top of the UI. You’ll be working within the “Build Tile Set” section of this tab.
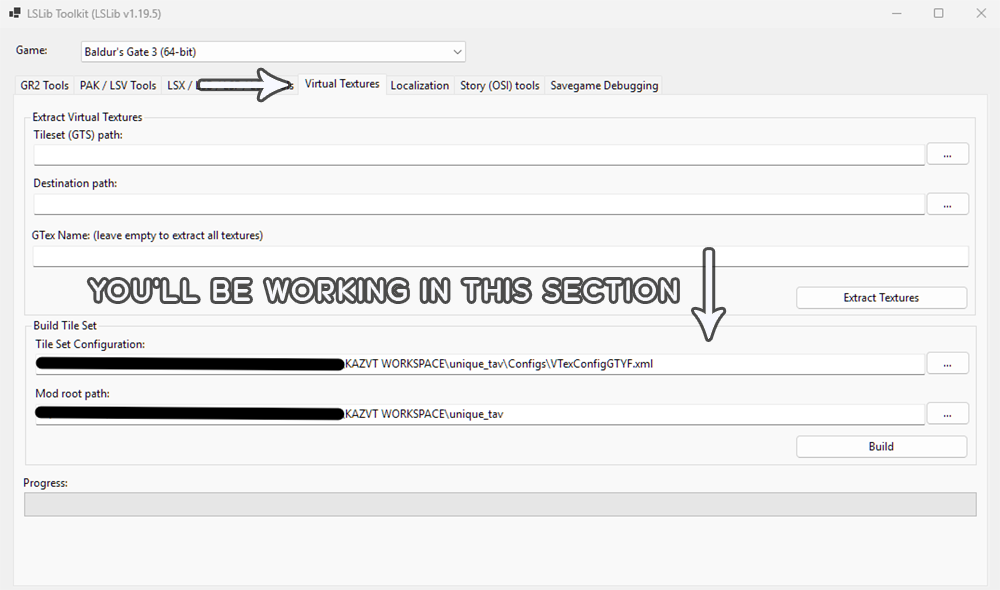
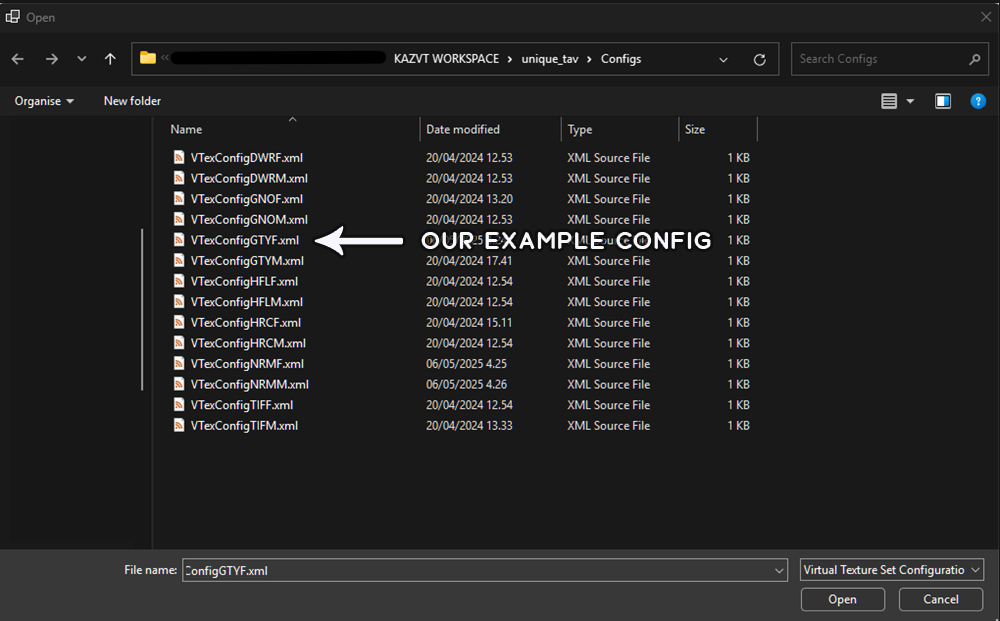
Click the three dots on the right of the “Tile Set Configuration” line. In the window that opens, navigate to wherever you unzipped your KAVT Virtual Texture Workspace and further to unique_tav\Configs. Within this folder, select whichever Config file matches the Race and Body type combination your body textures are intended for. In our case, this is the Config file named “VTexConfigGTYF” - VTex Config Githyanki Female. Double click this file, which will add it’s path to the Tile Set Configuration field.
This is our configuration file. It dictates which textures will be packed into which .gtp/.gts file; the files that will store our Virtual Textures moving forward.
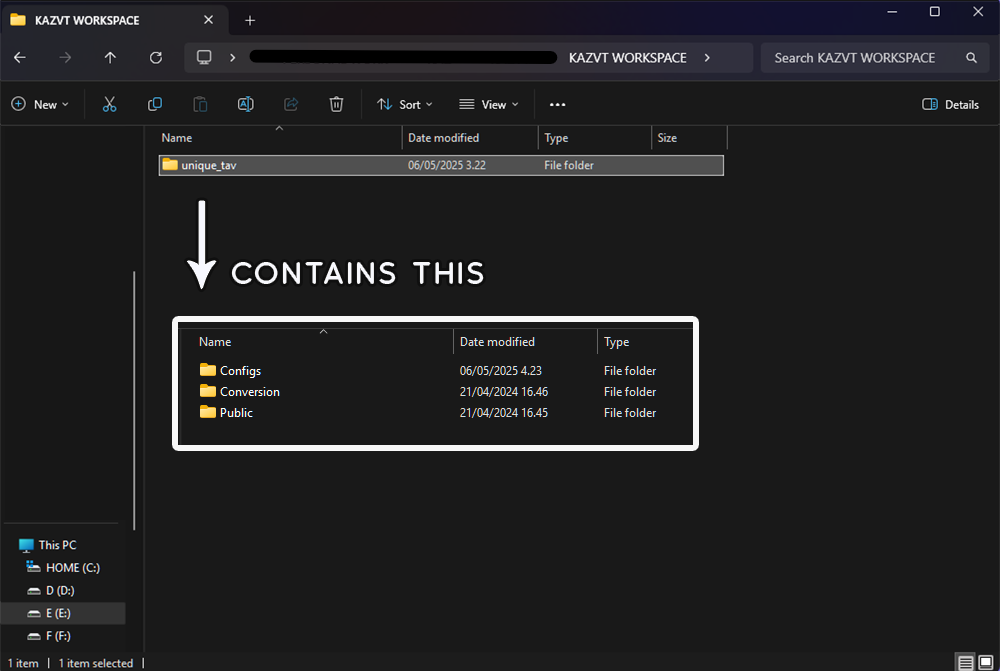
Next, click the three dots on the right of the “Mod Root Path” line. Navigate to where you’ve unzipped your KAVT Virtual Texture Workspace once again, and select the folder named “unique_tav” that contains “Configs”, “Conversions”, and “Public”. Once again, click open, or simply double-click the file.
Now, simply click “Build”. LSLib will now build your Virtual Texture tilesets. You’ll receive a small popup once the process has finished.
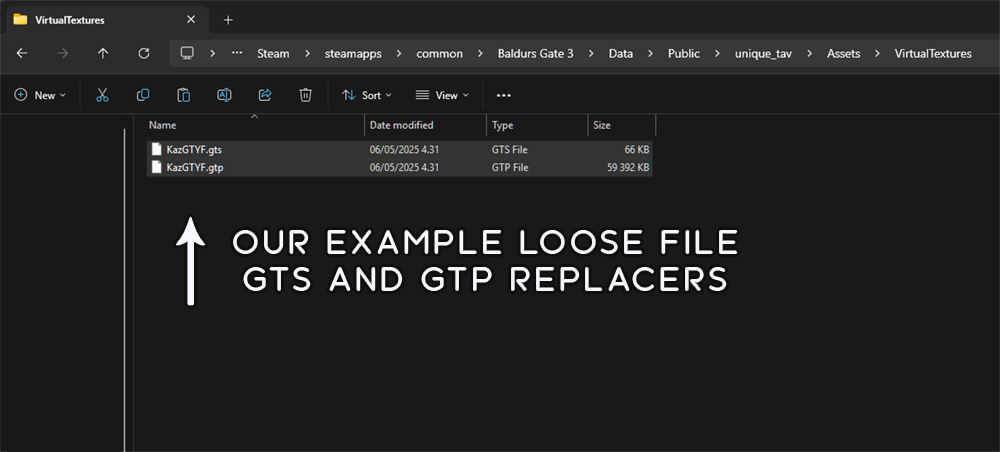
Step 5 - Loading your .gts and .gtp files
Now that we’ve successfully packed our Virtual Textures, we can add them to our game files. Similarly to how Body Texture overrides function for Unique Tav, KAVT’s Virtual Textures are loaded as loose file overrides.
First, we’ll grab our freshly generated set of Virtual Texture files from within our workspace. They’re located at …\unique_tav\Public\unique_tav\Assets\VirtualTextures\(TEXTURES ARE HERE). You’ll want to copy both the .gtp and the .gts for your corresponding Race and Body Type.
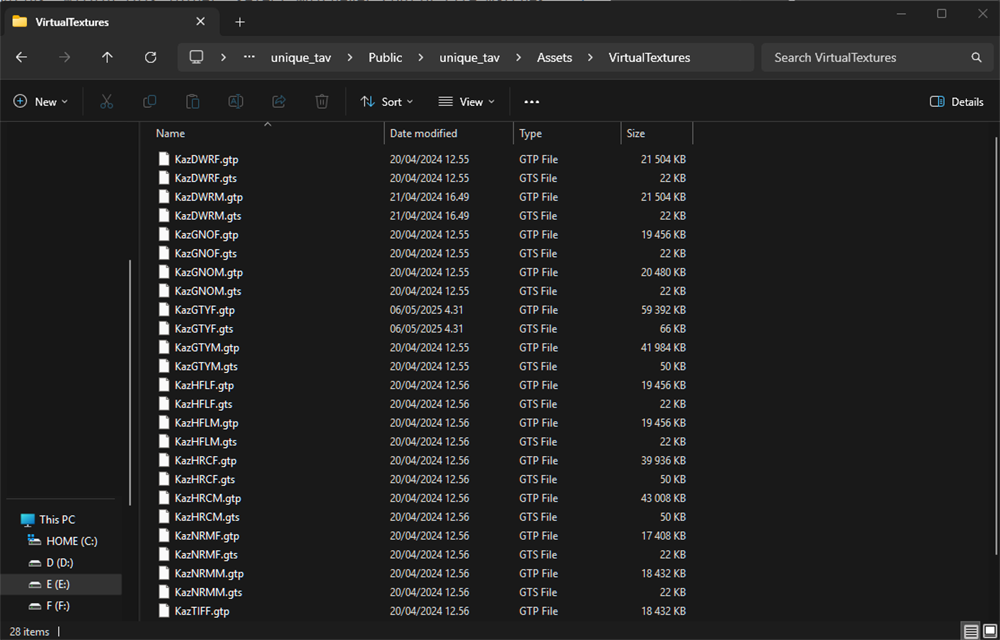
Next, navigate to your game’s Data folder - the easiest way to do so is via the BG3 Mod Manager’s shortcut, if you’re using it as your Mod Manager. Alternative, you can directly navigate to it; it’ll be located at …\Steam\steamapps\common\Baldurs Gate 3\Data.
Further navigate to …\Steam\steamapps\common\Baldurs Gate 3\Data\Public\unique_tav\Assets\VirtualTextures. Paste the .gts and .gtp files you copied from within your workspace into this folder. This is where your Virtual Texture overrides will be located.
Step 6 - Test your body textures in-game
Finally, you’ll now be able to load up your game and witness your body textures in all their glory!
¶ KAVT-Specific Load Order Information
This section will specifically talk about load order in the context of KAVT and KAVT NVP and will mostly cover things like Unique Tav/KAVT patches, races, Glow Eyes/Eyes of the Beholder, and similar things.
If you’re interested in more generalized load order information, we’d recommend checking out this guide instead. :)
¶ General Information
KAVT and KAVT NVP, as well as modded races and Glow Eyes/Eyes of the Beholder, can be somewhat sensitive when it comes to load order because they all edit the same entries.
These entries are “Character Visuals” entries. They define your character’s baseline appearance in CC, and there is one entry for each race and body type combination (meaning four entries per subrace). Unfortunately, we cannot make multiple changes to these same entries without overwriting each other - this is why patches are necessary, and load order is important, as whichever mod modifies these entries last will overwrite all other changes to these entries.
¶ What Order to Load Things in
Generally, this is the order we’d recommend loading things in. Please note these do not need to be directly after one another. We are also only covering content that directly relates to KAVT in some capacity.
- Race Mods
- Race Mods’ Unique Tav Patches
- Head Mods
- Head Mods’ Unique Tav Patches
- KAVT or KAVT NVP
- KAVT Customization Patch*
- Glow Eyes or Eyes of the Beholder
- Glow Eyes or Eyes of the Beholder Unique Tav Patch
*Please note that this patch will not work if you are using Glow Eyes or Eyes of the Beholder. As mentioned above, these mods all edit the same entries and will overwrite each other! In practice, this means EotB/Glow Eyes are overwriting your customizations - make those changes in EotB/Glow Eyes patches instead!
In practice, this may look something like this:
¶ Customization
¶ The KAVT Glowmap
If you've previously used Kaz Virtual Tav, you may already be familiar with the concept of the glowmap. To briefly summarize, a glowmap is a type of texture that traditionally adds glow in some capacity - in the context of KVT, the glowmap allows you to add a glowing tattoo to your Tav. For KAVT and KAVT NVP, we've made some adjustments to the glowmap to make additional features possible, utilizing the additional two, previously empty channels of the texture to allow for an additional tattoo, and opacity.
The name glowmap was kept the same despite these additions, as the name had to remain this way internally to ensure compatibility with content that previously utilized the glowmap functionality of KVT. While it technically no longer is solely a glowmap, it is still called a glowmap in this context to avoid confusion and mismatch between internal names and what users see. :)
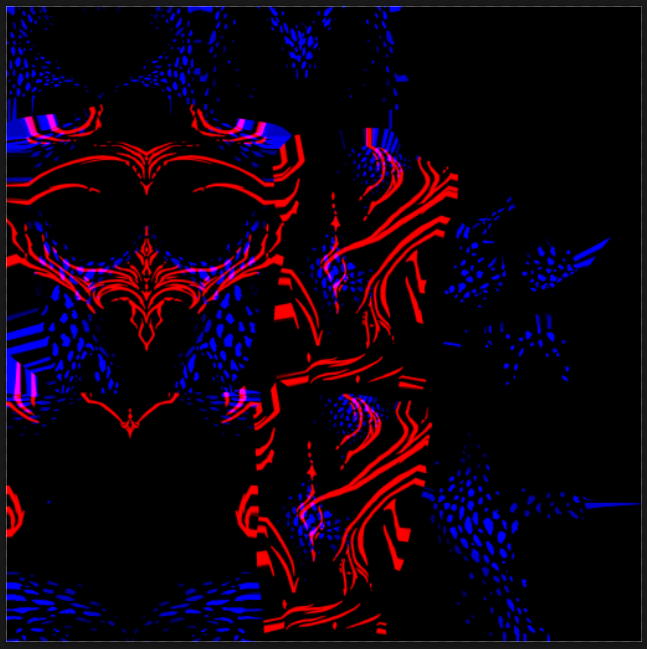
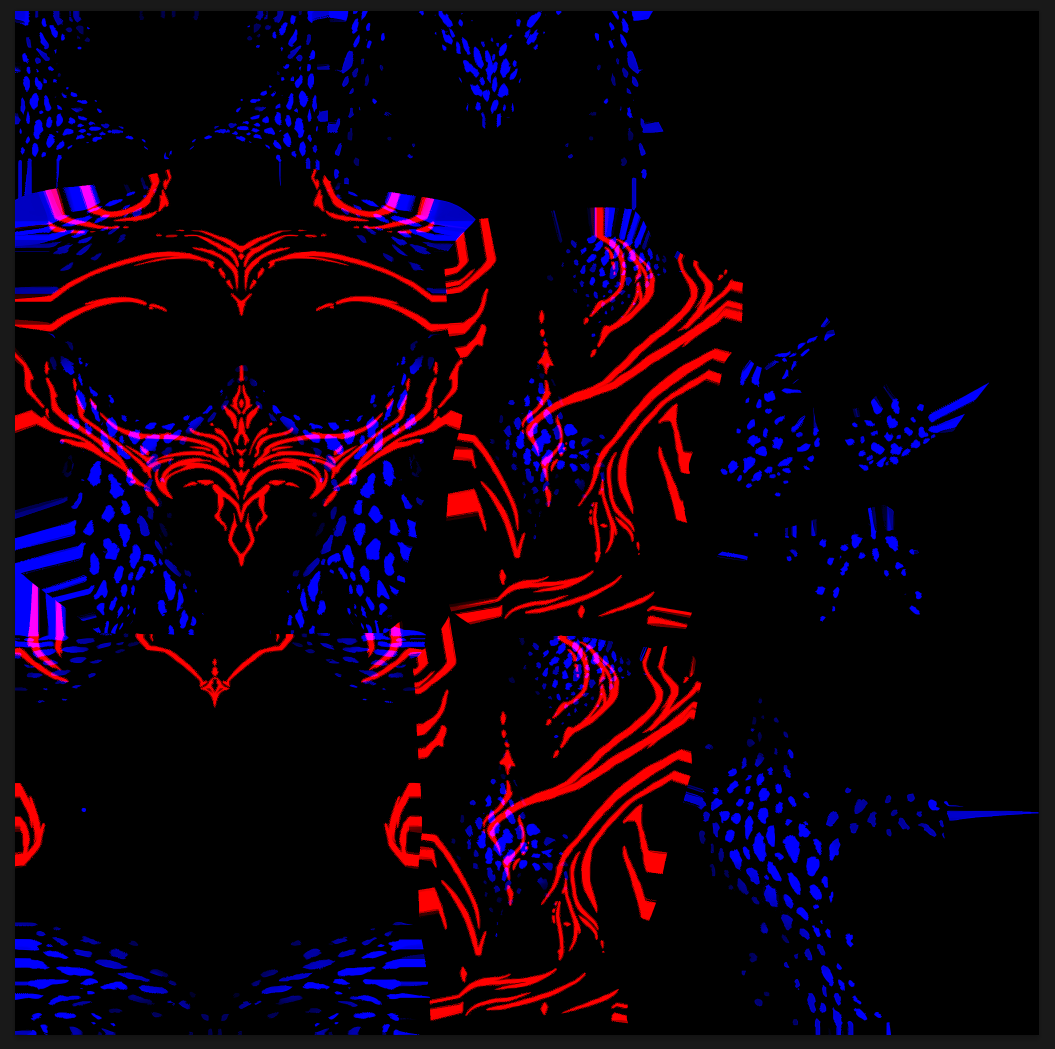
As you can see, the glowmap appears similarly to the tattoo and makeup atlases - one design appears in red (this is the glowing tattoo, located on the red channel), and one design appears in blue (this is the additional tattoo, located on the blue channel). Each glowmap contains a single design on each channel, compared to an atlas, which consists of multiple designs per image arranged in a grid pattern. This means that to change the design added via glowmap, you'll only need to replace the texture.
¶ Customizing the Glowmap
We recommend utilizing the KAVT Glowmap Resource available among the optional files on the KAVT mod page. Using this resource will make the process of creating the glowmap easier, particularly for users who have not made one before.
‼️ Some creators have made KAVT compatible mods utilizing the glowmap. If the modded options you use have been made compatible already, you can download those versions instead and won’t need to create a glowmap yourself.
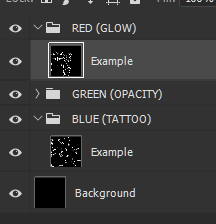
The Glowmap Resource contains the following files:
- Example .psd files of all 3 Glowmaps, merged
- Provided to provide an example of what a finished Glowmap may look like
- .psd files of all 3 Glowmaps, working files
- Provided to simplify the creation of content compatible with KAVT
- A PDF guide
The glowmap resource is a little more bare-bones than e.g. the atlas resources. This is because the glowmap is very customizable, and doesn't contain any design by default. The examples provided contain two designs on two channels of the glowmap texture.
If you have little experience editing images with Photoshop or GIMP, we'd recommend checking out the BG3 Image Editing Basic section further down on this wiki page first. It covers some of the baseline skills you might need to do this sort of editing - all of these skills are very simple to acquire, and editing these resources isn't as scary as it might seem if you haven't done so before! The Image Editing Basic section primarily covers very basic information on how to use image editing software for users who have never interacted with software like this before, meaning that if you have used Photoshop or Gimp in any capacity, you're likely good to go when it comes to editing the glowmap.
You can find detailed instructions on how to edit both the head and body glowmaps here.
¶ General Information
All three Glowmaps (for the head, the body, and the genitals) are set up to function the same way - there are no differences regarding the functions of each channel between the three types of glowmaps included in KAVT.
‼️Note: KAVT NVP users only have access to the body glowmap due to restrictions imposed by the shaders themselves.
As a Mod user, you’ll primarily be utilizing the Red and Blue channels of these textures. The Green channel contains the Opacity feature, which is currently in an experimental state and will likely primarily prove useful to Mod Authors.
The Red channel contains the Glow, which appears as a glowing, pulsing Tattoo in-game. The Blue channel contains the Additional Tattoo. The Glowmap only contains their designs, and colors are customized either by file edit, or in CC (by eye color).
All three Glowmaps are provided at a size of 4096px x 4096px. You may scale them down without their features being negatively affected. This may be beneficial especially in the case of the Head Glowmap, as if you decide to use, for example, existing Tattoo or Makeup designs that are originally part of an atlas for this Glowmap, they may be smaller than the size of the glowmap resource provided. However, designs may be less crisp if you decide to scale them down. This will be particularly noticeable on the body.
¶ Glowmap Paths and Compression
⚠️ It is incredibly important for your glowmap to use the correct name as detailed below. It is equally as important for your glowmap to be saved as .DDS, and not .dds.
The game will not read your glowmap if it doesn't follow the naming convention we've provided exactly or .DDS is not capitalized.
The paths for the glowmap files are as follows:
Head: …\Baldurs Gate 3\Data\Generated\Public\Shared\Assets\unique_tav\FACE\GLOWY\KVT_Head_Glowmap.DDS
Body: …\Baldurs Gate 3\Data\Generated\Public\Shared\Assets\unique_tav\BODY\GLOWY\KVT_Body_Glowmap.DDS
Genitals: …\Baldurs Gate 3\Data\Generated\Public\Shared\Assets\unique_tav\FACE\GLOWY\KVT_Genital_Glowmap.DDS
‼️Note: If these paths don't exist within your game files, please create the appropriate folders yourself.
When saving a file as .DDS, you'll be provided a window of settings when saving your file. These are the settings you'll want to use for the glowmap:
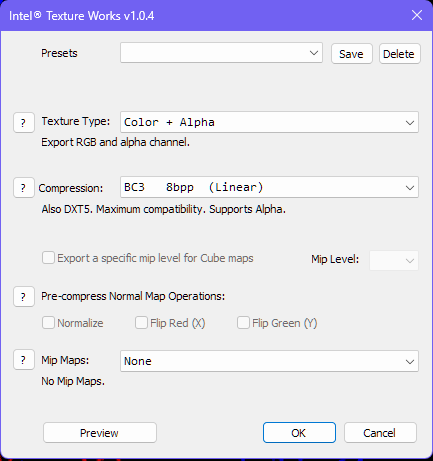
‼️Note: Your settings window may appear a little bit differently depending on which Photoshop .DDS plugin you use, or alternatively, if you're not using Photoshop but another image editor instead. Regardless, the compression type of BC3 (which may also be referred to as DXT5) is the most important part of this window. Please also make sure to save your file without Mip Maps, as this may make your designs appear blurry.
¶ The KAVT Customization Patch
⚠️ This patch is not packed into a mod by default to make it easier for users to edit this patch, as this way, you won't need to unpack the patch .pak in addition to making the edits and packing the mod yourself.
You can find the KAVT customization patch among the optional files in the file tab on the KAVT mod page.
We highly recommend using a text editor other than the standard Notepad app that comes built into Windows devices to edit these files. We personally use VS Code, but other editors like Notepad++ or Sublime can also be used.
This process is very similar to the process of customizing your Body Tattoo color through Unique Tav. However, instead of editing KAVT or KAVT NVP directly as you’d do with Unique Tav, we’ve provided this Patch that contains only the files you’ll need to edit in order to make the process easier for users not too familiar with creating Mods.
¶ Customization Options
Through editing the patch, you can customize the following features of KAVT. Options marked with an asterisk (*) are only available to KAVT users and won't work with KAVT NVP.
- Body Tattoo (Color, Intensity, Metalness)
- Body Glow (Color, Intensity, Pulse Speed)
- Head Glow (Color, Intensity, Pulse Speed)*
- Secondary Body Tattoo (Color, Intensity)
- Secondary Head Tattoo (Color, Intensity)*
Body Glow and Head Glow (for the glowing tattoo added via glowmap) use the same color parameter. Any Glow Color set within the patch will be overridden in CC if you choose a modded eye color that includes Glow.
¶ Editing the Customization Patch (If not EotB or Glow Eyes)
⚠️ If you are using Eyes of the Beholder or Glow Eyes alongside KAVT, you will need to make these edits in a different file. Please see the EotB/Glow Eyes section a little further below for details!
Requirements
- Norbyte’s LSLib or the Modder's Multitool
- The Customization Patch available in the Files tab on the mod page
- A text editor (Notepad, VS Code, Notepad++, Sublime, etc)
Step 1 - The Customization Patch
Download the Customization Patch from the Files tab on this Mod page. Inside the .zip file you’ll find the file structure of the Customization Patch Mod, unpacked. The files inside are thoroughly commented with additional details and labelling to make the process as easy as possible for you.
Unzip the file wherever is the most convenient for you, as you’ll be working within it.
Step 2 - Making your Changes
Navigate to the following path:…\KAZSTRA_UniqueTav_Customization\Public\KAZSTRA_UniqueTav_Customization\Content\[PAK]_CharacterVisuals
Within this folder, you’ll find a number of files named after BG3 Races. Open whichever file name matches the Race which you’d like to edit; e.g. if you'd like to edit Body 1 Humans, you'd open _Humans.lsf.lsx.
Changes are made for each Race, Subrace, and Body Type individually. We’ll be using the Human file as an example for this guide. Your file may look similar to this:

Read the instructions within the file carefully. Each Subrace and Body Type combination is labelled appropriately. Open the section of the Subrace and Body Type you’d like to edit by opening the appropriate collapsed section; we’ve marked the symbol you’ll need to click to do so in the screenshot shown above. Once opened, your file may look like this:

Scroll down until you see a section of code separated by “<!— KAVT CUSTOMIZATION —>“. The section between this label and the “<!— KAVT CUSTOMIZATION END —>“ label contains all the code necessary to customize your KAVT or KAVT NVP as you desire.

Here, you can now make whichever edits you’d like to make. Each parameter has been labelled, describing what it edits, how the values shown affect the feature you’re editing, and what changes are possible for the given parameter.
Once you have made your changes, save the file.
Step 3 - Packing the Patch
You can now pack the Mod using either LSLib, or the Modder’s Multitool
LSLib
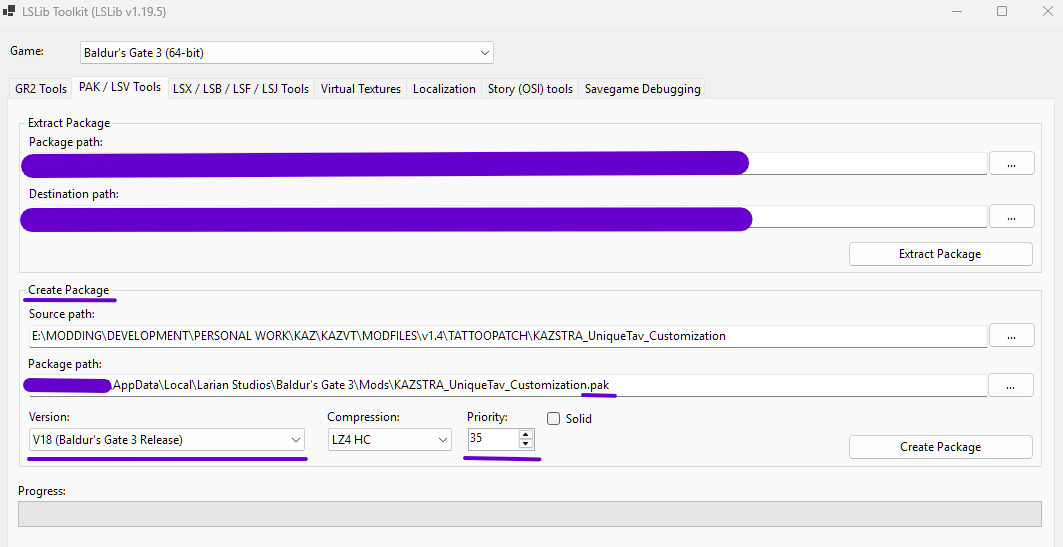
If you’re using LSLib, navigate to the “LSX/LSB/LSF/LSJ Tools” tab, and batch convert the entire Patch by entering the path to the root folder as both the “Input Directory” and “Output Directory” paths. Click “Convert” to convert the entire patch at once.

Then, navigate to the “PAK/LSV Tools” tab. Enter the path to the root folder as the “Source Path” path and whichever directory you’d like to place the finished .pak in as the “Package Path”. In our example, this is the Mods folder. Make sure the “Package Path” ends with the name of the .pak and the extension “.pak”. Before packing, ensure the Version is set to V18, and the Priority to 35.
Then, create the .pak by clicking “Create Package" and install it via BG3MM as you would any other Mod. Load it after KAVT or KAVT NVP.
Modder’s Multitool
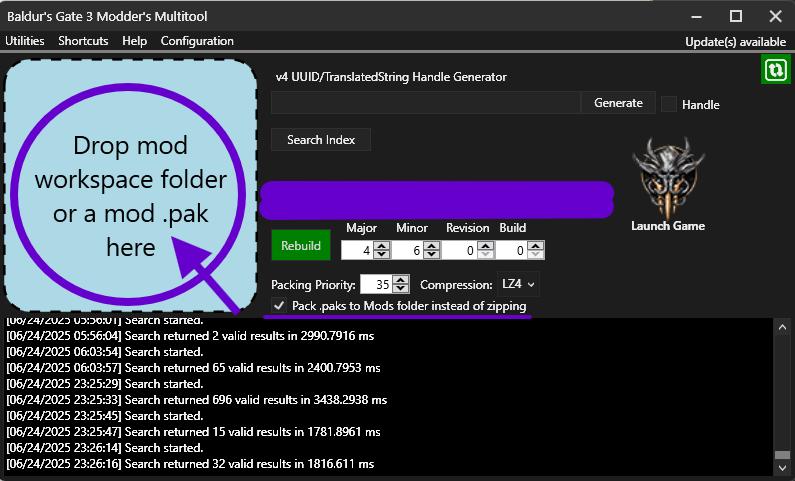
If you’re using the Modder’s Multitool, you’ll only need to drag the root folder of the Patch onto the appropriate spot inside the Modder’s Multitool window. Your Mod will be packed to the same directory you’ve placed the root folder in, or alternatively directly to your Mods folder, should you have selected this setting. Install the mod via BG3MM as you would any other mod. Load it after KAVT or KAVT NVP.
¶ Editing the Customization Patch (If using EotB or Glow Eyes)
⚠️ This section is only relevant if you're using Eyes of the Beholder or Glow Eyes alongside KAVT. If you are not, please refer to the above section instead!
If you're using Eyes of the Beholder or Glow Eyes alongside KAVT, you will need to make your Customization changes within their Unique Tav patches instead of using the KAVT customization patch.
This is because KAVT and EotB/Glow Eyes edit the same files and entries, and will thus override each other. If you are loading EotB/Glow Eyes and their patches after KAVT's Customization Patch, your customization won't work; likewise, if you load EotB/Glow Eyes before KAVT's Customization Patch, EotB/Glow Eyes won't work. This is an unfortunate limitation and is the reason compatibility patches are necessary in the first place.
The process is the same as the one detailed above, however you'll need to unpack the patch before editing it.
¶ What's Where & How Does It Work?
¶ KAVT Face Customization
⚠️ This section is only relevant if you're using KAVT. These customization options are not available for KAVT NVP.
KAVT includes a number of new options for face customization. This section details how they work, where you can find them, what they don't do, and how you can edit them.
¶ What Face Customization Options are there?
When using KAVT, you will first and foremost have access to the standard vanilla CC face customization options you may already be familiar with. This includes:
- Face Tattoo, selectable in CC
- Makeup, selectable in CC
- Scars, selectable in CC
Additionally, you will also have access to the following options that are added via the KAVT head glowmap:
- Glowing Face Tattoo, not selectable in CC
- Additional Face Tattoo, not selectable in CC
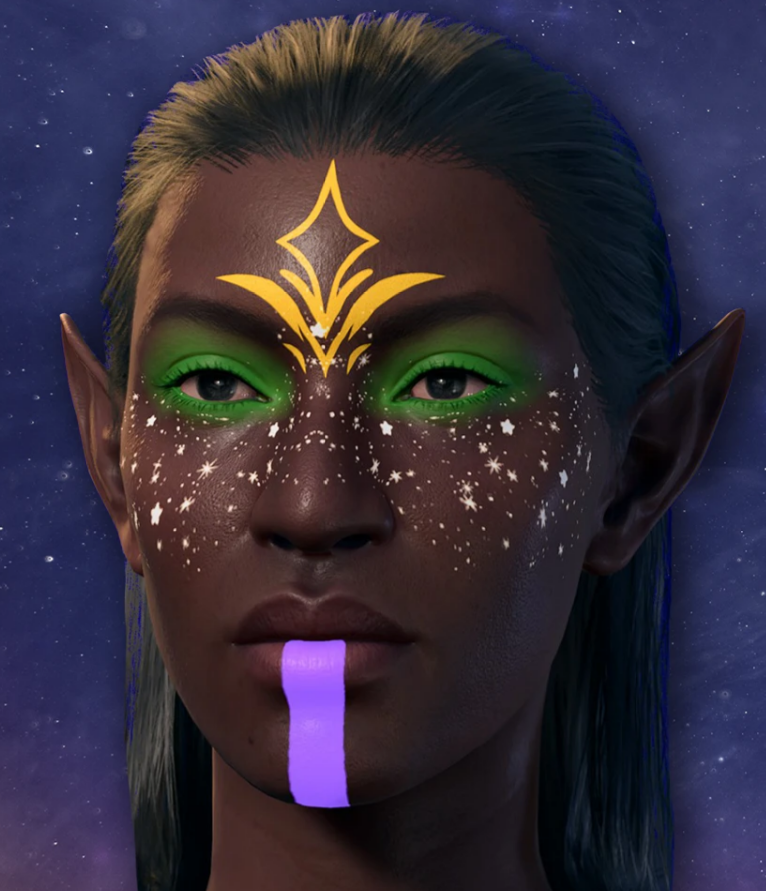
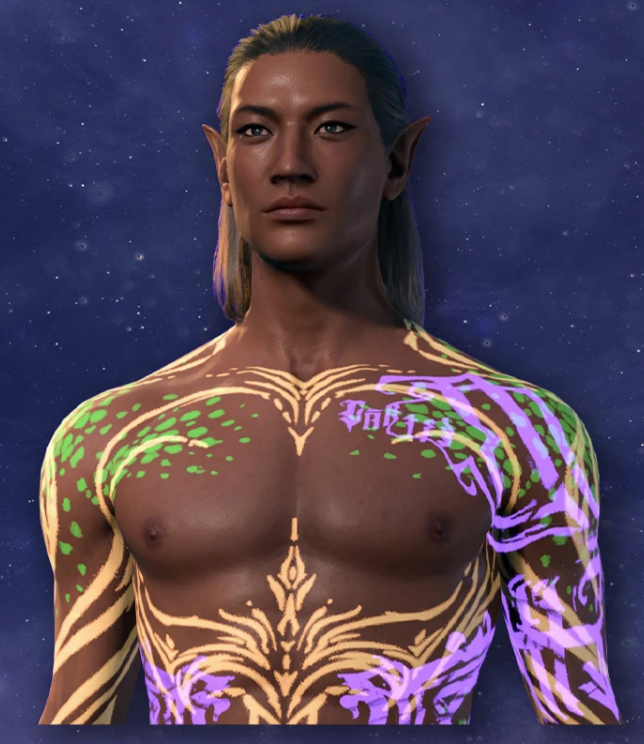
As this image shows, this allows for a total of four tattoo/makeup designs, each with their own color, to be used simultaneously. Two of these options can be customized in CC, and two of these options can be customized via the glowmap texture.
¶ The CC Options
Which CC options are available to you depends on whether you're using a custom tattoo, makeup, or scar atlas alongside KAVT. If you want to customize your atlas, or continue using the atlas you previously used alongside Unique Tav, check out the appropriate sections that provide more information on how you're able to do that.
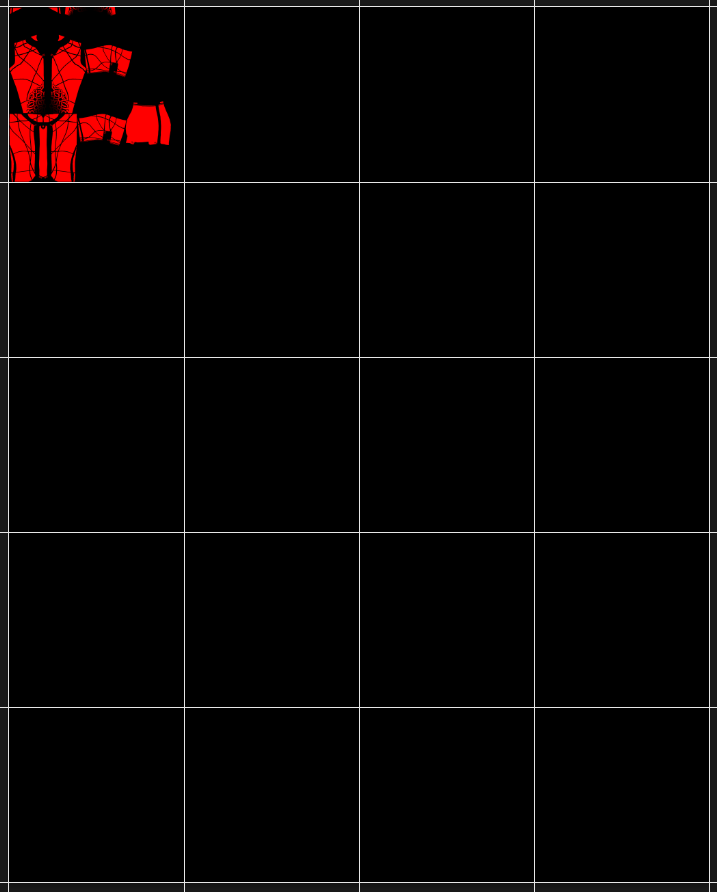
Regardless of whether you use custom atlases or not, you'll have access to 24 scar designs, 89 tattoo designs, and 34 makeup styles directly in CC. These options can be changed via the magic mirror, or Appearance Edit.
¶ The Glowmap Options
⚠️ The glowing face tattoo and additional face tattoo added via glowmap cannot be chosen or changed in CC. This includes the magic mirror and Appearance Edit.
Their design depends entirely on the glowmap, and their colors, opacity, metalness and other features can be set within the customization patch.
By utilizing the glowmap added by KAVT, you can access two additional face tattoo “slots”. These options are not available in CC.
By default, the head glowmap included in KAVT is blank. That means that unless you choose to utilize and customize the glowmap, your Tav won't have a glowing tattoo or an additional tattoo on their face.
¶ How does the Glowmap work?
If you've previously used Kaz Virtual Tav, you may already be familiar with the concept of the glowmap. To briefly summarize, a glowmap is a type of texture that traditionally adds glow in some capacity - in the context of KVT, the glowmap allows you to add a glowing tattoo to your Tav. For KAVT and KAVT NVP, we've made some adjustments to the glowmap to make additional features possible, utilizing the additional two, previously empty channels of the texture to allow for an additional tattoo, and opacity.
The name glowmap was kept the same despite these additions, as the name had to remain this way internally to ensure compatibility with content that previously utilized the glowmap functionality of KVT. While it technically no longer is solely a glowmap, it is still called a glowmap in this context to avoid confusion and mismatch between internal names and what users see. :)
As you can see, the glowmap appears similarly to the tattoo and makeup atlases - one design appears in red (this is the glowing tattoo, located on the red channel), and one design appears in blue (this is the additional tattoo, located on the blue channel). Each glowmap contains a single design on each channel, compared to an atlas, which consists of multiple designs per image arranged in a grid pattern. This means that to change the design added via glowmap, you'll only need to replace the texture.
¶ Editing the Head Glowmap
‼️ The head glowmap is only available within KAVT.
‼️Note: We have used Photoshop to edit the Glowmap; the process will be very similar when working with Gimp instead, but what you see within your image editing software will likely be a little bit different from the screenshots we've provided.
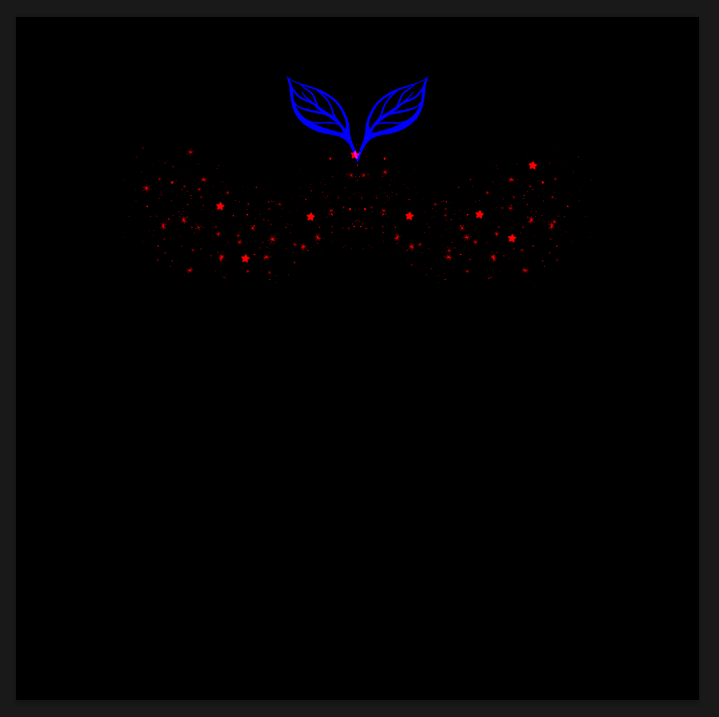
When opening our example glowmap working file from the glowmap resource mentioned earlier in this section, you’ll find the following layer setup with a number of image layers inside of folders:

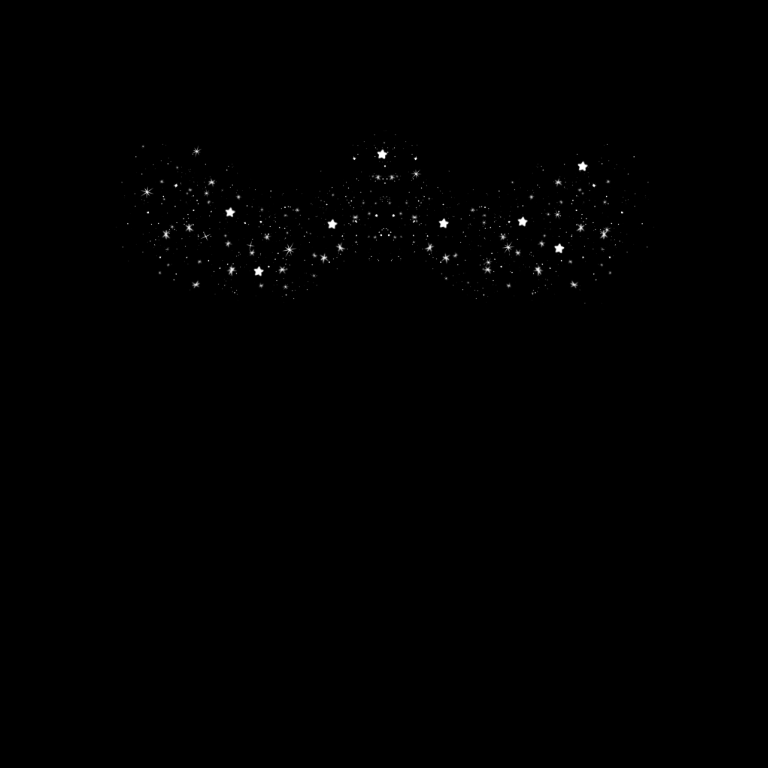
Whereas the glowmap included within these resources itself will look like this:
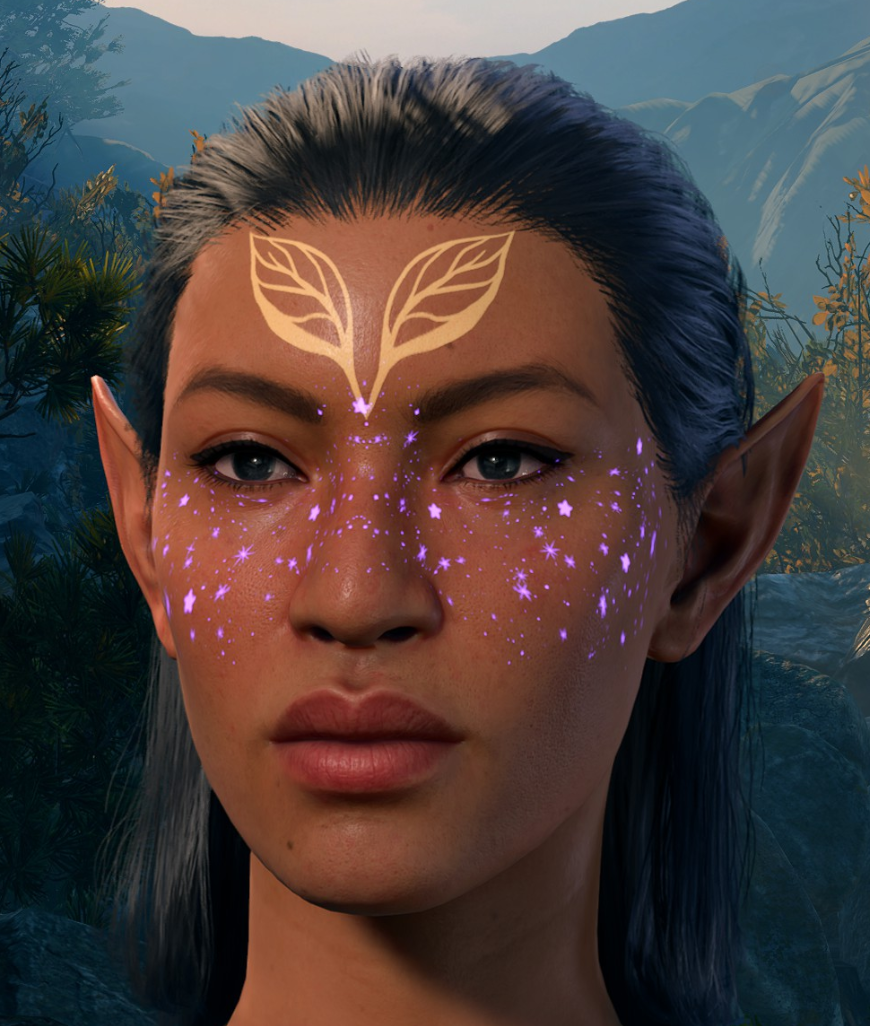
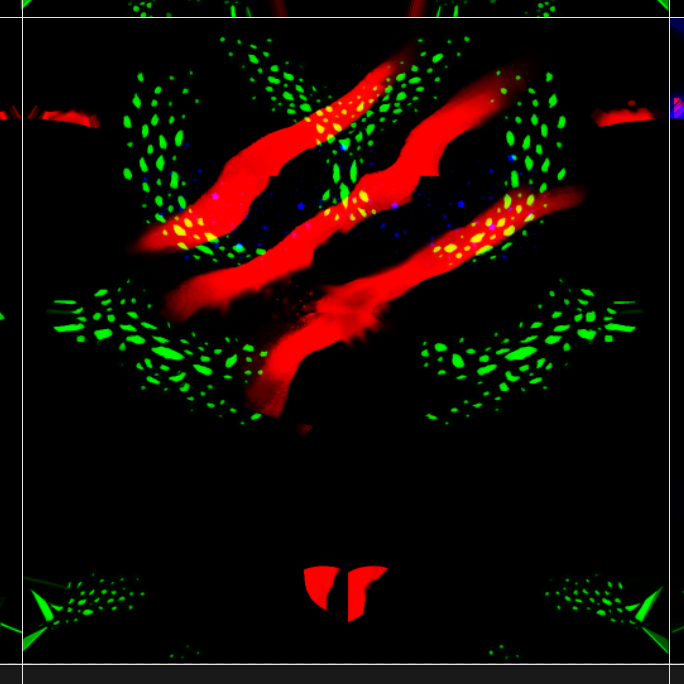
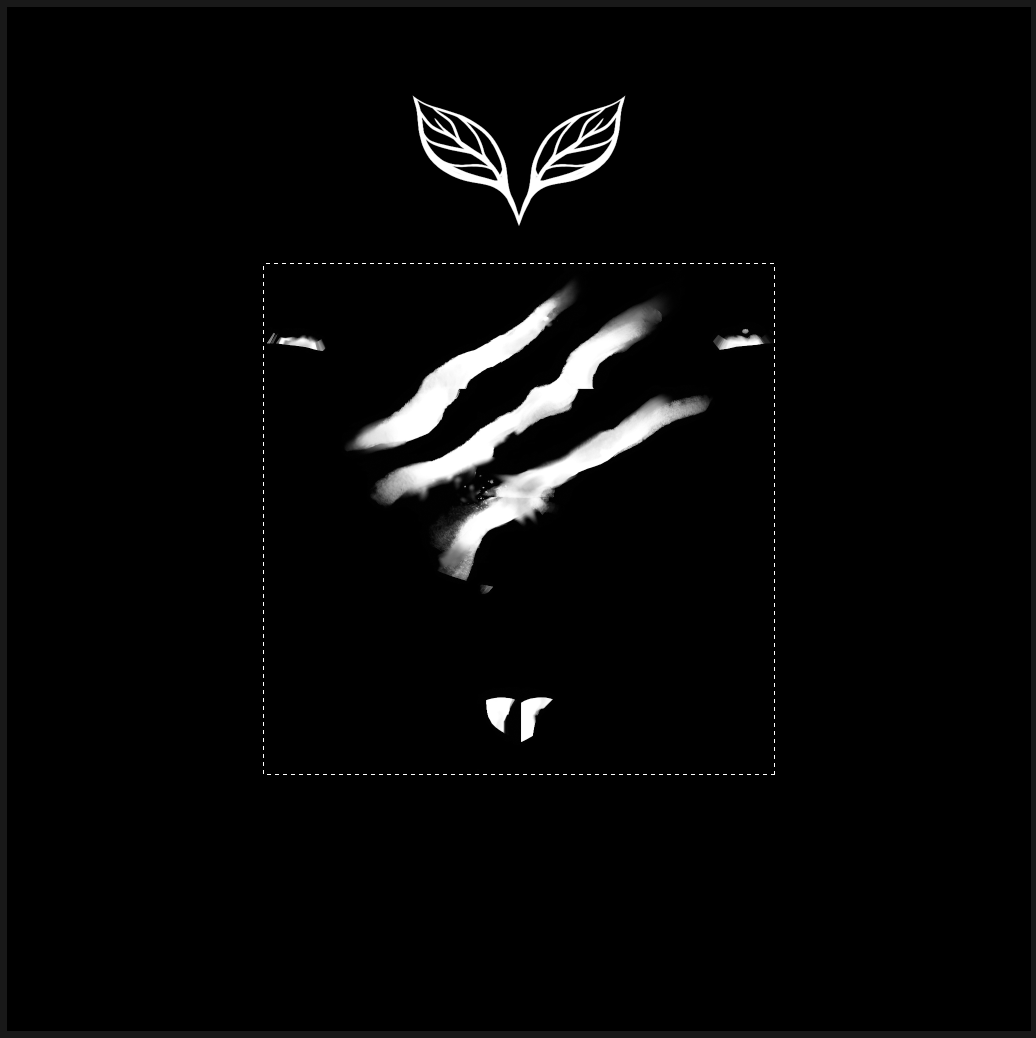
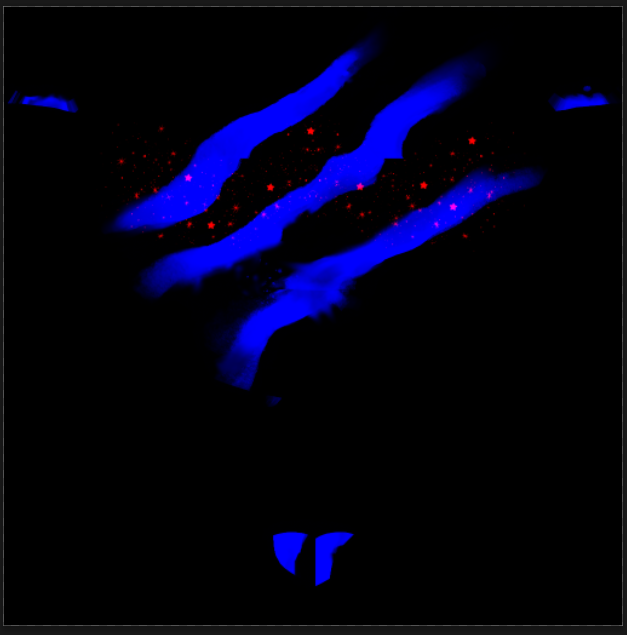
As you can see by the colors, it contains glowing freckles on the Red (Glow) channel, and a forehead Tattoo on the Blue (Additional Tattoo) channel.
In-game, this example Glowmap will look like this:
The merged glowmap file doesn't contain folders and individual layers as the working file does; instead, you'll only see a singular layer containing both designs on different channels. The image you see when opening the file will be the same as the second image in this section, showing both designs on the glowmap in red or blue respectively.
To customize the glowmap, you can choose one of two options depending on how you would like to customize the glowmap. This process will be the same for both the glow tattoo (red channel) and the additional tattoo (blue channel), with the only difference being the channel you ultimately paste your design onto.
¶ Using an existing Vanilla or modded Tattoo/Makeup Design
This option is the easier of the two, as it doesn't require you to create your own design from scratch. If you'd like to do so instead, the appropriate section further down will cover that process.
‼️If you're using a modder's tattoo or makeup design not initially created for use with the KAVT glowmap, it is best practice to ask for permission before editing their work. Check out the permission tab on the mod page, and if permission to edit their files isn't provided there, we highly recommend asking the creator - especially if you're somebody who likes to share screenshots of their Tavs on social media or in discord servers!
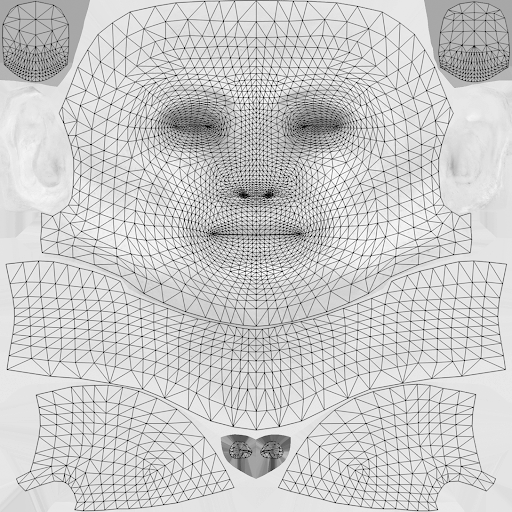
For this example, we'll be using a design included in the extended KAVT tattoo atlas. You will need the atlas that contains the tattoo or makeup design you'd like to use as a glowing or additional tattoo via the KAVT glowmap, and the KAVT glowmap merged file contained in the resource we mentioned earlier in this section. You won't need to use the working file unless you want to make edits to the design you've chosen (please ask for permission first!).
Open both the atlas you'd like to select a tattoo or makeup design from and the merged glowmap file. The atlas we're using looks like this when opened and only contains one layer:
The merged glowmap file looks like this and only contains the one layer:
Once both files are open, we can proceed with copying the design of your choice from the atlas that contains it. Before doing this, we'd recommend enabling Guides (the dividing lines shown in the atlas image above) as they make it much easier to see where each design starts and ends. In Photoshop, you can do this by navigating to View > Guides > New Guide Layout. The window that opens looks as follows, with the settings shown being appropriate for an atlas that is KAVT-sized (4 tiles wide, 8 tiles tall):
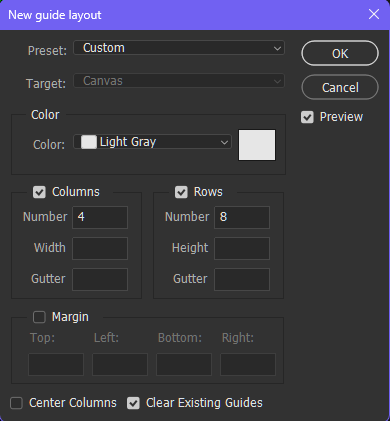
If the atlas you're taking your design from is a different size, you can adjust the size accordingly by increasing or decreasing the width (in tiles, called Columns) and height (in tiles, called Rows).
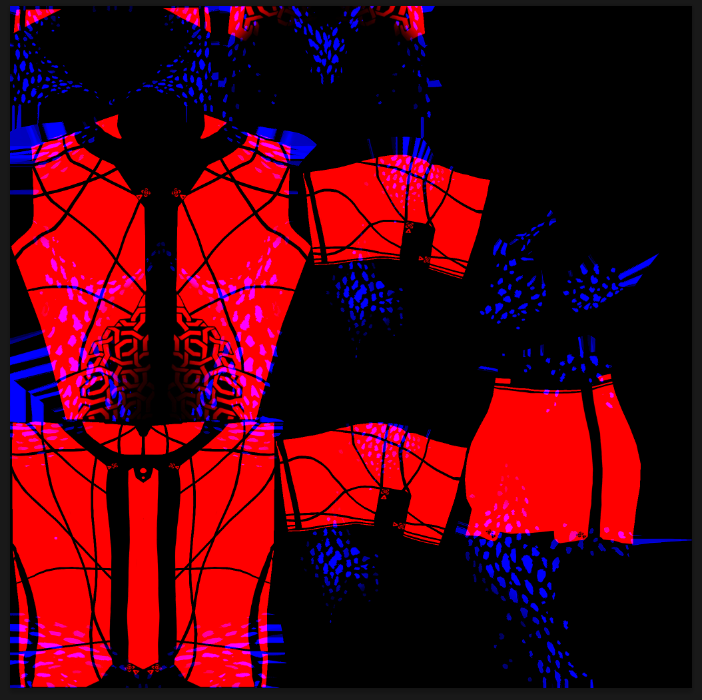
Next, we'll find our design. For our example, we'll be using one of the goblin facepaint tattoo options included in the KAVT tattoo atlas. As you can see from the color of the design within its tile, this tattoo is contained within the Red channel of this atlas; if the design is blue or green, it occupies the respective channel instead.
Open the Channels tab to the right of the Layers tab towards the bottom right of your window.
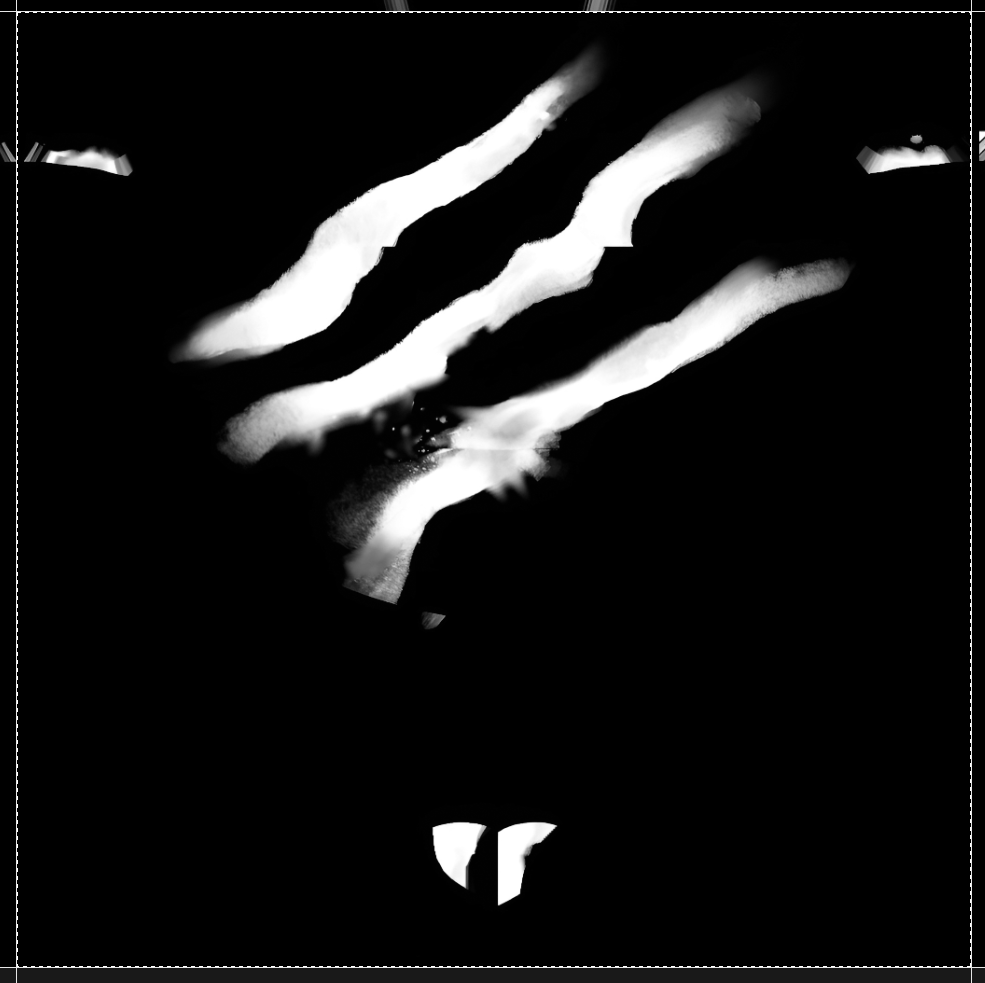
Select the channel your design of choice is located in, then swap back to the Layers tab. Your atlas should now only show the designs located on the appropriate channel, which in our case is the red channel. They will appear in white:
Now, we can select our design's tile. To do this, select the selection/marquee tool from the tool bar. We recommend zooming into the design until it occupies the majority of your screen, as that makes selecting it in its entirety easier. Using the selection/marquee tool, select only the tile of the design you've chosen; if you enabled Guides, this will be clearly marked and your selection tool will “snap” to the Guides you've set, making selecting only your design of choice easier. Once you have selected the design, copy it either via hotkey (ctrl+c), or by navigating to Edit > Copy.
With our design of choice copied, you can now swap back to the glowmap merged file. Open the channels tab, and click the channel you'd like to use for this design. The red channel is used for the glowing tattoo, and the blue channel is used for the additional tattoo; we'll be using the blue channel for this example. Your image will change, once again only showing the channel you've chosen. Paste your design into the channel you've chosen, then select the RGB channel to view the full glowmap.
⚠️ Potential Issue: When pasting your design, you may find that the design you've chosen doesn't fit the glowmap and only occupies part of the image. This may look like this:
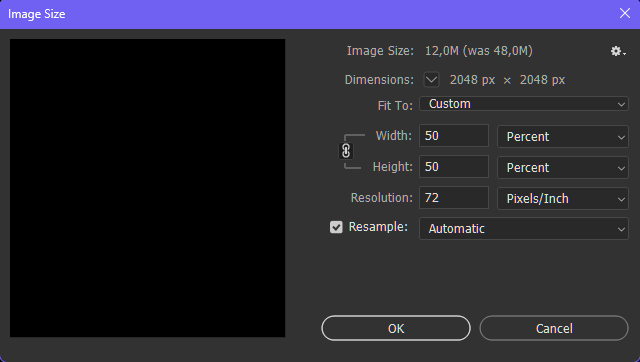
If this happens, undo the paste either via hotkey (ctrl+z) or by navigating to Edit > Undo. You will need to resize your glowmap to match the size of your design. You can do so to navigating to Image > Image Size. In our example case, the design we've chosen is only half the size of the glowmap, meaning we'll need to reduce the size of the glowmap by 50%:
Once you've appropriately re-sized your glowmap, you can repeat the pasting step. The result may look like this:
If you want to empty a channel because you don't want to use this option, you can do so by navigating to the channel you'd like to empty, selecting the canvas using the selection/marquee tool, and then hitting the delete key. You will be prompted to choose a fill color; choose black for an empty glowmap channel.
Now that your glowmap is customized, you can export it. The export settings and further information can be found a little further down in this section.
¶ Drawing your own Design
If you'd like to draw your own design, we'd recommend using the working file instead, as within this file, each channel is separated into it's own folder. This means that you can more easily create additional layers to work with. Please note that drawing your own design is definitely more advanced than using existing tattoo or makeup designs from the vanilla game or other creators' mods due to the placement requirements of the designs. We'd recommend using the head UV template for tattoo and makeup designs included in this resource by neonbutchery to make sure things line up correctly. It looks like this:
You'll want to draw your design in white on a black background. On the glowmap, anything not fully black will appear as part of your design. You can use this to your advantage and create designs with varying levels of opacity by working not only in true white, but also in shades of grey, but it is also important to consider this to avoid accidental spots appearing within your design!
👏 Tip: If you struggle with the high contrast of a white design on a solid black background, we'd recommend working in colors that are more comfortable to look at for you instead. As long as you make sure your design is white and your background is black once you're done creating your custom design, everything will work as intended.
Once you've finished your design, you can open the merged glowmap file included in the resource. This file only contains the one layer.
Click on this layer, then click the Channels tab shown on the right side of the Layers tab on the screenshot above. This tab will look like this when opened:

Click on the channel corresponding to which “slot” you'd like this design to use; choose the red channel if you'd like the tattoo to glow and pulse, or the blue channel if you'd like the design to appear as a non-glowing tattoo. Then, first swap back to the Layers tab within this file, and then swap back over to the working file, where your drawn design currently resides. Make sure the design you've created is merged down, meaning it only occupies one layer that contains both the black background and the white design.
Now, select the entire image using the selection/marquee tool, then copy it either via hotkey (ctrl+c) or by navigating to Edit > Copy. Then, swap back to the merged file we previously opened.
‼️Note: If you have more experience with image editing software, you may be tempted to simply select your layer and hit ctrl+c. We don't recommend doing it this way, because the individual channels will at times not accept the copied image if it has been copied this way. We explicitly recommend selecting the entire canvas and copying it that way.
Within the merged file, simply paste the design you've copied into the file. As we previously selected the channel we'd like it to occupy, the design should automatically paste into this channel. If not, re-select the channel as mentioned earlier, and try pasting your design again. You can double-check whether your design made it to the correct channel by opening the Channels tab once again, and clicking the RGB channel - this will make all channels within the vile visible. Your design should now appear in red or blue, depending on which channel you chose for your design.
Now that your glowmap is customized, you can export it.
¶ Exporting your Glowmap
Once you have customized your glowmap using (or not using) the information provided above, you can export it to use alongside KAVT or KAVT NVP.
For this example, we'll be using Photoshop and the Intel DDS plugin. Your settings may look a little different if you're using the NVIDIA DDS plugin for photoshop instead, or are using another image editing software like Gimp.
⚠️ It is incredibly important for your glowmap to use the correct name as detailed below. It is equally as important for your glowmap to be saved as .DDS, and not .dds.
The game will not read your glowmap if it doesn't follow the naming convention we've provided exactly or .DDS is not capitalized.
Navigate to either File > Save As or File > Save a Copy. We personally use Save as Copy to be able to continue working in the .psd file if adjustments needs to be made and to avoid accidentally not saving this progress, as Save As will make the .DDS file you are exporting in this step the file that's open (instead of the .psd we initially opened to work in).
You can save your file either in a location of your choosing and manually move it to the appropriate folder within your game files, or save it directly within your game files. We recommend the latter, as it removes an additional step.
The path for the glowmap file is as follows:
Head: …\Baldurs Gate 3\Data\Generated\Public\Shared\Assets\unique_tav\FACE\GLOWY\KVT_Head_Glowmap.DDS
‼️Note: If these paths don't exist within your game files, please create the appropriate folders yourself.
When saving a file as .DDS, you'll be provided a window of settings when saving your file. These are the settings you'll want to use for the glowmap:
‼️Note: Your settings window may appear a little bit differently depending on which Photoshop .DDS plugin you use, or alternatively, if you're not using Photoshop but another image editor instead. Regardless, the compression type of BC3 (which may also be referred to as DXT5) is the most important part of this window. Please also make sure to save your file without Mip Maps, as this may make your designs appear blurry.
¶ KAVT & KAVT NVP Body Customization
⚠️ This section is relevant to you whether you're using KAVT or KAVT NVP. It only covers body tattoos - for body texture editing, check the appropriate section based on which version of the mod you're using.
KAVT includes a number of new options for body customization. This section details how they work, where you can find them, what they don't do, and how you can edit them.
¶ What Body Customization Options are there?
When using KAVT, you will have access to the following options for body customization that are added via the KAVT head glowmap:
- Glowing Body Tattoo, not selectable in CC
- Additional Body Tattoo, not selectable in CC
You will also have access to the following, not via glowmap:
- Primary Body Tattoo, not selectable in CC
As this image shows, this allows for a total of three tattoo designs, each with their own color, to be used simultaneously. None of these options can be customized in CC. Two of these options are customizable via glowmap, and one of these options is customizable via body tattoo atlas (as you may already be familiar with from Unique Tav).
¶ The Glowmap Options
⚠️ The glowing body tattoo and additional body tattoo added via glowmap cannot be chosen or changed in CC. This includes the magic mirror and Appearance Edit.
Their design depends entirely on the glowmap, and their colors, opacity, metalness and other features can be set within the customization patch.
By utilizing the glowmap added by KAVT, you can access two additional body tattoo “slots”. These options are not available in CC.
By default, the body glowmap included in KAVT is blank. That means that unless you choose to utilize and customize the glowmap, your Tav won't have a glowing tattoo or an additional tattoo on their body.
¶ How does the Glowmap work?
If you've previously used Kaz Virtual Tav, you may already be familiar with the concept of the glowmap. To briefly summarize, a glowmap is a type of texture that traditionally adds glow in some capacity - in the context of KVT, the glowmap allows you to add a glowing tattoo to your Tav. For KAVT and KAVT NVP, we've made some adjustments to the glowmap to make additional features possible, utilizing the additional two, previously empty channels of the texture to allow for an additional tattoo, and opacity.
The name glowmap was kept the same despite these additions, as the name had to remain this way internally to ensure compatibility with content that previously utilized the glowmap functionality of KVT. While it technically no longer is solely a glowmap, it is still called a glowmap in this context to avoid confusion and mismatch between internal names and what users see. :)
As you can see, the glowmap appears similarly to the tattoo and makeup atlases - one design appears in red (this is the glowing tattoo, located on the red channel), and one design appears in blue (this is the additional tattoo, located on the blue channel). Each glowmap contains a single design on each channel, compared to an atlas, which consists of multiple designs per image arranged in a grid pattern. This means that to change the design added via glowmap, you'll only need to replace the texture.
¶ The Body Glowmap
‼️ The body glowmap is available within both KAVT and KAVT NVP.
‼️Note: We have used Photoshop to edit the Glowmap; the process will be very similar when working with Gimp instead, but what you see within your image editing software will likely be a little bit different from the screenshots we've provided.
When opening our example glowmap working file from the glowmap resource mentioned earlier in this section, you’ll find the following layer setup with a number of image layers inside of folders:
Whereas the glowmap included within these resources itself will look like this:
As you can see by the colors, it contains a glowing tattoo on the Red (Glow) channel, and gith body spots on the Blue (Additional Tattoo) channel.
In-game, this example Glowmap will look like this:
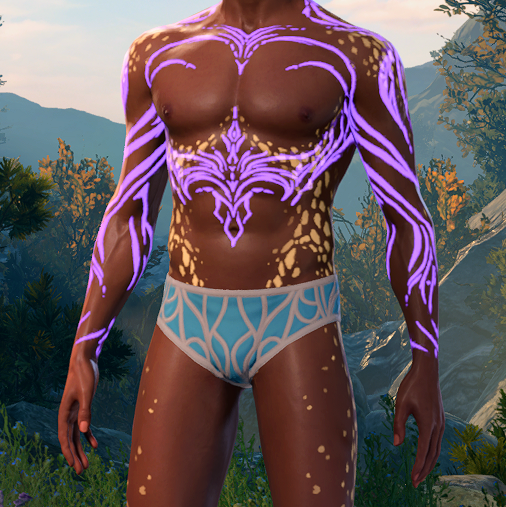
The body tattoos used for these examples were created by Jerinski, who kindly allowed us to use his work for example content.
The merged glowmap file doesn't contain folders and individual layers as the working file does; instead, you'll only see a singular layer containing both designs on different channels. The image you see when opening the file will be the same as the second image in this section, showing both designs on the glowmap in red or blue respectively.
To customize the glowmap, you can choose one of two options depending on how you would like to customize the glowmap. This process will be the same for both the glow tattoo (red channel) and the additional tattoo (blue channel), with the only difference being the channel you ultimately paste your design onto.
¶ Using an existing Vanilla or modded Tattoo/Makeup Design
This option is the easier of the two, as it doesn't require you to create your own design from scratch. If you'd like to do so instead, the appropriate section further down will cover that process.
‼️ If you're using a modder's tattoo design not initially created for use with the KAVT glowmap, it is best practice to ask for permission before editing their work. Check out the permission tab on the mod page, and if permission to edit their files isn't provided there, we highly recommend asking the creator - especially if you're somebody who likes to share screenshots of their Tavs on social media or in discord servers!
For this example, we'll be using a design created by Jerinski. You will need the atlas that contains the tattoo design you'd like to use as a glowing or additional tattoo via the KAVT glowmap, and the KAVT glowmap merged file contained in the resource we mentioned earlier in this section. You won't need to use the working file unless you want to make edits to the design you've chosen (please ask for permission first!).
Open both the atlas you'd like to select a tattoo design from and the merged glowmap file. The atlas we're using looks like this when opened and only contains one layer (and only one design - but others may contain more):

The merged glowmap file looks like this and only contains the one layer:
Once both files are open, we can proceed with copying the design of your choice from the atlas that contains it. Before doing this, we'd recommend enabling Guides (the dividing lines shown in the atlas image above) as they make it much easier to see where each design starts and ends. In Photoshop, you can do this by navigating to View > Guides > New Guide Layout. The window that opens looks as follows, with the settings shown being appropriate for the body tattoo atlas (4 tiles wide, 5 tiles tall):
If the atlas you're taking your design from is a different size, you can adjust the size accordingly by increasing or decreasing the width (in tiles, called Columns) and height (in tiles, called Rows).
Next, we'll find our design. For our example, we'll be using the only design in this tattoo atlas. As you can see from the color of the design within its tile, this tattoo is contained within the Red channel of this atlas; if the design is blue or green, it occupies the respective channel instead.
Open the Channels tab to the right of the Layers tab towards the bottom right of your window.
Select the channel your design of choice is located in, then swap back to the Layers tab. Your atlas should now only show the designs located on the appropriate channel, which in our case is the red channel. They will appear in white:

Now, we can select our design's tile. To do this, select the selection/marquee tool from the tool bar. We recommend zooming into the design until it occupies the majority of your screen, as that makes selecting it in its entirety easier. Using the selection/marquee tool, select only the tile of the design you've chosen; if you enabled Guides, this will be clearly marked and your selection tool will “snap” to the Guides you've set, making selecting only your design of choice easier. Once you have selected the design, copy it either via hotkey (ctrl+c), or by navigating to Edit > Copy.
With our design of choice copied, you can now swap back to the glowmap merged file. Open the channels tab, and click the channel you'd like to use for this design. The red channel is used for the glowing tattoo, and the blue channel is used for the additional tattoo; we'll be using the blue channel for this example. Your image will change, once again only showing the channel you've chosen. Paste your design into the channel you've chosen, then select the RGB channel to view the full glowmap.
⚠️ Potential Issue: When pasting your design, you may find that the design you've chosen doesn't fit the glowmap and only occupies part of the image. This may look like this:
If this happens, undo the paste either via hotkey (ctrl+z) or by navigating to Edit > Undo. You will need to resize your glowmap to match the size of your design. You can do so to navigating to Image > Image Size. In our example case, the design we've chosen is only half the size of the glowmap, meaning we'll need to reduce the size of the glowmap by 50%:
Once you've appropriately re-sized your glowmap, you can repeat the pasting step. The result may look like this:
If you want to empty a channel because you don't want to use this option, you can do so by navigating to the channel you'd like to empty, selecting the canvas using the selection/marquee tool, and then hitting the delete key. You will be prompted to choose a fill color; choose black for an empty glowmap channel.
Now that your glowmap is customized, you can export it. The export settings and further information can be found a little further down in this section.
¶ Drawing your own Design
While it is possible to draw body tattoo designs much the same way you can draw facial tattoo and makeup designs, we're not going to go in-depth on how to do so in this guide. This is because this is generally considered much more complex than creating facial tattoos and makeup designs, and most commonly done in Blender or Substance Paint. We feel going in-depth on how to do this is a little past the needs of this guide. Sorry!
¶ Exporting your Glowmap
Once you have customized your glowmap using (or not using) the information provided above, you can export it to use alongside KAVT or KAVT NVP.
For this example, we'll be using Photoshop and the Intel DDS plugin. Your settings may look a little different if you're using the NVIDIA DDS plugin for photoshop instead, or are using another image editing software like Gimp.
⚠️ It is incredibly important for your glowmap to use the correct name as detailed below. It is equally as important for your glowmap to be saved as .DDS, and not .dds.
The game will not read your glowmap if it doesn't follow the naming convention we've provided exactly or .DDS is not capitalized.
Navigate to either File > Save As or File > Save a Copy. We personally use Save as Copy to be able to continue working in the .psd file if adjustments needs to be made and to avoid accidentally not saving this progress, as Save As will make the .DDS file you are exporting in this step the file that's open (instead of the .psd we initially opened to work in).
You can save your file either in a location of your choosing and manually move it to the appropriate folder within your game files, or save it directly within your game files. We recommend the latter, as it removes an additional step.
The paths for the glowmap files are as follows:
Body: …\Baldurs Gate 3\Data\Generated\Public\Shared\Assets\unique_tav\BODY\GLOWY\KVT_Body_Glowmap.DDS
Genitals: …\Baldurs Gate 3\Data\Generated\Public\Shared\Assets\unique_tav\FACE\GLOWY\KVT_Genital_Glowmap.DDS
‼️Note: If these paths don't exist within your game files, please create the appropriate folders yourself.
When saving a file as .DDS, you'll be provided a window of settings when saving your file. These are the settings you'll want to use for the glowmap:
‼️Note: Your settings window may appear a little bit differently depending on which Photoshop .DDS plugin you use, or alternatively, if you're not using Photoshop but another image editor instead. Regardless, the compression type of BC3 (which may also be referred to as DXT5) is the most important part of this window. Please also make sure to save your file without Mip Maps, as this may make your designs appear blurry.
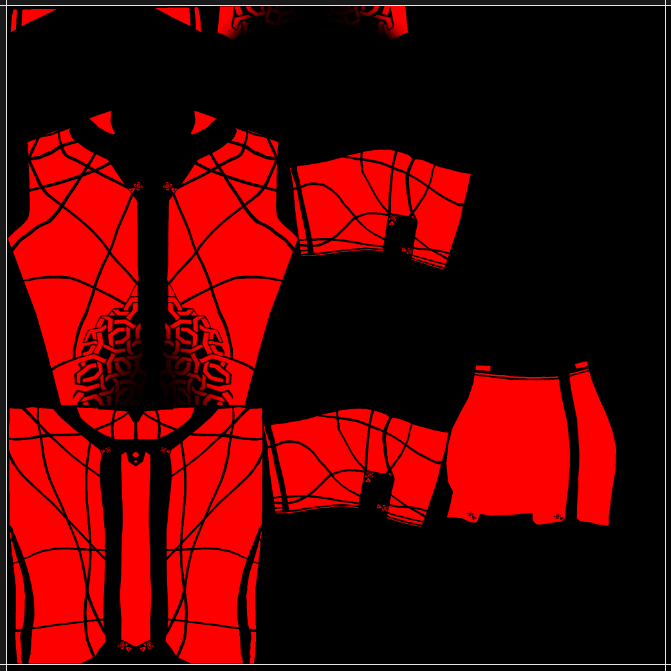
¶ The Body Tattoo Atlas Option
In addition to the two body tattoos possible via KAVT glowmap, you can also use a third body tattoo design via the body tattoo atlas. You may already be familiar with this way to add body tattoos if you're used Unique Tav in the past.
‼️If you've previously used a body tattoo with Unique Tav and simply want to continue using it, you don't need to edit your files, re-name them, or move them. They will continue to work!
¶ How does the Body Tattoo Atlas work?
Much like the atlases used for heads' tattoos, makeup, and scars, the body tattoo atlas is a collection of body tattoo designs arranged in a grid pattern. In vanilla BG3, this body tattoo atlas is not accessible to Tav and is only used by NPCs. Because of that, we cannot edit body tattoos added via this atlas in CC - Not even with Unique Tav or KAVT.
UI editing to add things to CC is incredibly difficult - so we are not using this atlas as a “true” atlas; any body tattoo design we use will be located within the first tile of the atlas, at the top left of the image, and in practice, swapping tattoos will be much the same as the process of swapping tattoos is like when using the KAVT body glowmap tattoos.
¶ Using a Body Tattoo Atlas Tattoo
The most likely scenario when using a body tattoo this way is that you'll be using a pre-existing body tattoo design made by another modder, hence we will be limiting our instructions to using these mods alongside KAVT.
Body Tattoo Mod - Folder Type
If the body tattoo mod you've chosen includes a folder named Generated within its .zip or .rar file, all you'll need to do to install this mod is to drop this folder at the following path:
…\SteamLibrary\steamapps\common\Baldurs Gate 3\Data\
If you're asked whether you'd like to overwrite files and/or folders, select “Yes”. This is everything required to install this type of body tattoo mod.
Body Tattoo Mod - File Only Type
Occasionally, you may come across a body tattoo mod that does not include a folder named Generated within its .zip or .rar file, and instead consists of only .DDS file(s). In this case, installing the mod requires a few extra steps.
You'll want to place your tattoo atlas .DDS file at the following path: …\SteamLibrary\steamapps\common\Baldurs Gate 3\Data\Generated\Public\Shared\Assets\unique_tav\BODY\TATTOO\.
If this path does not already exist for you (e.g. if you've not used Unique Tav before KAVT, or haven't customized your body tattoo before), you'll want to create these folders yourself. Once they're in place, drop the .DDS file in this folder.
Additionally, if the file is not named “Skin_Atlas_Body_UNI_Tattoo_A_MSK.DDS”, you'll want to rename the file.
¶ KAVT Body Customization
⚠️ This section is only relevant if you're using KAVT. It only covers body texture edits - if you're interested in body tattoo customization, check out the section above.
This section covers replacing body textures when using KAVT. If you're using KAVT NVP, check out the appropriate section further down instead, as there are distinct differences in how to edit body textures between these two versions.
We will not be covering how to edit the textures themselves. Texture editing itself is a complex process that is much better covered by guides dedicated to this topic rather than this manual on how to use KAVT. Sorry!
¶ Turning Traditional Body Textures into Virtual Textures
The primary difference in how KAVT handles body textures is their format. If you're interested in how virtual textures work specifically, check out the virtual textures section of this wiki page.
⚠️ You will only need to convert body textures if you are using body texture edits. This is not required to edit tattoo, makeup or scar atlases, the glowmaps, or the body tattoo atlas.
You also will not need to do this if you'd like to use KAVT as it is. This is only necessary if you want to use custom body textures.
As KAVT requires you to convert standard body textures to virtual textures, if you’d like to use custom body textures not already compatible, we’ve included this guide to simplify the process as much as possible.
Requirements
- Norbyte’s LSLib
- The KAVT Virtual Texture Workspace available in the files tab on the mod page
- Your body textures of choice, including CLEA, NM, and HMVY
Please note that you’ll need to use LSLib to pack Virtual Textures. You cannot do so with the Modder’s Multitool.
List of Virtual Texture File Names
These are the names of the texture files. You’ll need to match these names when adding your textures to this folder. These textures follow the following naming convention, with content not in brackets being consistent between all races and body types:
UNIQUE_(RACE)_(M/F)_NKD_BODY_A_(TEXTURE TYPE).DDS
Githyanki / GTY
GTS: “Public/unique_tav/Assets/VirtualTextures/KazGTYF.gts”
GTP: “Public/unique_tav/Assets/VirtualTextures/KazGTYF.gtp”
GTS: “Public/unique_tav/Assets/VirtualTextures/KazGTYM.gts”
GTP: “Public/unique_tav/Assets/VirtualTextures/KazGTYM.gtp”
Tiefling / TIF
GTS: “Public/unique_tav/Assets/VirtualTextures/KazTIFF.gts”
GTS: “Public/unique_tav/Assets/VirtualTextures/KazTIFF.gtp”
GTS: “Public/unique_tav/Assets/VirtualTextures/KazTIFM.gts”
GTS: “Public/unique_tav/Assets/VirtualTextures/KazTIFM.gtp”
Normies (Elf, Half-Elf, Human) / NRM
GTS: “Public/unique_tav/Assets/VirtualTextures/KazNRMF.gts”
GTS: “Public/unique_tav/Assets/VirtualTextures/KazNRMF.gtp”
GTS: “Public/unique_tav/Assets/VirtualTextures/KazNRMM.gts”
GTS: “Public/unique_tav/Assets/VirtualTextures/KazNRMM.gtp”
Half-Orc / HRC
GTS: “Public/unique_tav/Assets/VirtualTextures/KazHRCM.gts”
GTS: “Public/unique_tav/Assets/VirtualTextures/KazHRCM.gtp”
GTS: “Public/unique_tav/Assets/VirtualTextures/KazHRCF.gts”
GTS: “Public/unique_tav/Assets/VirtualTextures/KazHRCF.gtp”
Halfling / HFL
GTS: “Public/unique_tav/Assets/VirtualTextures/KazHFLM.gts”
GTS: “Public/unique_tav/Assets/VirtualTextures/KazHFLM.gtp”
GTS: “Public/unique_tav/Assets/VirtualTextures/KazHFLF.gts”
GTS: “Public/unique_tav/Assets/VirtualTextures/KazHFLF.gtp”
Gnome / GNO
GTS: “Public/unique_tav/Assets/VirtualTextures/KazGNOM.gts”
GTS: “Public/unique_tav/Assets/VirtualTextures/KazGNOM.gtp”
GTS: “Public/unique_tav/Assets/VirtualTextures/KazGNOF.gts”
GTS: “Public/unique_tav/Assets/VirtualTextures/KazGNOF.gtp”
Dwarf / DWR
GTS: “Public/unique_tav/Assets/VirtualTextures/KazDWRM.gts”
GTS: “Public/unique_tav/Assets/VirtualTextures/KazDWRM.gtp”
GTS: “Public/unique_tav/Assets/VirtualTextures/KazDWRF.gts”
GTS: “Public/unique_tav/Assets/VirtualTextures/KazDWRF.gtp”
Step 1 - Acquiring LSLib
If you haven’t used LSLib before, acquire it from the link above. All you’ll need to do to set up this tool is download it from the link available above and unzip the files in the location of your choice.
Make sure you have .NET 8.0 installed, as it is required for this tool to function - You can find the download link on LSLib’s release page linked above.

Step 2 - KAVT Virtual Texture Workspace
Download the KAVT Virtual Texture Workspace from the optional files in the File tab on this Mod page. Using this workspace will make this process significantly easier as all configuration files required for packing Virtual Textures using LSLib have already been created for you.
Similarly to LSLib, you’ll want to unzip the folder inside this .zip wherever you’d like it to be - Ideally somewhere you’ll find it easily, as we will be using the files within throughout this process. There is no setup required for any of the configuration files within the workspace, they’ll function as is.
Step 3 - Inserting your Textures
Next, we’ll be adding our new Body Textures to the workspace. For this guide, I’ll be using the feminine Githyanki textures as an example - the process will be the same for every Race and Bodytype, only the exact names of the files used in the process will change according to which Race and Bodytype you’re looking to edit.
You’ll place your body textures within the following folder of the workspace: …\unique_tav\Conversion\Textures\(TEXTURES GO HERE). When you open this path, you’ll find it’s already filled with textures. These are the vanilla versions of all Body Textures, and whichever ones you’re not interested in changing can simply remain - we will not be touching them.

Take note of the naming convention of the textures in this folder. You’ll need to match these names when adding your textures to this folder. These textures follow the following naming convention, with content not in brackets being consistent between all races and body types:
UNIQUE_(RACE)_(M/F)_NKD_BODY_A_(TEXTURE TYPE).DDS
For the sake of our example, we will be adding our textures to this folder after re-naming them as follows:
UNIQUE_GTY_F_NKD_Body_A_CLEA.DDS
UNIQUE_GTY_F_NKD_Body_A_NM.DDS
UNIQUE_GTY_F_NKD_Body_A_HMVY.DDS
If you’re asked if you’d like to overwrite these files, select yes. Do not delete any of the other textures in this folder, even if you aren’t using them. Please keep in mind that for Virtual Textures, all three of these textures will need to use BC3/DXT5 compression. This is a distinct difference between Virtual Textures and Traditional ones, as for Traditional Textures, all three textures require different compression types.
Step 4 - Using LSLib
Now that our texture edits are in place, we’ll be packing our Virtual Textures using LSLib. Launch the tool and navigate to the “Virtual Textures” tab towards the top of the UI. You’ll be working within the “Build Tile Set” section of this tab.

Click the three dots on the right of the “Tile Set Configuration” line. In the window that opens, navigate to wherever you unzipped your KAVT Virtual Texture Workspace and further to unique_tav\Configs. Within this folder, select whichever Config file matches the Race and Body type combination your body textures are intended for. In our case, this is the Config file named “VTexConfigGTYF” - VTex Config Githyanki Female. Double click this file, which will add it’s path to the Tile Set Configuration field.
This is our configuration file. It dictates which textures will be packed into which .gtp/.gts file; the files that will store our Virtual Textures moving forward.

Next, click the three dots on the right of the “Mod Root Path” line. Navigate to where you’ve unzipped your KAVT Virtual Texture Workspace once again, and select the folder named “unique_tav” that contains “Configs”, “Conversions”, and “Public”. Once again, click open, or simply double-click the file.

Now, simply click “Build”. LSLib will now build your Virtual Texture tilesets. You’ll receive a small popup once the process has finished.
Step 5 - Loading your .gts and .gtp files
Now that we’ve successfully packed our Virtual Textures, we can add them to our game files. Similarly to how Body Texture overrides function for Unique Tav, KAVT’s Virtual Textures are loaded as loose file overrides.
First, we’ll grab our freshly generated set of Virtual Texture files from within our workspace. They’re located at …\unique_tav\Public\unique_tav\Assets\VirtualTextures\(TEXTURES ARE HERE). You’ll want to copy both the .gtp and the .gts for your corresponding Race and Body Type.

Next, navigate to your game’s Data folder - the easiest way to do so is via the BG3 Mod Manager’s shortcut, if you’re using it as your Mod Manager. Alternative, you can directly navigate to it; it’ll be located at …\Steam\steamapps\common\Baldurs Gate 3\Data.
Further navigate to …\Steam\steamapps\common\Baldurs Gate 3\Data\Public\unique_tav\Assets\VirtualTextures. Paste the .gts and .gtp files you copied from within your workspace into this folder. This is where your Virtual Texture overrides will be located.

This completes the process of editing your body textures.
¶ KAVT NVP Body Customization
⚠️ This section is only relevant if you're using KAVT NVP. It only covers body texture edits - if you're interested in body tattoo customization, check out the section above.
This section covers replacing body textures when using KAVT NVP. If you're using KAVT, check out the appropriate section further above instead, as there are distinct differences in how to edit body textures between these two versions.
We will not be covering how to edit the textures themselves. Texture editing itself is a complex process that is much better covered by guides dedicated to this topic rather than this manual on how to use KAVT. Sorry!
¶ Installing Unique Tav-compatible Body Texture Mods
When creating KAVT NVP, we kept the naming conventions and file pathing used by Unique Tav intact. This means that any body texture mod compatible with Unique Tav should also inherently be compatible with KAVT NVP.
Body Texture Mod - Folder Type
If the body texture mod you've chosen includes a folder named Generated within its .zip or .rar file, all you'll need to do to install this mod is to drop this folder at the following path:
…\SteamLibrary\steamapps\common\Baldurs Gate 3\Data\
If you're asked whether you'd like to overwrite files and/or folders, select “Yes”. This is everything required to install this type of texture tattoo mod.
Body Texture Mod - File Only Type
Occasionally, you may come across a body texturemod that does not include a folder named Generated within its .zip or .rar file, and instead consists of only .DDS file(s). In this case, installing the mod requires a few extra steps.
You'll want to place your tattoo atlas .DDS file at the following path: …\SteamLibrary\steamapps\common\Baldurs Gate 3\Data\Generated\Public\Shared\Assets\unique_tav\BODY\RACENAME\GENDER.
If this path does not already exist for you (e.g. if you've not used Unique Tav before KAVT, or haven't customized your body tattoo before), you'll want to create these folders yourself. Once they're in place, drop the .DDS file in this folder.
¶ Texture Editing
¶ BG3 Image Editing Basics
This section is meant to provide some baseline knowledge that might be useful to users who have never used an image editing software before. :) It is intended to cover the very basics required for BG3 edits to textures such as tattoo and makeup atlases.
¶ What Image Editing Software can I use to edit .DDS files?
There are a number of options, both free and paid, to edit .DDS files. Most of these options will require a separate (free) plugin to open .DDS files, so don't be surprised if you can't initially open them!
- Adobe Photoshop
- Paid Subscription
- DDS Plugin Options:
- GIMP
- Free
- GIMP DDS Plugin
- Paint.NET*
- Free
- DDS FileType Plugin
*Lacks some functionalities like channels but is useful for expansive DDS compression options
¶ What's the Deal with .DDS Compression Types?
.DDS is a compressed file format. That means it's a type of image that has been compressed in a way to make the file itself smaller; this is good for performance. You might be familiar with .jpeg, which is another compressed file format.
BG3 specifically is relatively sensitive when it comes to .DDS compression types - and there are many of them. But don't worry too much about them! Every guide providing details about how to edit common textures - such as makeup/tattoo or scar atlases, face textures, and body textures - will tell you exactly which compression you'll be using to save that specific texture. You can just ignore the remainder.
¶ Finding your Way Around the Software
Using Photoshop as an example, as that's what we're most familiar with, we'll give you a brief rundown of what you might be looking at when opening the software for the first time.
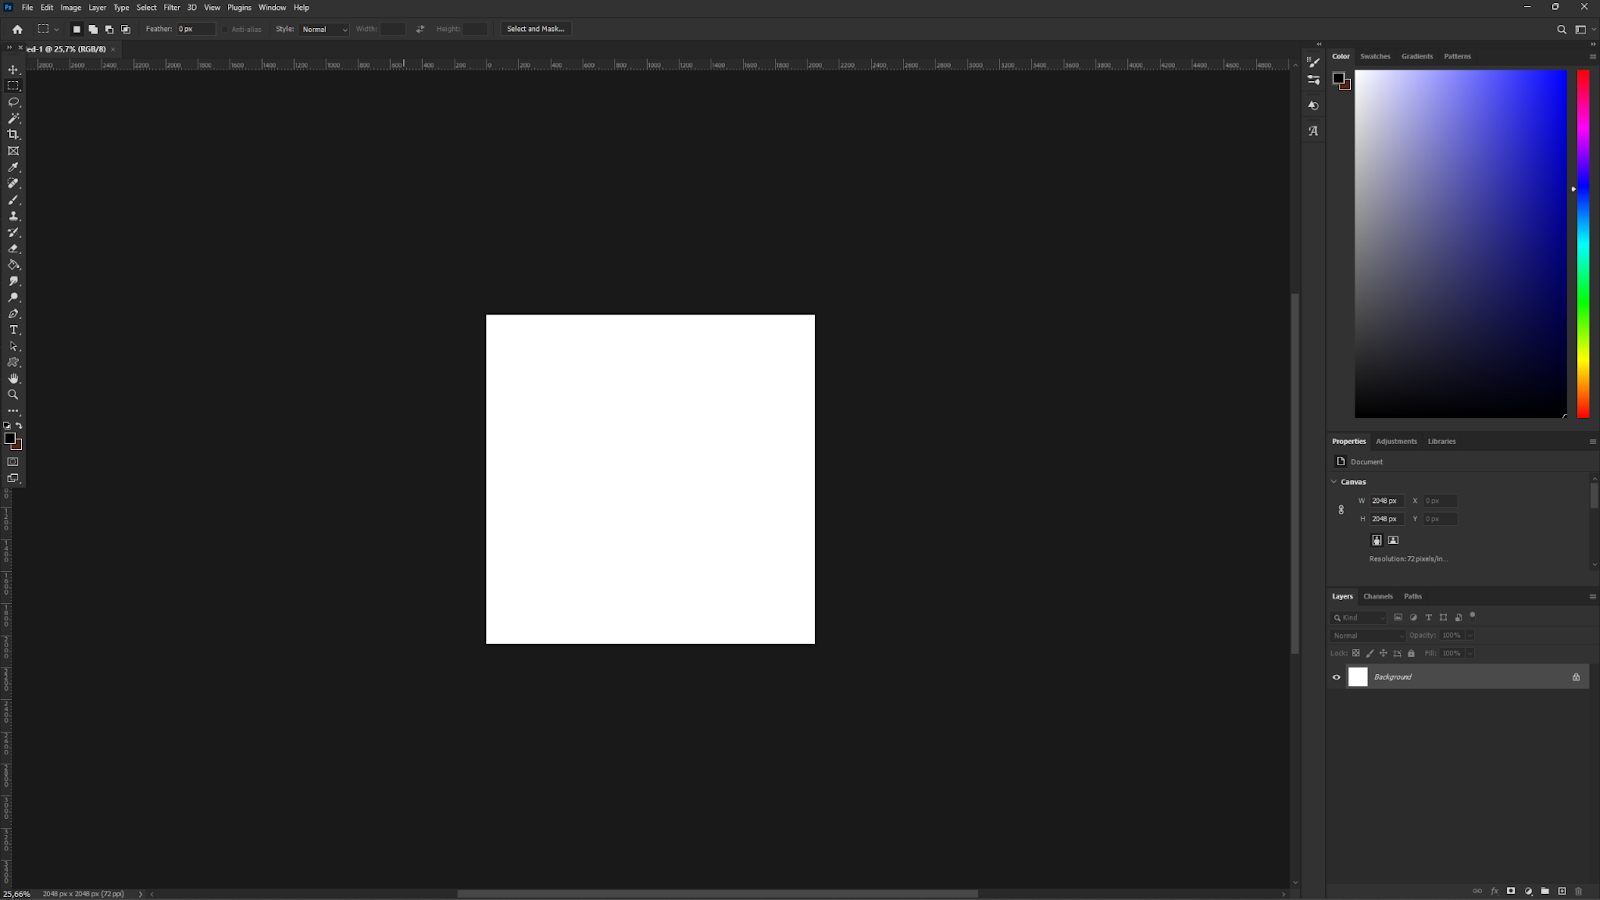
This might be what you're greeted with when you open your software of choice for the first time. Looking at it, things can be quite overwhelming - let's break it down a little bit.

Typically off to the side in some way, you might see something like this - a toolbar. This is essentially a list of tools you'll have access to when using your software. This includes things like brushes, a tool to select things, the eyedropper to select individual colors, an eraser, a text tool, and much more! You can hover them to find out what they are, or give things a quick try, but for basic editing of BG3 files, you'll primarily just be using the selection/marquee tool, and the move tool, both of which are usually located towards the very top of your toolbar. If there's something that you can't imagine a use for, you probably won't need it just yet!
You'll also be using this section a lot - the layers tab. You can think of a layer quite literally as individual layers of (transparent) paper stacked on top of each other - things on a layer will cover things in the same spot on layers below them. This allows you to, for example, draw a design without needing to do it all in one piece, which can make it easier to make changes down the line. In this same section, you'll also find the Channels tab, which is very commonly used with BG3 textures of any kind.
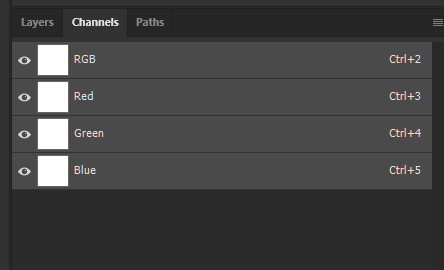
Channels contain color information - what this means in practice is that if you have a tattoo on the red channel of the atlas, it will appear as red when viewing the texture as a whole, but it is only contained on the red channel of the texture. In the case of something like BG3, each channel is read by the game individually; that's how an atlas can store three designs per tile, rather than just one. If you copy the image contained within a specific channel, it'll always be black and white. Channels can't contain colored images.
¶ Opening a File
The easiest way to open a file with your software of choice is to right click the file itself, select “Open with”, and then choose the software.
¶ Saving a File
If you've opened a file, for many files using the hotkey ctrl+s is enough to save the file. In the case of .DDS files, however, you'll need to select your compression options before being able to fully save. It's important to always follow the compression settings mentioned in whichever guide you're following when editing a texture, because BG3 is quite sensitive when it comes to compression types. In most cases, it'll also be important to ensure you capitalize .DDS (Windows defaults to .dds, which BG3 won't read in most cases).
We'd also always recommend keeping a .psd copy of the .DDS file you're editing instead of editing and saving the same .DDS file multiple times. This is because .DDS files are compressed every time they're saved, and doing so repeatedly will gradually degrade the quality of the file, making it appear “crunchy” and artifacted instead of nice and crisp. A .psd file isn't compressed and has intact layers and channels, which is important for files you're working on.
¶ I Need More Help
If you're struggling with editing BG3 files, please don't hesitate to reach out. :) I'd also recommend some of our community discords if you require help, such as the official Larian discord server, or the BG3 Modding Community discord server.
¶ Tattoo & Makeup Atlas Editing
This section will cover some basic information on how to edit tattoo and makeup atlases. This explicitly includes the face tattoo and makeup atlases for “normies” (non-dragonborn) and the dragonborn makeup atlas, but the same principle also applies to other atlases, such as, for example, the body tattoo atlas.
¶ Re-Sizing a Vanilla-Sized Atlas for Use with KAVT & KAVT NVP
If you would like to use custom tattoo and makeup atlases that are compatible with Unique Tav but not explicitly compatible with KAVT, you will need to make two types of changes to your atlases for them to work alongside KAVT or KAVT NVP.
‼️ Some creators have made KAVT compatible versions of their tattoo and makeup mods available.
If the modded options you use have been made compatible already, you can download those versions instead and won’t need to make any changes yourself.
Re-Sizing your Atlases
For this step, we recommend using the “Tattoo, Makeup and Scar Atlas” resource available under “Optional Files” in the file tab on KAVTs mod page.
To briefly explain why we recommend this - .DDS files are compressed, similarly to a .jpeg. Opening a .DDS file, making edits, and then saving it once more will degrade the quality of the image, similarly to how .jpeg files may appear “crunchy” - Lines will be less crisp and designs may become blurry or artifacted. The resource we’ve made available is in the form of a .psd file, which is not compressed. This will ensure things aren’t compressed multiple times, keeping your tattoos and makeup as crisp as possible.
The process is the same for both the tattoo and makeup atlas. You will need Photoshop or Gimp to do this. For this guide, we will be using the files “KAVT Tattoo Atlas - Merged” and/or “KAVT Makeup Atlas - Merged”. We will only cover adding your existing Unique Tav atlas to the bottom half of the larger KAVT atlas - if you want to modify where specific designs are located or assemble a fully custom atlas, we recommend checking out the more in-depth guide included in the Resources file that goes over working with the “Working File” instead. :)
When opening the file, you’ll see the larger tattoo or makeup atlas on the screen. You will also want to open the atlas you have used alongside Unique Tav at the same time.
Inside your Unique Tav atlas file, open the “Channels” tab. Within Photoshop, this tab is located next to the “Layers” tab - this’ll be similar with other image editing software.
Select the “Red” channel from the list. The appearance of your image will change, and only the red tattoos will be visible. Select the entirety of your canvas using the selection tool, and copy it (ctrl+c, or navigating to Edit > Copy in the top bar).
Now, swap over to your KAVT atlas.
Similarly, navigate to the “Channels” tab and select the red channel. Paste (ctrl+v, or navigating to Edit > Paste in the top bar) the “Red” channel you just copied from your Unique Tav atlas into the “Red” channel of your KAVT atlas. Re-position it by dragging it downwards until it covers the bottom half of the atlas.
Now, you’ll repeat this same process for the “Green” and “Blue” channels of your atlases. Once you’ve done this for all three channels, you’ve successfully added your Unique Tav atlas to the bottom half of the KAVT atlas.
Next, we will save our atlas. Navigate to File > Save As, then choose the location for your file. You can either save it directly to the correct location, or save it to a different location and then copy it over to the correct path:
YOURGAMEFOLDER\Generated\Public\Shared\Assets\unique_tav\FACE
You will want to choose the following names for your atlases:
Tattoo: KVT_Head_Atlas_Tattoo.DDS
Makeup: KVT_Head_Atlas_Makeup.DDS
Dragonborn Makeup: KVT_Head_Atlas_Makeup_Dragonborn.DDS
Capitalization and spelling are important here! Your game will not read these files correctly if there are spelling mistakes, capitalization differences, or the file is placed at the wrong location.
These are the export settings we will use to save our atlases:
Please note your menu might look slightly differently if you use the NVIDIA dds plugin for Photoshop instead of the Intel one, or you are using another image editor to make these changes.
Now, your atlas has been re-sized and re-named and will work with KAVT.
Why do we need to re-size the atlas?
The changes allowing for the larger atlas to work are made within the shader we edit within KAVT. Inside the shader, we have told the game to look for an atlas that is 4 tiles wide and 8 tiles tall - the game will always treat the atlas as if it is that size, even if the atlas you’ve added is only 4 tiles tall.
This image illustrates what issues that might cause:
As you can see, the left atlas contains one tattoo neatly within each tile. The atlas on the right, however, is cut up into more sections than there actually are tattoos, resulting in each tattoo getting cut in half. In-game, this results in misplaced and awkwardly cut tattoos. This is why you’ll want to re-size your atlas. :)
¶ Re-Arranging or “Frankensteining” an Atlas - GIMP
⚠️ We always recommend asking authors before editing their assets directly. Please check the mod page of the mods you'd like to combine before doing so, and/or ask the authors for permission.
If you're determined to have the most suitable customization options available to you in CC, you may want to edit tattoo or makeup atlases to only include options you're interested in using. In cases like this, "frankensteining" atlases - taking bits of multiple tattoo or makeup mods and assembling your own custom atlas from these options - is a popular option used by many. It is good practice to ask the authors before doing this, so please check in about using other's assets before starting.
💜 Credit: This section was very kindly written by satanfish from the Faerûn Fashionistas Discord server! It was written with GIMP in mind and was explicitly written from a user's perspective, so it is very in-depth and detailed. The tattoo atlas used as an example in this section was created by CovenElf; you can find it here.
¶ Getting Started
Open the KAVT tattoo or makeup working file. In this example, I will use the tattoos. Then, open the tattoo atlas that has tattoos you want to add to KAVT. You should now have two tabs open:
⚠️Note: I made a mistake while doing this guide, so I already have the extra tab open that you will be creating for this next step.
On the tattoo atlas you want to add to KAVT, click “Colors” on the top bar. Most of the way down, you will see an option for “Components”. Mouse over that, then select “Decompose” so that the atlas will break up into it’s individual red, green, and blue atlas channels (this is really important!)
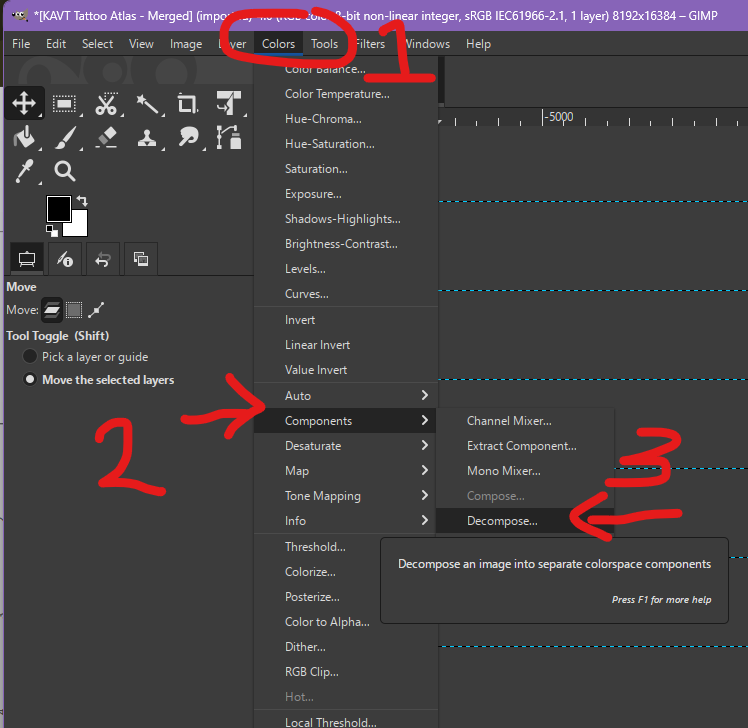
You will get a popup box asking a bunch of stuff, and basically you want it to look like this when you hit okay:
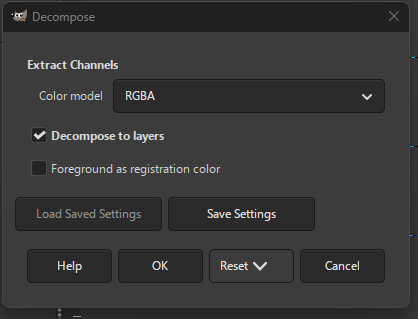
When you hit “OK”, it will load for a minute, and then it will look like this:
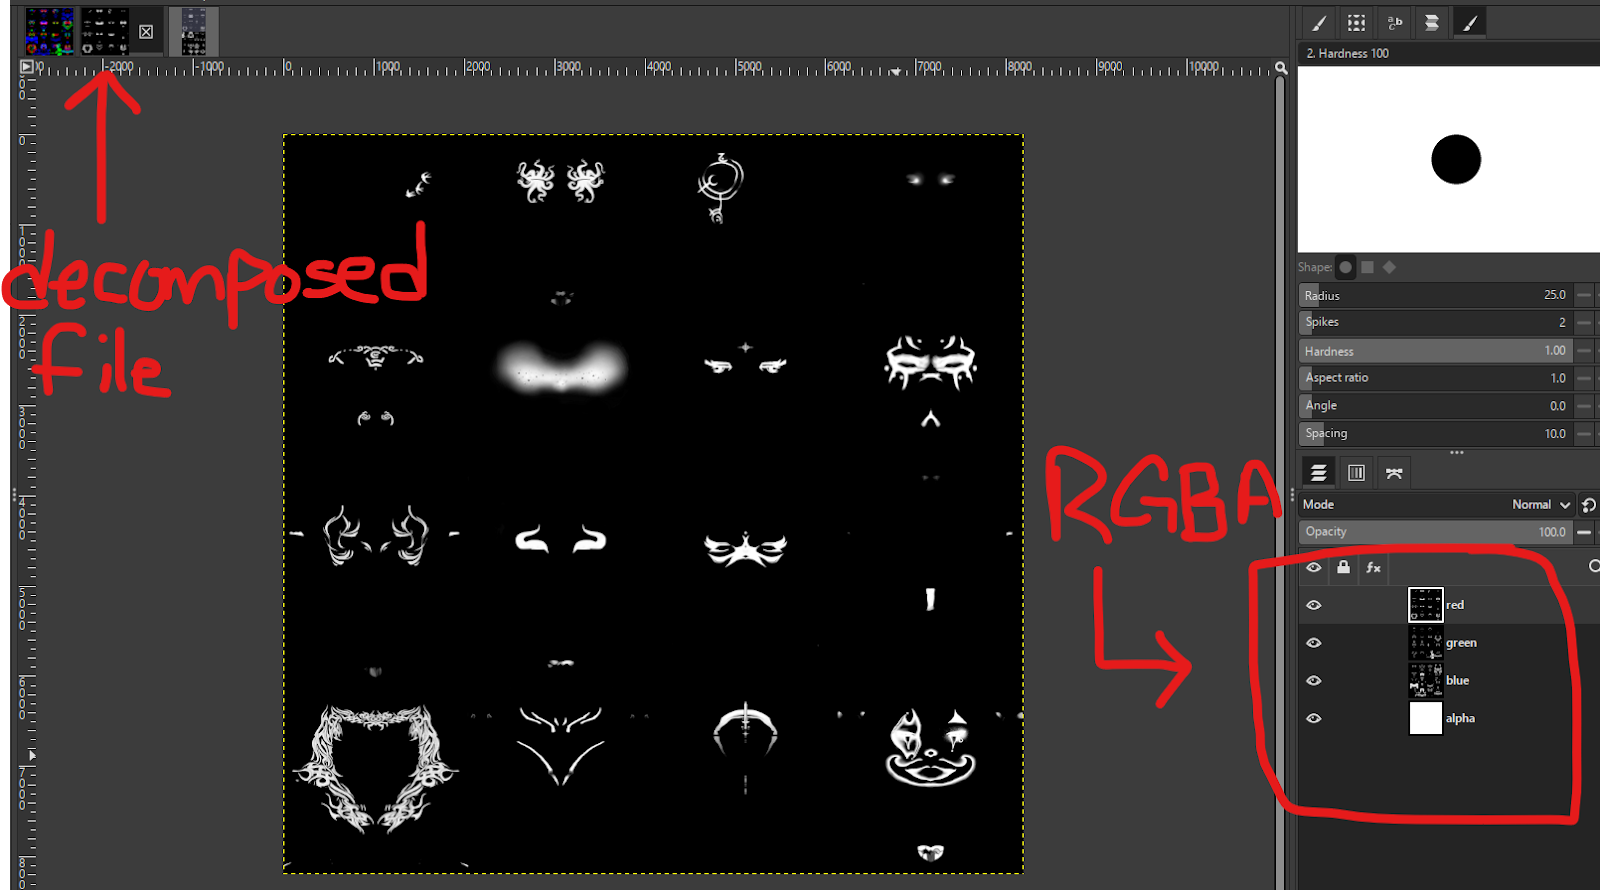
Take note of the RGBA channels that I have in the box here. We’re going to use those in a minute.
You will need to keep track of which atlas is which, so I usually keep both the original coloured copies open to refer to. You can also refer to the very top of the menu to see what the name of the current tab you’re in is.
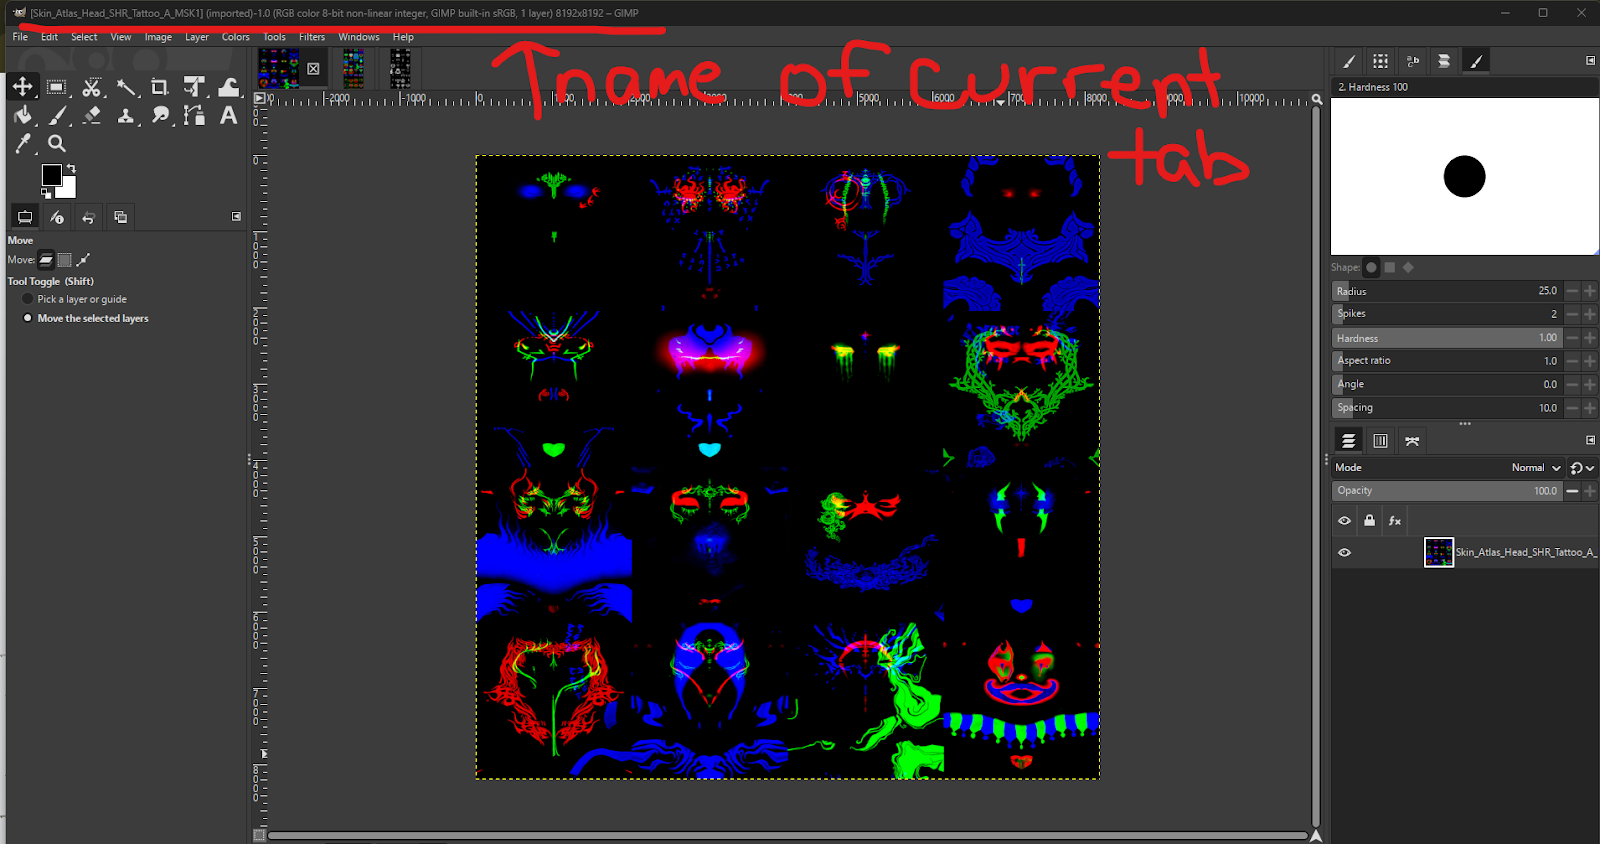
From here, I am positive there is a more efficient way, but this is the way that works for me, so this is the way I use.
First, decide which channel you want to work on. Tattoo atlases use three channels: red, green, and blue. Makeup uses the red channel. For this guide’s purposes, we will start with the red channel and work our way through.
On the KAVT atlas, select the eye icon next to the green, blue, and alpha channels. The red channel should be the only one with an eye icon:
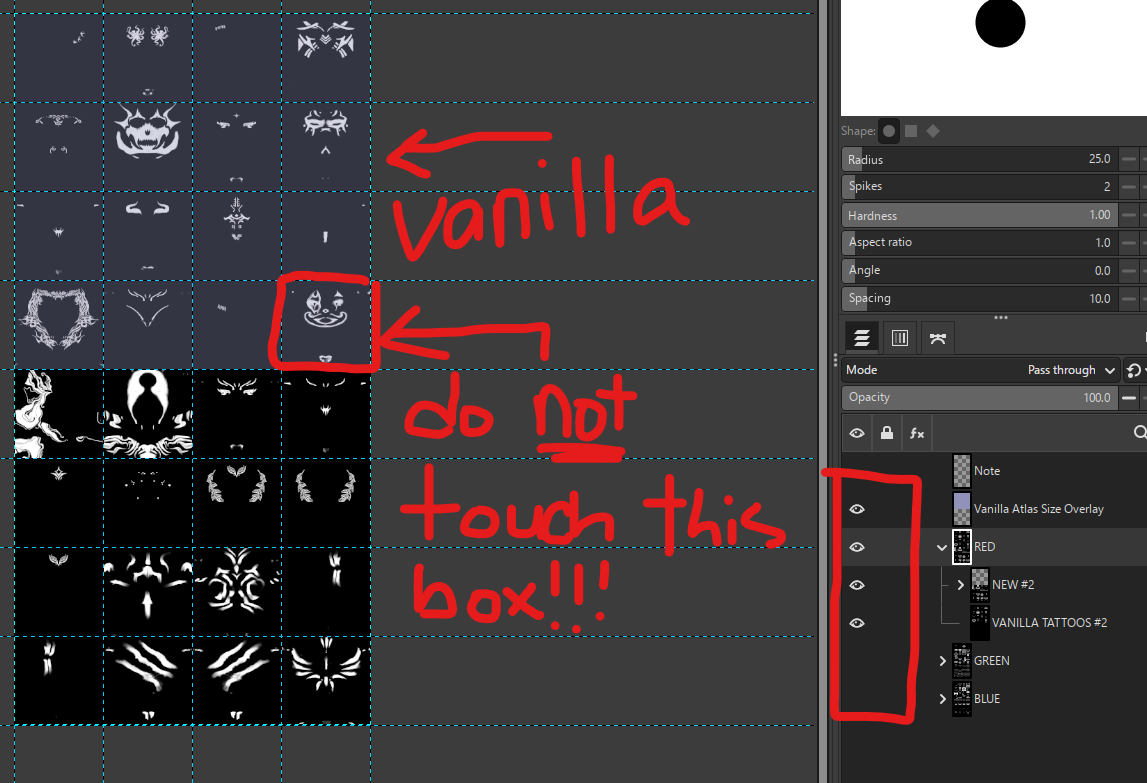
I expanded the Red channel here because we’re going to have to decide if we want to work with the vanilla tattoos (replacers) or the added tattoos. If you want to replace some of the vanilla tattoos, click on the eye icon beside “NEW #2” so that the added tattoos are hidden. I like to keep the overlay so I know where the vanilla tattoos are on the atlas.
Do not touch the clown make-up or tattoo box. Any other vanilla tattoo can be replaced, but NOT the clown.
Next, go to the decomposed atlas that you want to add to KAVT and do the exact same thing - click the eye icon for every channel that is not “red”.
On the atlas that you want to add to KAVT, click on “Edit” at the top, then click on “Copy Visible”:
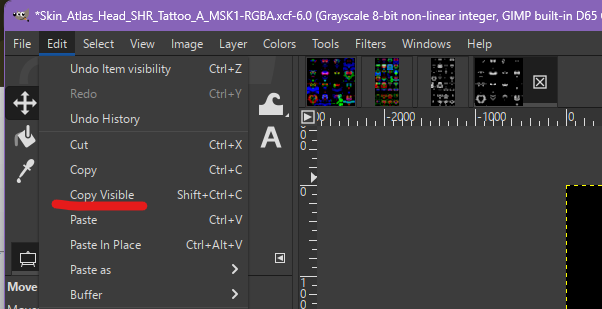
After this point, I realized my mistake, so the tabs at the top will be correct going forward!
Back to KAVT’s atlas now! We are going to edit the vanilla tattoos, so hide “NEW #2” by clicking on the eye icon, and then select “VANILLA TATTOOS #2” by clicking on it so it has a white outline around it:
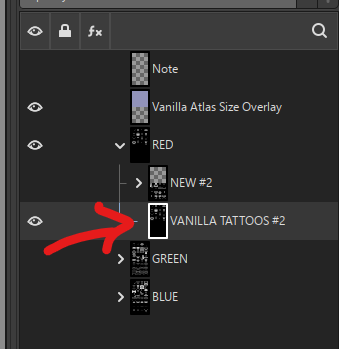
Once you have done that, click on “Edit,” then hover over “Paste as” and select “Paste as floating data into selection:
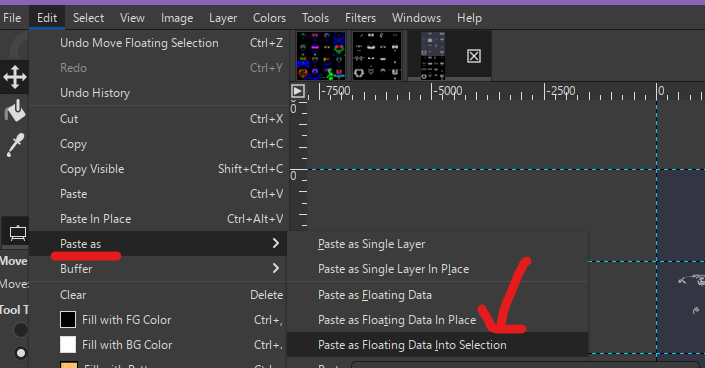
When you paste it in, it will plop the red channel from the atlas you want to add as a floating layer, usually somewhere in the middle of the atlas. Wherever it drops, you now want to move it by clicking and dragging it down. I strongly encourage zooming into a corner basically as far in as you can so that you can see the blue and white outlines. You want to make sure the two are overlapping or your added tattoos won’t be positioned correctly on the face in the game.
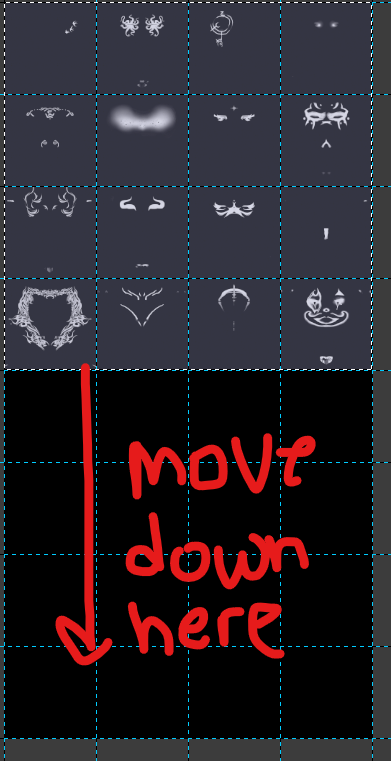

👏 Tip: while moving the atlas, you can use the arrow keys to position it. So, in the above screenshot that says “bad”, I can move it over using my left arrow key until the blue and white lines overlap.
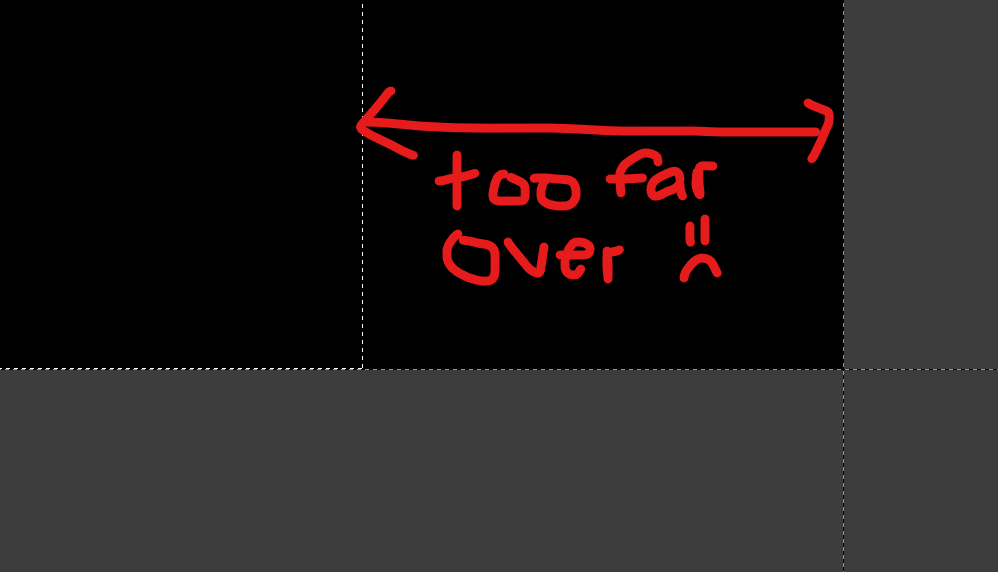
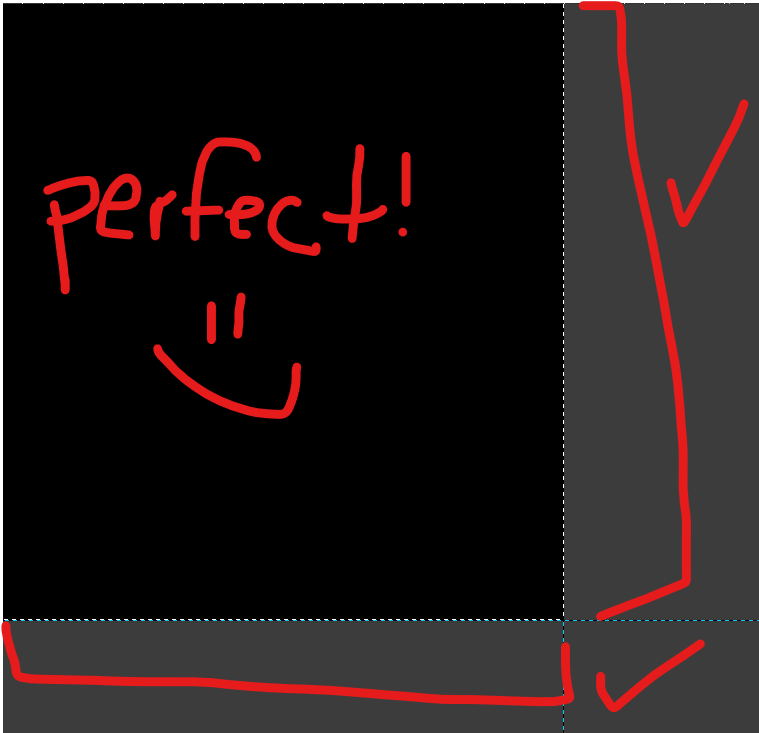
After you have finished positioning it, it should look like this:
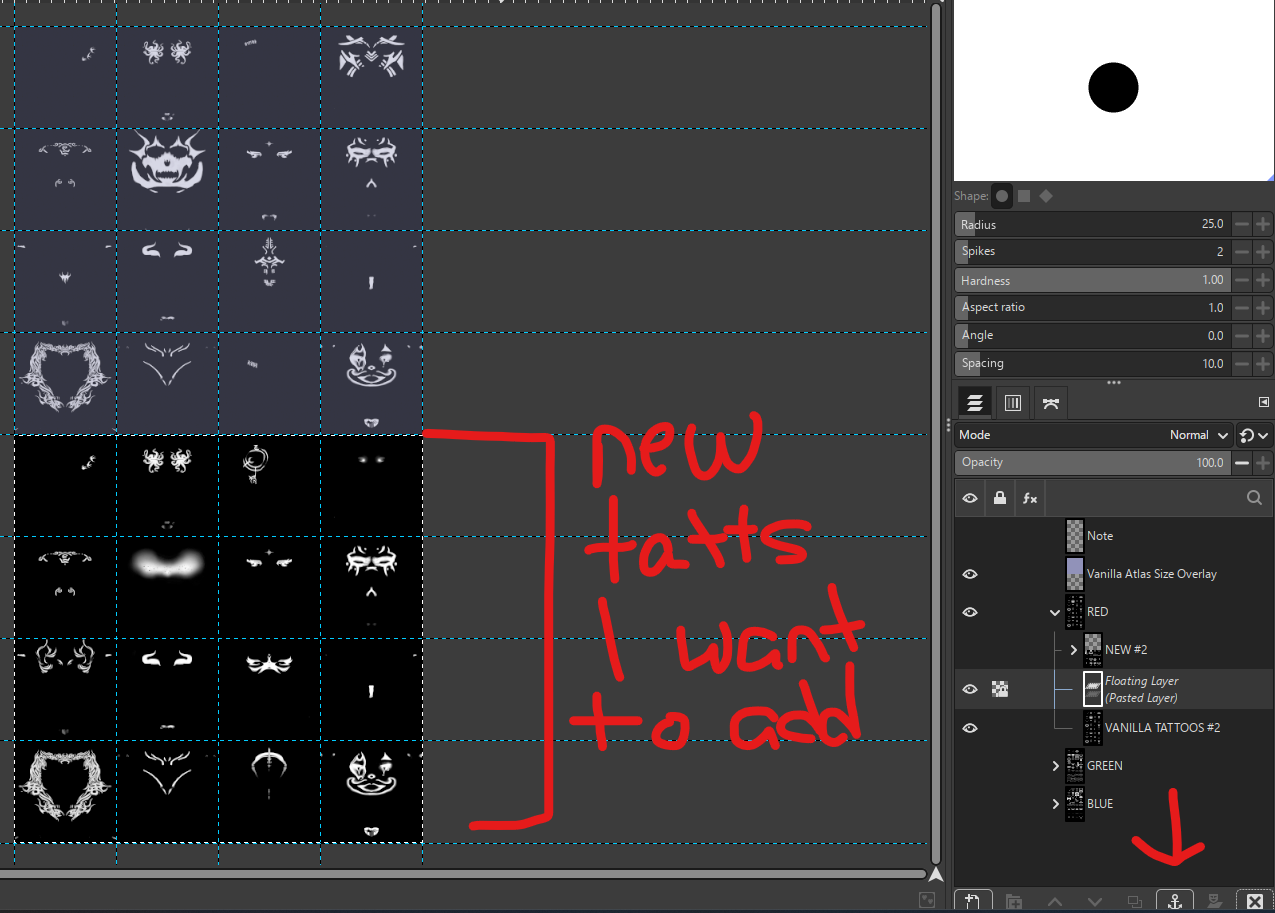
On the bottom right, where you see the arrow in the above screenshot, click the anchor icon. This will cause the “Floating Layer” we pasted and moved to merge with “Vanilla Tattoos #2” (as Vanilla Tattoos #2” is underneath it, which is why we wanted to make sure it was selected before pasting - the floating layer pastes above whichever layer had the white outline!).
Now for the actual editing part!
On the left hand side of the screen that has a bunch of GIMP’s different tools, select the rectangle button (“Rectangle Select Tool”):
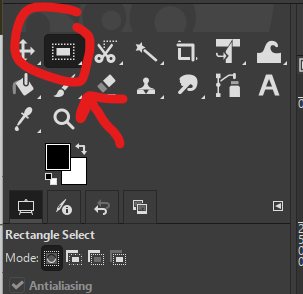
Click in the corner of the box of one of the tattoos you want to move into the vanilla tattoos and drag your cursor to the opposite corner (i.e. I clicked on the top left corner and dragged down to the bottom right). The select box will snap to the blue lines, so you don’t need to worry as much about being precise like when you moved the atlas.
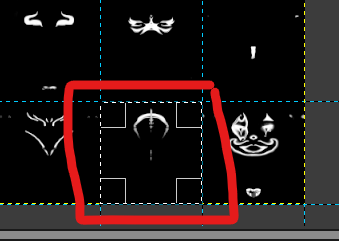
Click on “Edit” at the top, then click on “Cut”:
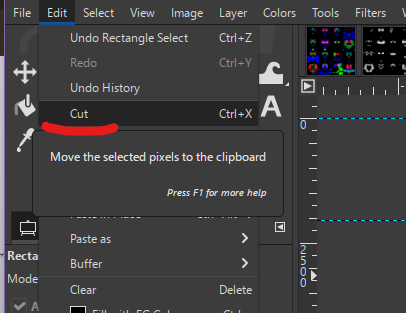
Click on Edit again and select “Paste as” and then “Paste as floating data into selection”:
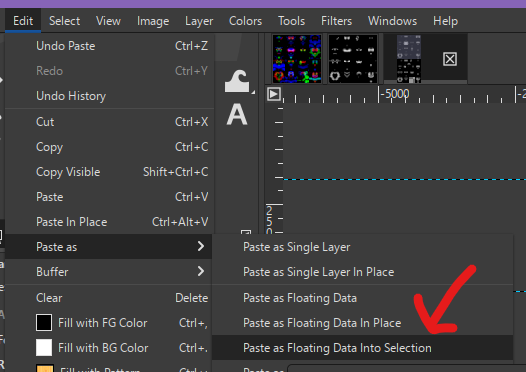
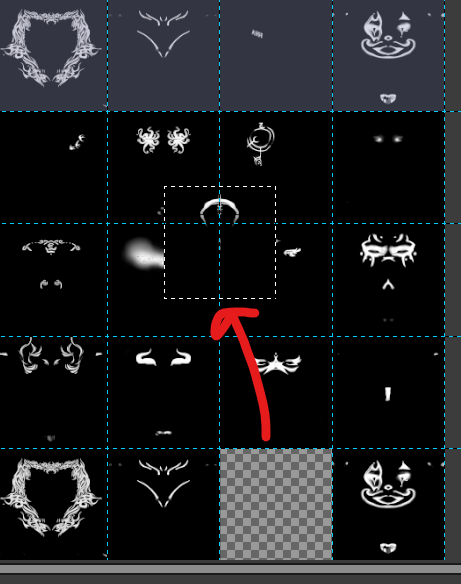
Once again, we are going to move it, except now we want to drag it over whichever vanilla tattoo you want to replace. Again, do NOT touch the clown. Anything else can be replaced, but not the clown.
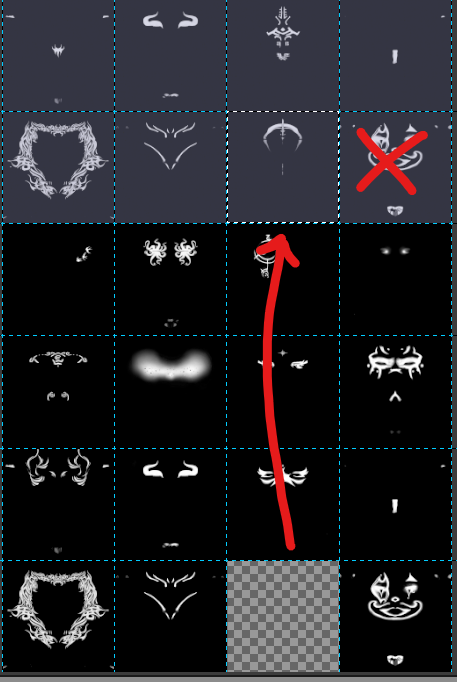
Once again, it will snap itself into place, so you do not need to zoom in to get it super precise. Once you are satisfied with where you have placed it, click on the little anchor symbol again, and this will paste it into the vanilla atlas.
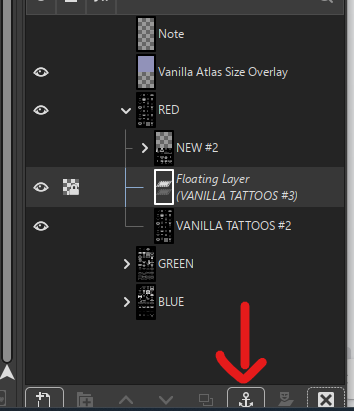
Keep doing this for every tattoo that you want to replace vanilla tattoos with. If you want to use more than one CC atlas to replace the vanilla tattoos, you would basically follow these exact same steps. I personally found it easier to work with one atlas at a time, and then once I was done with the first atlas, grabbed the second one I wanted some tattoos from and repeated these steps.
Once you are satisfied with your red channel, we are going to hide it and move on to the next channel (Green):
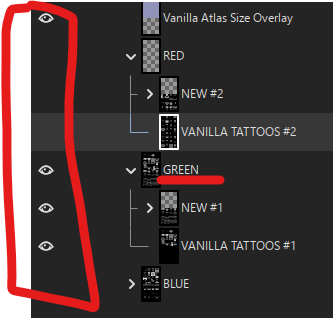
As you can see, I still have the red channel’s VANILLA TATTOOS #2 channel selected, so I will need to make sure to click on whichever green channel I want to edit (NEW #1 or VANILLA TATTOOS #1).
Go back to the atlas that you are adding to KAVT and hide the red channel, and unhide the green channel (all by clicking on the little eye icon/where the eye icon should be). Follow the exact same steps as above to add tattoos to the KAVT’s green channel. Same thing with the blue channel - hide everything but blue, copy as visible, paste as floating selection, move into place, anchor, cut, paste as floating, move into place, anchor. :)
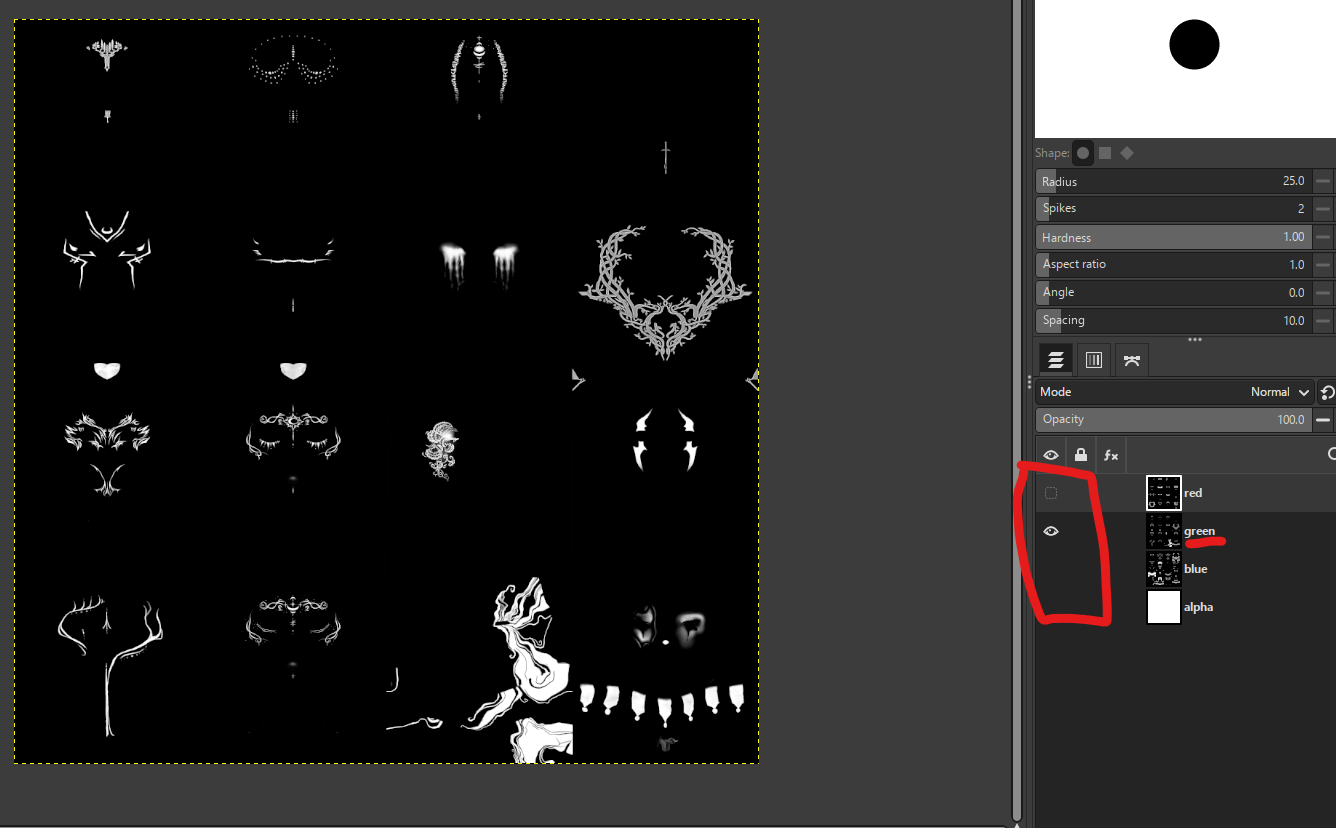
You can technically mix and match atlases, too! For example, if there are a lot of green channel tattoos you don’t like on KAVT, you can add tattoos from the red or blue channels from the second atlas as well (so, for example, if I wanted CovenElf’s first tattoo in the green channel to be on the red channel instead, I can still do that). I just found it easier for myself to keep like-with-like, and then, once I was done, I would mix-and-match if I had more tattoos I wanted to replace.
Once you have all the tattoos you want to include on the KAVT atlas, open the KAVT - Merged atlas. Once it opens, click on “Colors” -> “Components” -> “Decompose” and this will break it down into its RGBA channels. When you get the popup, make sure it looks the same as the screenshot earlier in this guide, then click “ok”.
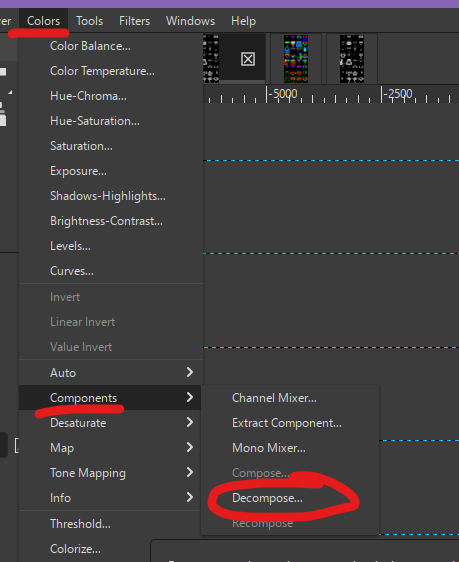
From here, we are going to work on each layer individually. On the decomposed KAVT merged file, hide everything but the red channel by clicking the eye icon. Make sure “Red” has the white outline – if it doesn’t, make sure you click on it after hiding everything:
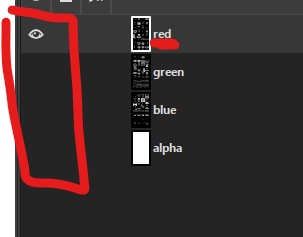
Next, go to the KAVT working atlas that you were just adding various tattoos to. Hide everything except the red channel:
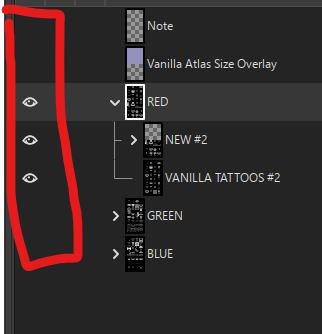
Again, make sure “RED” has the white outline!
Next, click on “Edit” and “Copy Visible”. Go back to the decomposed KAVT merged file (the black & white one), click “Edit”, hover over “Paste as” and select “Paste as floating layer into selection”. You should not need to reposition it, but, if you do, move it just like you did before. Then click on the little anchor symbol to paste the floating layer into the red channel:
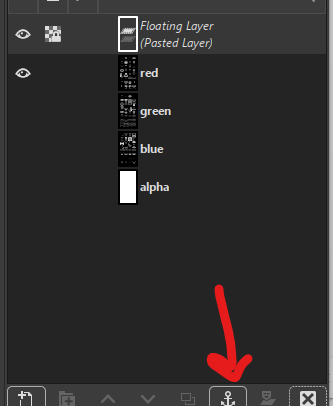
Repeat these steps for every channel you changed (i.e. if you changed tattoos on the green channel, you need to do the exact same steps – hide everything but the green channel, then copy/paste as floating layer/position/anchor).
Once you have finished combining the KAVT working atlas into the decomposed KAVT merged atlas, go into the decomposed KAVT merged atlas and click on “Colors”. Hover over “Components,” then select “Recompose”.
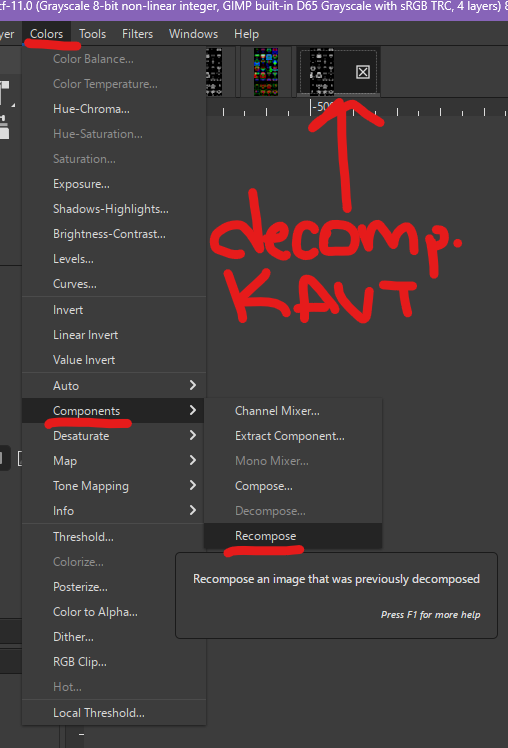
Give GIMP a moment to do its thing, then click on the coloured KAVT merged file. You should see your changes on the coloured file:
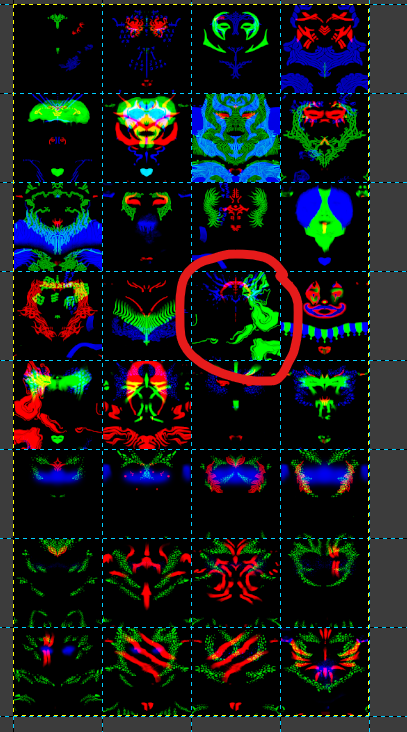
After it has recomposed, we now need to export it. DX11 cannot handle two large atlases, so you need to compress the tattoos atlas (or makeup, if you want a bigger makeup atlas). Personally, I used paint.NET – it’s free and relatively straight-forward to use for what I needed.
Click on “File” then “Export as”:
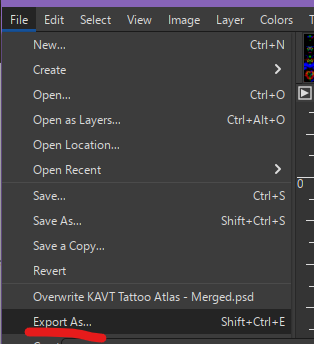
Make sure you export it using the KAVT naming scheme:
Skin_Atlas_Head_SHR_Tattoo_A_MSK -> KVT_Head_Atlas_Tattoo
KVT_Head_Atlas_Tattoo Skin_Atlas_Head_SHR_Makeup_A_MSK -> KVT_Head_Atlas_Makeup
You'll want to use BC1 compression for tattoo and makeup atlases.
¶ Scar Atlas Editing
⚠️ This section only covers editing the scars contained in the atlas - meaning only the scars selectable in CC. Scars that are part of the face textures themselves (e.g. Lae'zel's facial scars) will not be covered here.
This section will cover some basic information on how to edit scar atlases.
¶ Differences between the Scar Atlas and the Tattoo/Makeup Atlases
While scar and tattoo/makeup atlases are both atlases, there are a number of key differences between how each design itself is constructed. When viewing the scar atlas (on the right) and directly comparing it to a tattoo or makeup atlas (on the left), you'll immediately notice a number of differences that set this atlas apart from the others.
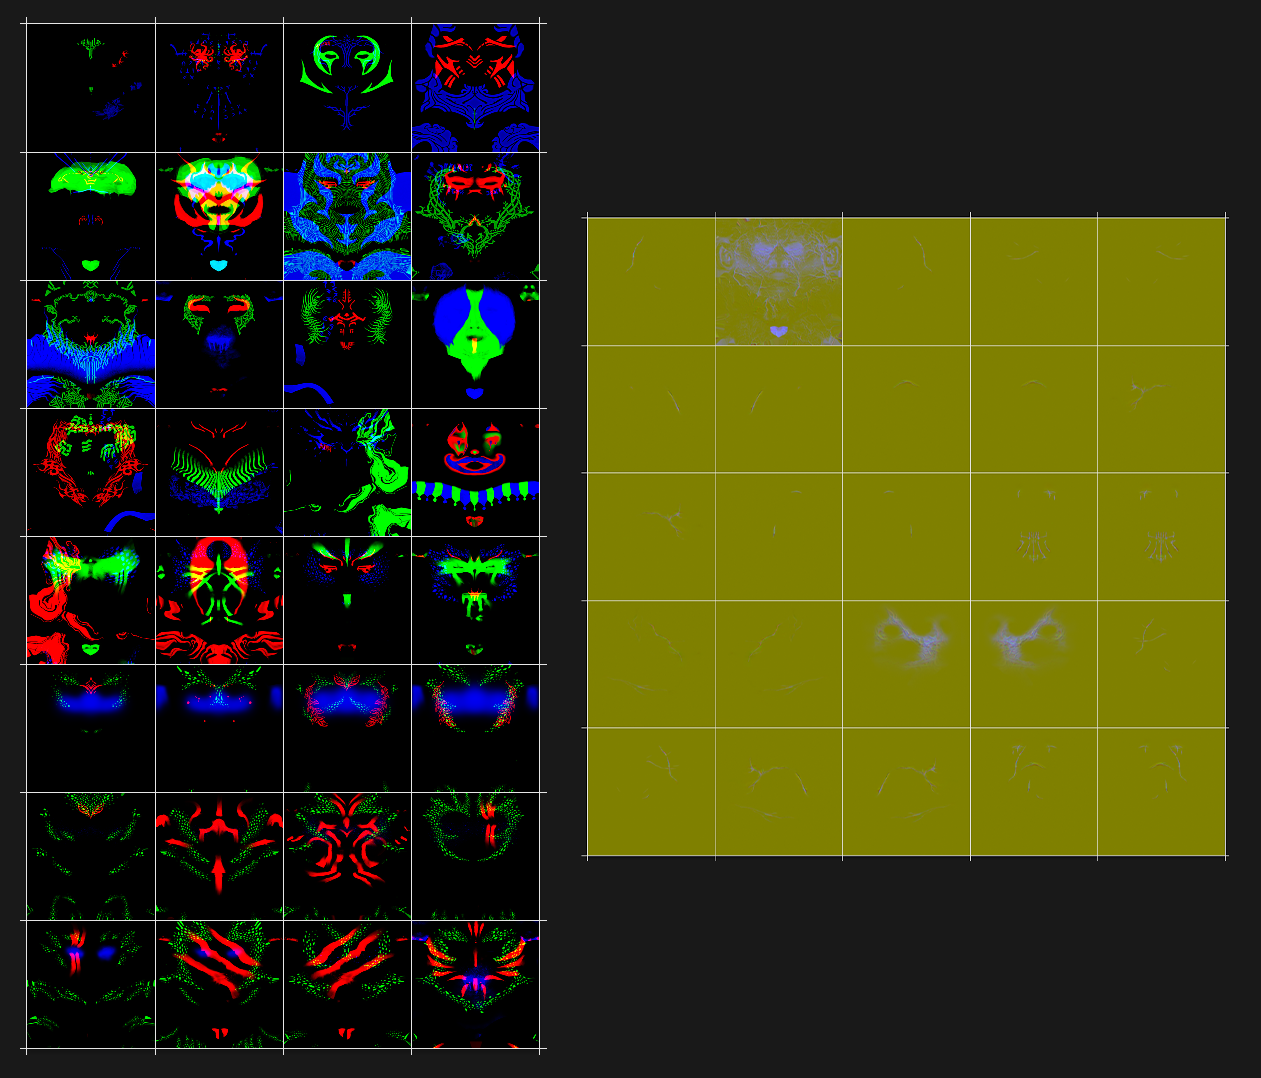
Unlike the tattoo and makeup atlas, where each design only occupies its tile on a single channel, scars occupy their tile on all three channels. In practice, this means that one scar design consists of three separate textures, one on each channel of the scar atlas. This is what each channel of a single scar design looks like:
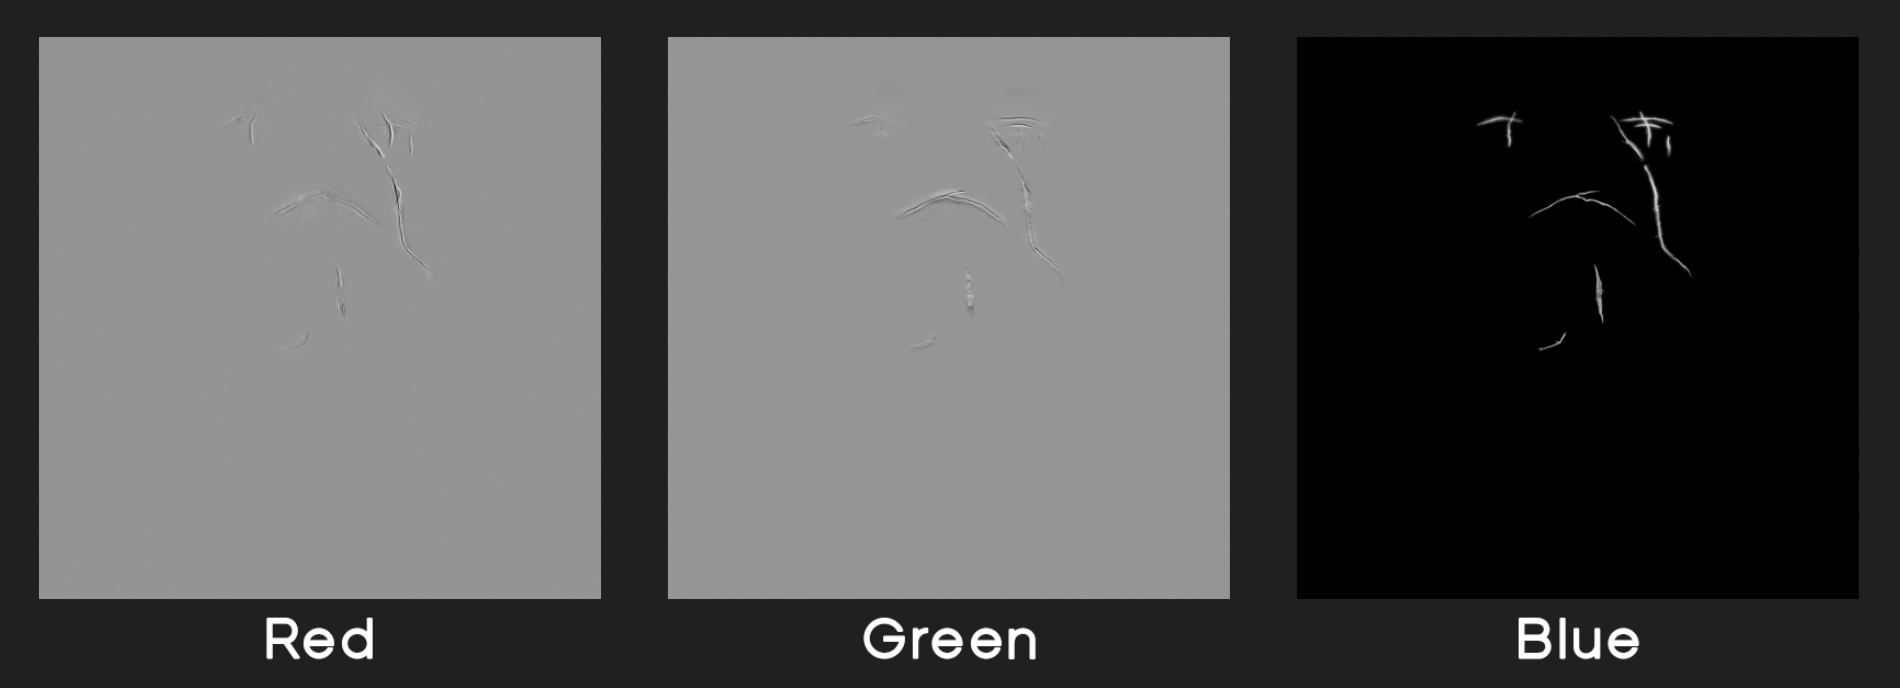
We won't go into detail on how these textures work exactly within this guide as its beyond the scope of KAVT, however it's important to remember that each scar design occupies all three channels when “frankensteining” a scar atlas. This means that when moving a scar design, you'll need to move the design on all three channels, rather than only needing to move it on one of the three channels as would be the case with a tattoo or makeup atlas.
¶ Re-Arranging or “Frankensteining” an Atlas - Photoshop
⚠️ We always recommend asking authors before editing their assets directly. Please check the mod page of the mods you'd like to combine before doing so, and/or ask the authors for permission.
If you're determined to have the most suitable customization options available to you in CC, you may want to edit your scar atlas to only include options you're interested in using. In cases like this, "frankensteining" atlases - taking bits of multiple scar mods and assembling your own custom atlas from these options - is a popular option used by many. It is good practice to ask the authors before doing this, so please check in about using other's assets before starting.
¶ Getting Started
⚠️ Photoshop was used to edit the atlas in this guide; the steps outlined here will still apply to other software, but there may be small differences.
We recommend using the KAVT Scar Atlas Resource available in the files tab on the mod page for this process. The file included contains each scar design's channels on individual layers, making it much easier to move designs around.
Open the KAVT scar atlas working file, as well as the scar atlas of the scar mod you'd like to transfer a design from. In the case of this guide, we'll be using the scar atlas from Tav with a Backstory. You should now have two tabs open:
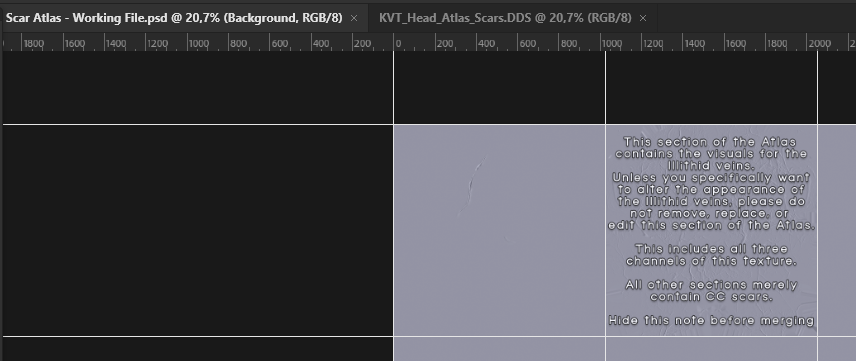
The working file contains three folders, one for each channel (Red, Blue and Green) with each scar design as its own named layer. One scar design consists of one layer from each of these folders; their names will match.
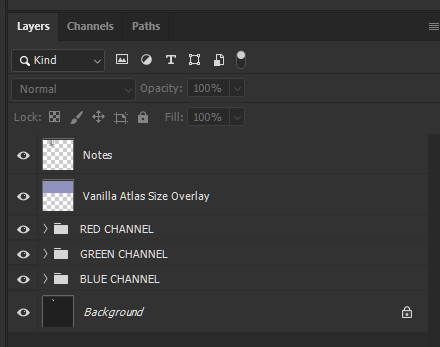
Click the eye next to the “Notes” and “Vanilla Atlas Size Overlay” layers to hide them. These layers are purely for reference and don't have any use within the final atlas. Now, select which scar on this atlas you'd like to replace with a scar from another atlas. Scars are numbered in the order they're placed within the atlas, from top to bottom, and left to right. Delete the appropriately named layers from all three folders. For our example, we'll be replacing “SCAR 03”. Once you've deleted them, your file should look roughly like this, with a gap in place of the design you've deleted:
⚠️ Don't delete or edit the second scar design in the top most row. This is the Illithid Vein design, and removing this design or editing it will affect the visuals of the half-illithid transformation.
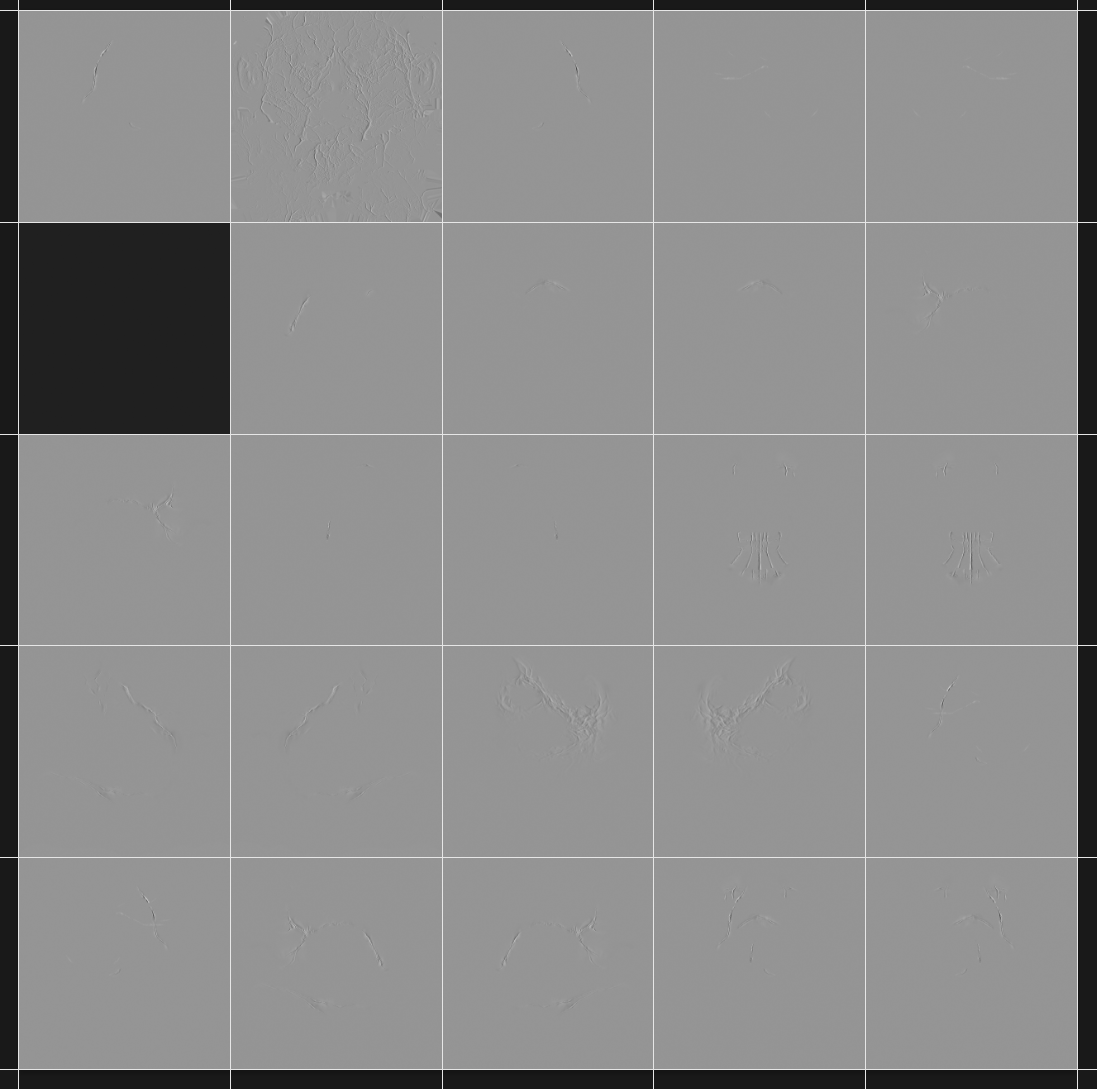
Now, swap to the tab containing atlas you've chosen to transfer a design from. If the atlas doesn't already contain guides (the white gridlines visible in the atlas image above), we recommend adding them by navigating to View > Guides > New Guide Layout. Adding guides will make it easier for you to separate your chosen design, as it will clearly indicate where each tile starts and ends. For the scar atlas, these are the appropriate guide settings:
This atlas will only consist of one layer, most commonly named either “Background” or “Layer 0” (but don't be alarmed if it's named something else). Choose the design you'd like to transfer from the atlas, and select it using the selection/marquee tool. We recommend zooming into the atlas until your design of choice occupies most of your screen, as that'll make it easier to select it correctly. If you've enabled guides, your selection tool will “snap” to the guidelines.
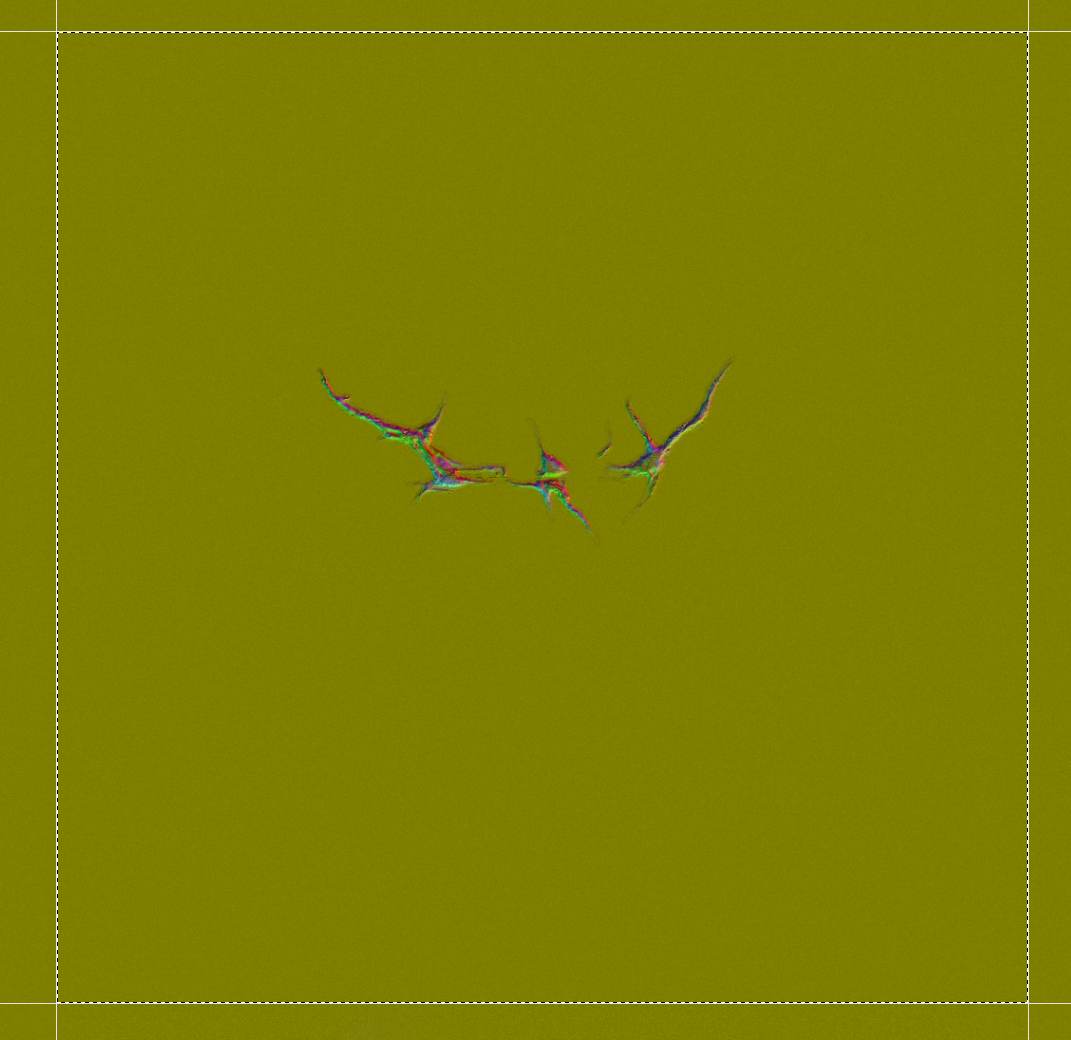
Now, open the “Channels” tab located in the same section as the layers tab.
Click on the second channel, “Red”. You'll notice the visuals of the atlas change, as when a channel is selected, only that channel's part of the design will be visible. For the design we've chosen, the Red channel looks like this:
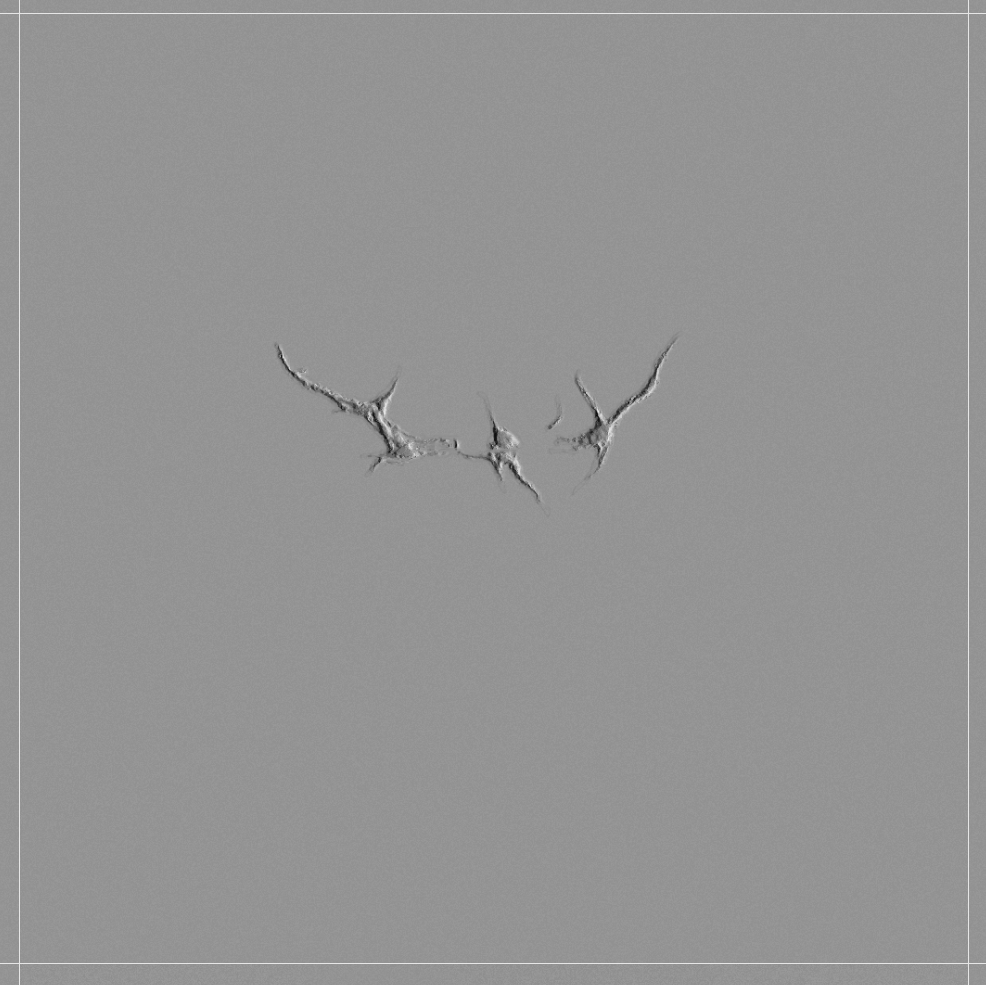
Now, copy this channel's part of the texture either via hotkey (ctrl+c) or by navigating to Edit > Copy. Then, switch back to the tab containing the KAVT Scar Atlas working file. Click on the “RED CHANNEL” folder in the folder tab, and paste the design you've just copied either via hotkey (ctrl+v) or by navigating to Edit > Paste. The section you've copied will usually appear in the center of the image:
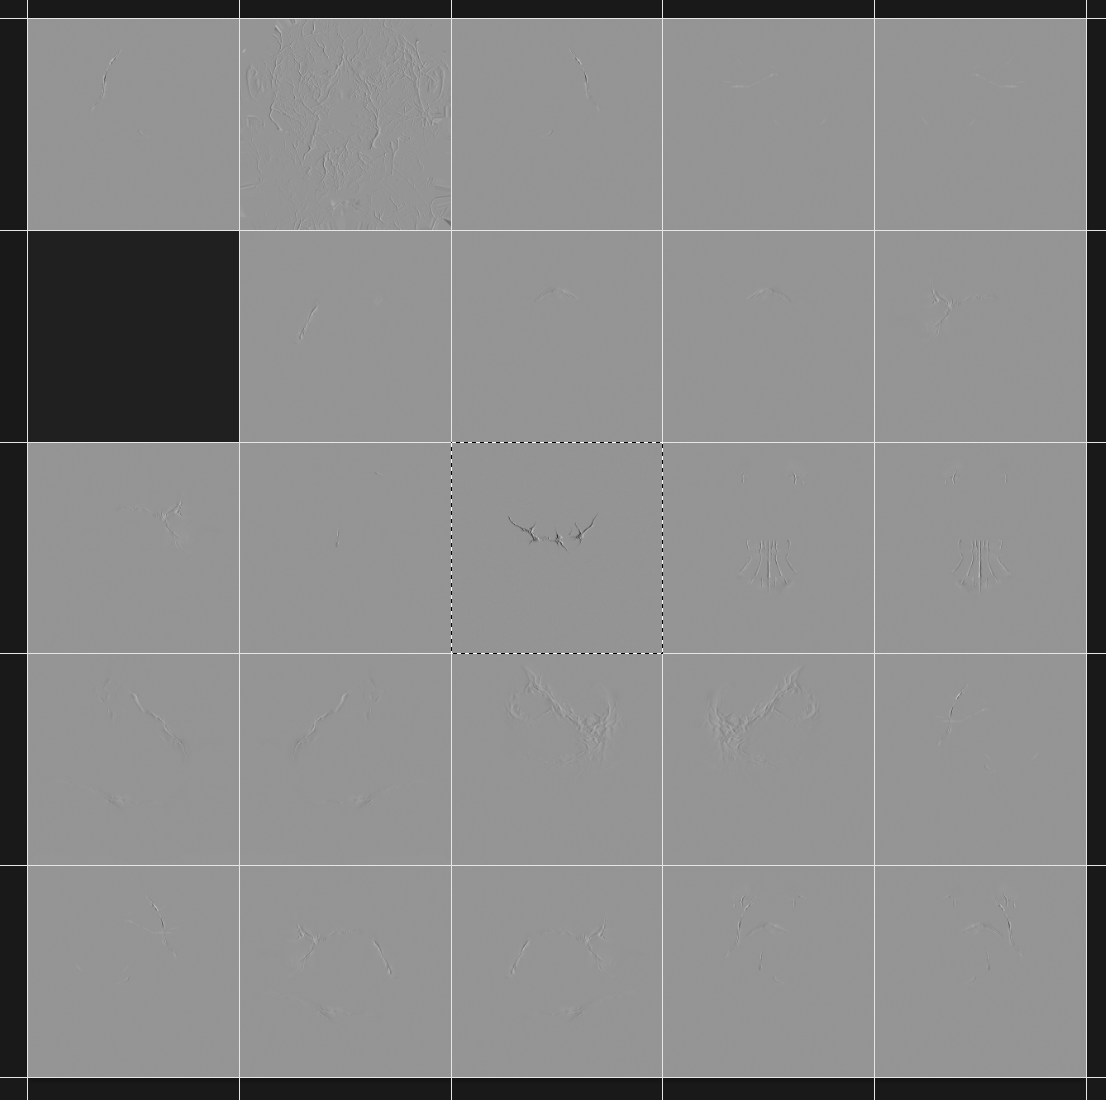
Using the Move Tool, drag the tile into the gap we created by deleting a design from the working file. Make sure the edges align with the gap.
⚠️ If you've enabled guides, your pasted tile will snap into place when moving it over to the empty spot. This helps you align the design correctly.
Next, you'll be repeating this same step for the Green and Blue channel. To be able to see the design you've pasted, we recommend tempoarily hiding the “RED CHANNEL” folder inside the working file by clicking the eye icon next to the folder, and then doing the same with the “GREEN CHANNEL” folder once you've pasted and re-positioned the green channel of the design you've chosen.
Once you've transferred all three channels of your design of choice, it should be present in each of the three “CHANNEL” folders within the working file. Unhide both folders you've hidden, and merge each folder by right-clicking it and selecting “Merge Group”.

Your working file should now contain the following layers:
Next, open the “KAVT Scar Atlas - Merged” file contained within the scar atlas resource. This is where we'll be assembling our edited atlas. When opening the file, you should see a fully assembled scar atlas with only a single layer:
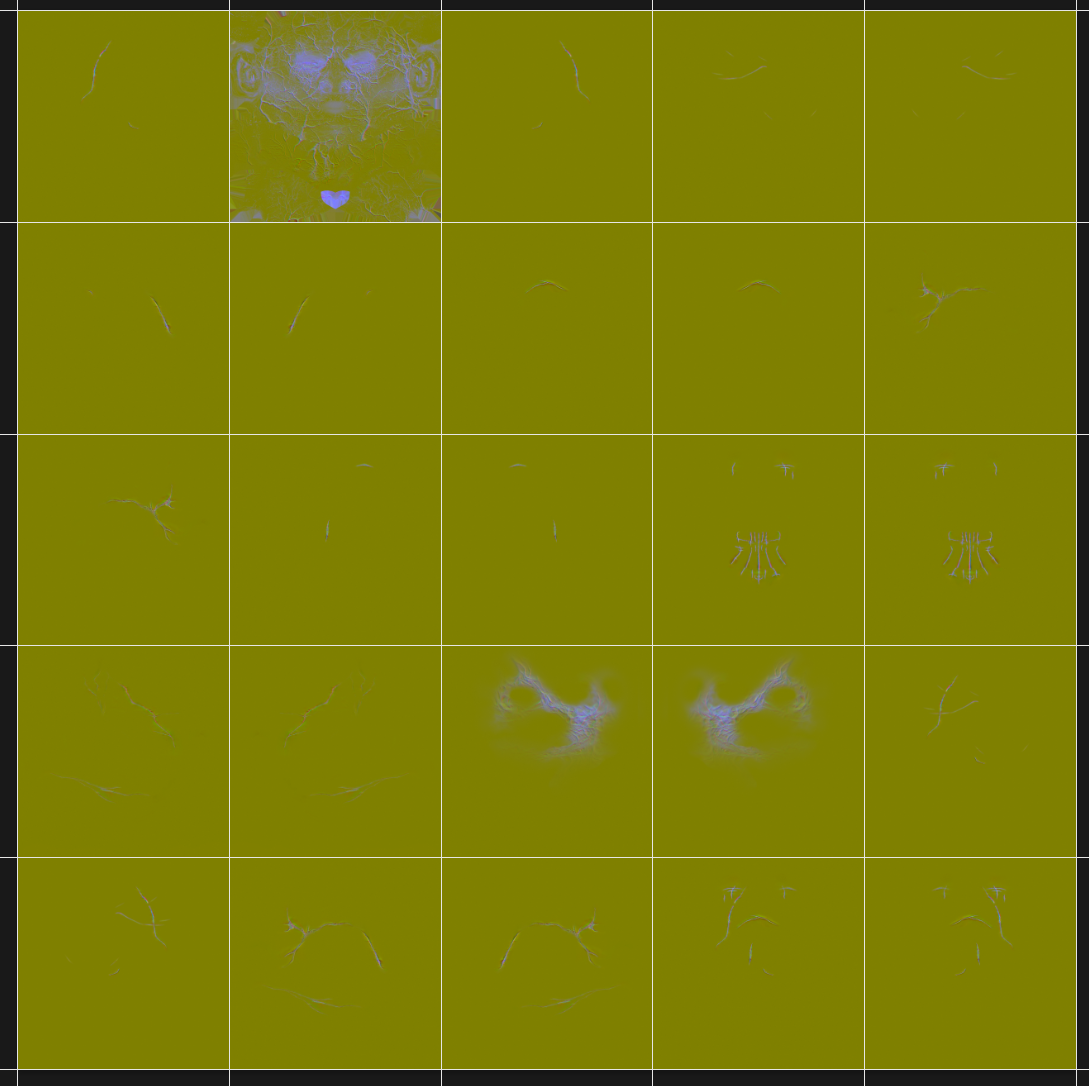
Navigate back to your working file tab, and select the entire canvas using the marquee/selection tool. Then, select the RED CHANNEL layer, and copy it either via hotkey (ctrl+c) or by navigating to Edit > Copy.
‼️Note: If you have more experience with image editing software, you may be tempted to simply select your layer and hit ctrl+c. We don't recommend doing it this way, because the individual channels will at times not accept the copied image if it has been copied this way. We explicitly recommend selecting the entire canvas and copying it that way.
Return to the “KAVT Scar Atlas - Merged” file tab, open the Channels tab, and select the Red channel.
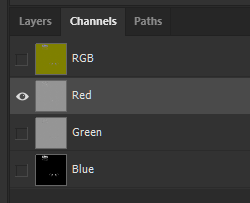
Now, paste the RED CHANNEL layer you copied from the working file into the Red channel of the merged file, either via hotkey (ctrl+v) or by navigating to Edit > Paste. If you choose to view the merged atlas at this point, you may see something akin to the image below (mismatched designs). This is normal, as each scar design consists of all three channels and we've currently only transferred one.
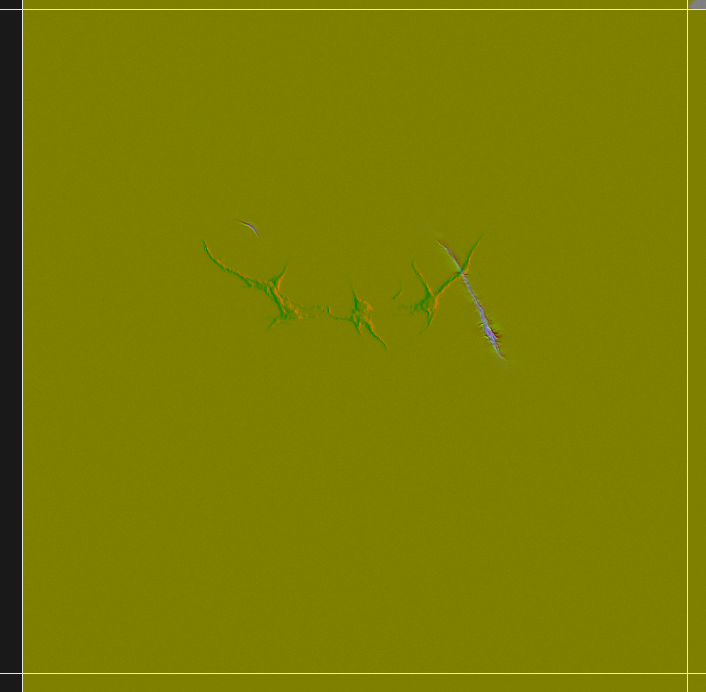
Next, you'll repeat the same process for the other two channels. Copy the GREEN CHANNEL layer of the working file into the Green channel of the merged atlas, and copy the BLUE CHANNEL layer of the working file into the Blue channel of the merged atlas. Your potentially previously misaligned transferred scar design should now show up correctly, similarly to this:
You have now successfully replaced a design with another! Now, you'll only need to export the atlas. Navigate to File > Save As, or File > Save a Copy (based on your personal preference), and choose where to save your file. You can save your file wherever you like and then manually transfer it to the appropriate folder within your game files, or save it directly within your game files at the following path:
YOURGAMEFOLDER\Generated\Public\Shared\Assets\unique_tav\FACE
You'll want to name your file KVT_Head_Atlas_Scars.DDS.
Capitalization and spelling are important here! Your game will not read these files correctly if there are spelling mistakes, capitalization differences, or the file is placed at the wrong location.
You'll be exporting this atlas using BC7/DX11+ compression. Don't generate Mip Maps. Your export settings may look something like this:

If you didn't save your atlas directly to the correct path within your game files, you'll want to move it manually after saving it somewhere else. If the folders at the indicated path don't exist, you'll want to create them yourself.
¶ Common Issues & How to Fix Them
¶ Misplaced Tattoos and/or Makeup
¶ Issue
Your tattoos and/or makeup may be misaligned or misplaced. This could look something like this:
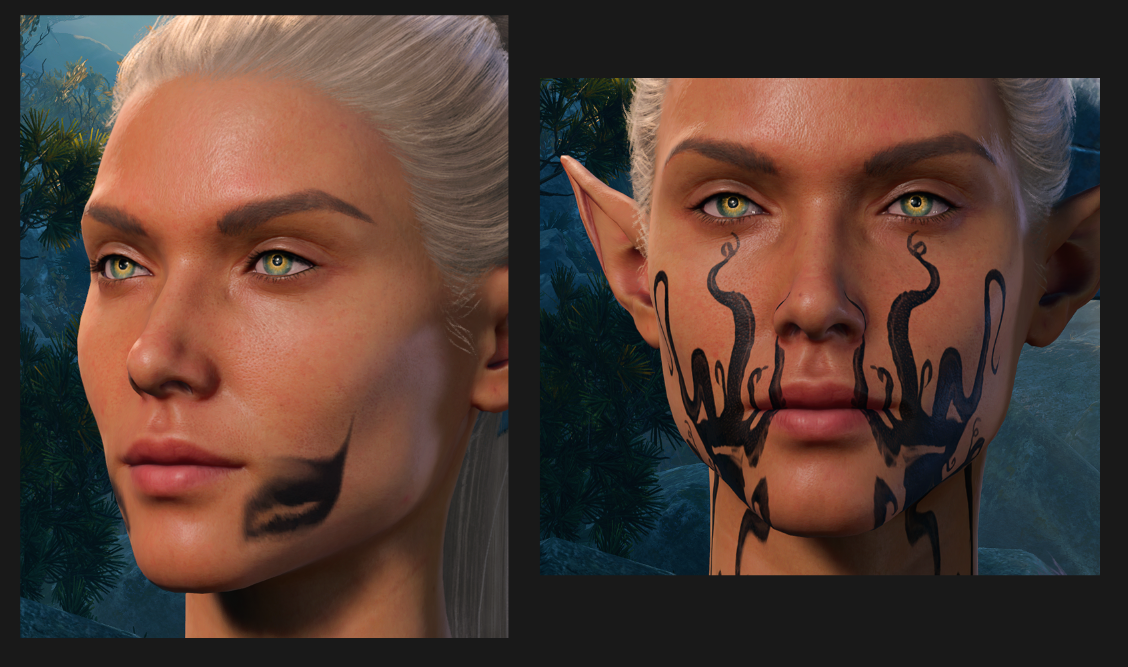
¶ Cause
This problem is caused by a tattoo or makeup atlas that doesn't match KAVT's increased atlas size, either added by another mod via .pak, or loaded as a loose file. Vanilla atlases are 4 x 4 tiles in size, whereas KAVT's atlases are 4 x 8 tiles in size. Even if the loaded atlas is smaller than KAVT's atlas, the game will still attempt to map 8 tattoos or makeup designs to this smaller atlas:
¶ Solution
Remove the atlas or re-size it. You can find information on how to re-size an atlas to fit KAVTs size further up on this wiki page.
¶ New Tatttoo and Makeup options show in CC but not on Heads
¶ Issue
The new makeup options added by KAVT show in CC, but when you select them, they don't show up on the head you're using.
¶ Cause
This is caused by the head or race you're using either not being set up for Unique Tav, or being set up improperly. It references the wrong atlas (vanilla), which doesn't contain any designs in the bottom (expanded) half.
¶ Solution
Make sure that the head and/or race mod you're using supports Unique Tav, either by using its Unique Tav variant, or by using a Unique Tav patch for this mod.
¶ Issues when KAVT is disabled
¶ Issue
When KAVT is in my mod folder, but disabled through the mod manager, I'm experiencing issues like missing bodies, misaligned/misplaced tattoo and makeup, or other issues.
¶ Cause
KAVT contains overrides for vanilla assets to function as intended. These overrides will still override vanilla assets even if the mod is disabled; you can see this in your mod manager:
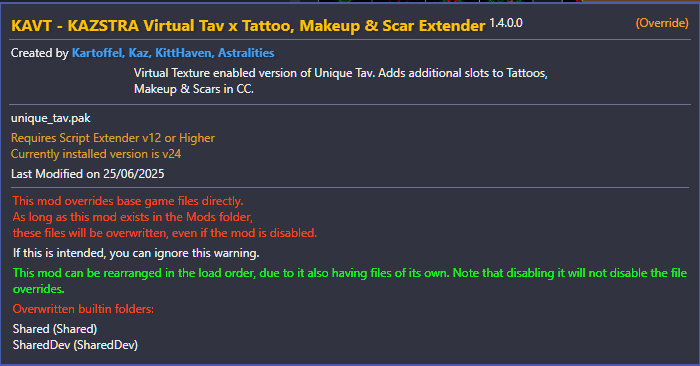
¶ Solution
Delete KAVT or KAVT NVP from your mod folder when you aren't using the mod.
¶ Other Guides, Credits, & Thanks
¶ Other Relevant Guides & Resources
¶ Mod Usage
¶ Asset Creation
Guides and Resources that may help you if you're interested in creating your own assets to use with KAVT.
BG3 Shaders for Substance Painter
¶ Credits
¶ Mods used as Examples
Jerinski's Glowy Vanilla Body Tattoos
¶ People
Satanfish for writing the Tattoo/Makeup Atlas “frankensteining” section
¶ Thank you
Jerinski, Skiz & Copperleaves for feedback
BG3CMTY & Faerûn Fashionistas folks for their support
Kaz 💜