¶ Custom Animations Blender Walkthrough
¶ written by ltpitb and kit
In this section of the animation tutorial we will go over using the provided animation rigs and exporting the animations for use in BG3.
- Creating an animation in Blender.
- Converting an animation for BG3.
¶ 1. Creating animations in Blender
¶ 1.1. Setup
Required software and Add-ons
Blender – recommended version is 4.5+ (3.6 is the minimum compatible version with the addon below).
Norbyte's BG3/DOS2 Collada Exporter - An addon for Blender that allows you to import and export GR2 files for Baldur’s Gate 3 through either Collada (.DAE) or GLTF.
Lslib – a tool by Norbyte for manipulating Baldur’s Gate 3 files.
Animation Template with BG3 IK Animation Rigs – a collection of control rigs (head and body) ready for animating.
This tutorial assumes you have some basic knowledge of how to navigate the Blender interface. If you need a refresher you can refer to the “Interface Overview” by the Blender Foundation. If you have no experience at all in Blender I recommend the classic “How to Create a Donut” introductory tutorial series by Blender Guru, which has been updated for the latest version of Blender.
Some animation specific terminology you may hear often :
A model / mesh – is a 3D object. It can be anything from a simple sphere to a human or a spaceship. The model itself can’t be turned into an animation for this game's purposes unless it has…
A rig / armature – this is basically the “bones” of the 3D object and allows you to control and manipulate it in space. A rig can be as simple as one bone to move a sphere, or dozens of bones on a face to create different expressions.
¶ 1.2. Creating an animation
A relatively quick YouTube tutorial on the basics of Blender’s animating functions and UI - highly recommended to watch first, if you are not yet familiar with it.
¶ Tutorial for working with the IK rigs from Nexus
Video tutorial with instructions and animation tips (temporarily unlinked until an update)
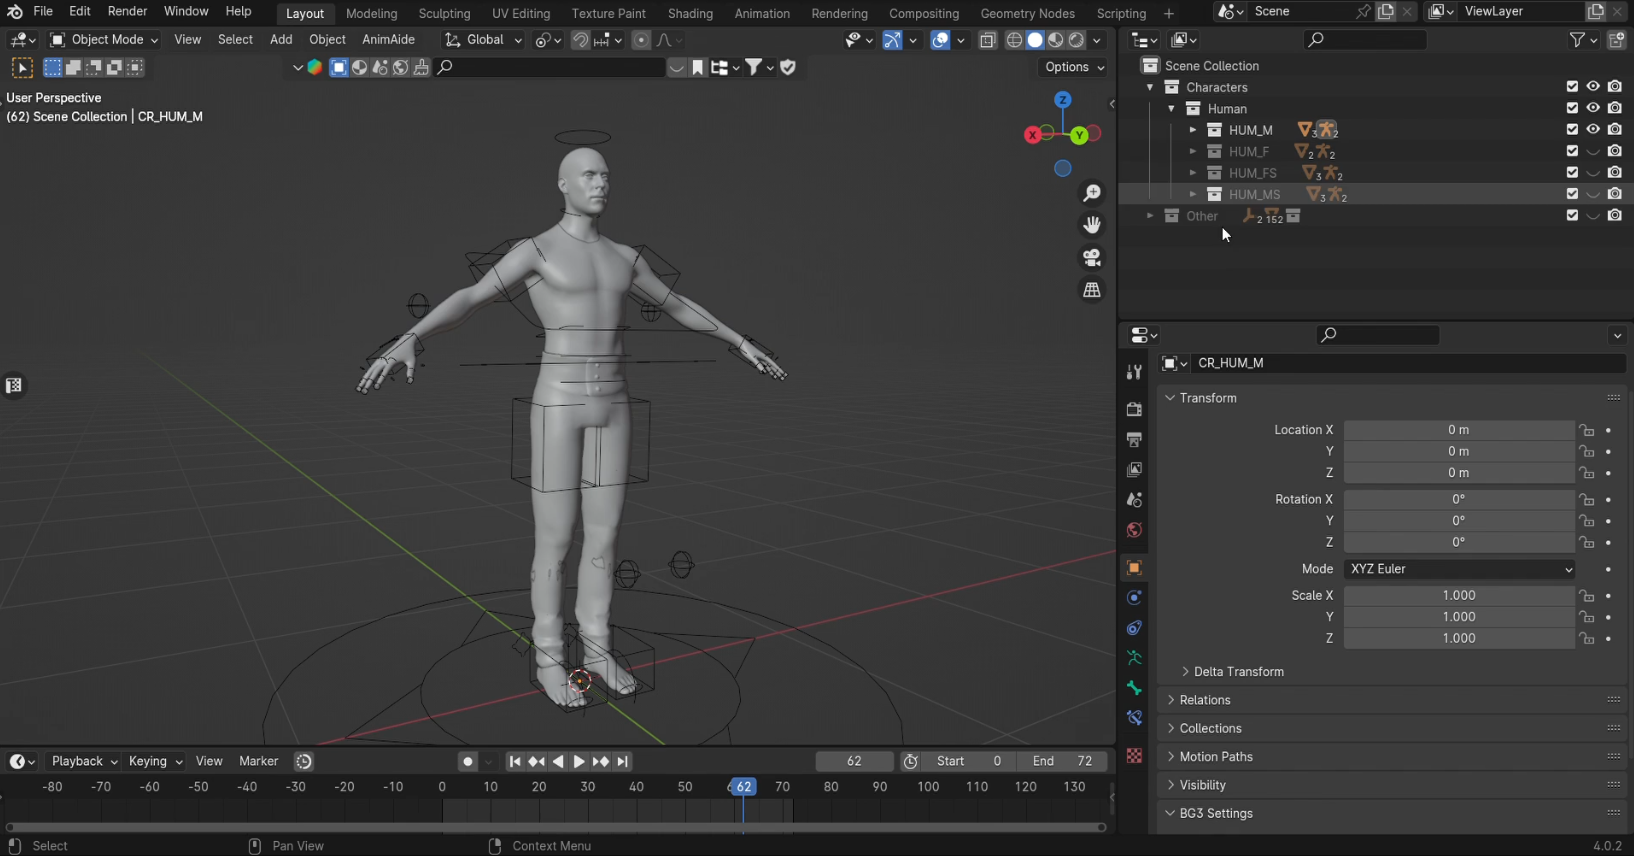
Once you have opened the animation template, you will see collections with rigs for all the playable body types/races. Each body type has a control rig (CR) and a skeleton rig (SK). The control rig is meant for animating on, and serves a puppeteering function for the skeleton rig. The skeleton is where you would bake the animation in the end and what you export out of Blender back into the game.
Make sure you’re in pose mode. We recommend using auto-keying if you’re going to animate manually (so that keyframes are inserted automatically whenever you move/rotate/scale a bone), but remember when it is enabled and disable it if necessary.
Most animations in the game play at at either 30 FPS or 60 FPS and therefore it is important to set it to the appropriate FPS in Blender for it to export correctly and play correctly within the game (Blender’s default starter scene has the FPS at 24).
Keep it the starting frame of the animation (your frame range) at 0 and not 1, this is the correct setting for animations to be exported to BG3.
As of writing this tutorial, all of the rigs are facing in the positive Y direction, and are mirrored, so the limbs you perceive to be on the left are named right, and so on. This is intentional (and is due to Blender’s axis mismatch with the game’s engine), and any animation you make on them will be mirrored in-game, so keep that in mind.
Knowing how to manage keyframes will be a big part of your animation process. For more information on the basics of keyframing in Blender refer to “Keyframe Fundamentals” by the Blender Foundation. The version of blender they use is dated but the core concepts still apply. For a tutorial that uses more recent versions of Blender you can refer to “Tutorial: Blender Keyframes For Beginners” by PIXXO 3D.
¶ Additional useful tutorials on Blender’s animating functions:
AnimAide (free Blender animation addon, version for 4.0+), YouTube tutorial on AnimAide
YouTube Tutorial on Blender’s Non-Linear Animation (layered animation) Editor
Animation Layers (paid Blender animation addon)
¶ Why the bones are oriented like That™
Bones in Granny/GR2 files actually function more like joints, akin to Maya etc., not Blender, where a bone has a head and a tail. A joint only occupies one point in space compared to two by a bone head and tail. Joints are interpreted as bone heads by Blender.
Another difference is that the primary local axis (the axis that goes through/along the length of the joint/bone) of a bone in Maya/GR2 is X, whereas in Blender it is Y. When importing a joint-based GR2 file with the addon, Blender essentially guesses the position of the bone tail based on its own standard for a primary axis. Because it is different in Blender, visually the bones appear to be "sideways". This is meant to be this way and will be correctly exported back into the game by the addon, since the position of the tails does not technically matter (but the position/orientation of the heads does matter).
TL;DR: Do not worry, they are meant to look exactly like that and will be exported back correctly into the game. If you (correctly) used the import via GLTF it likely already assigned custom sphere shapes to the bones for an easier view.
¶ 1.3. How to correctly bake and export your animation
When you’re done with your animation or want to test it in progress, you’ll need to export it in a format (e.g. GLTF) that can be converted into the modeling / animation format used by BG3 - “.GR2”, using Norbyte's addon.
To get there you’ll need to :
- Export the animation into a GR2 format using the exporter addon (the “export via GLTF” option, not via Collada).
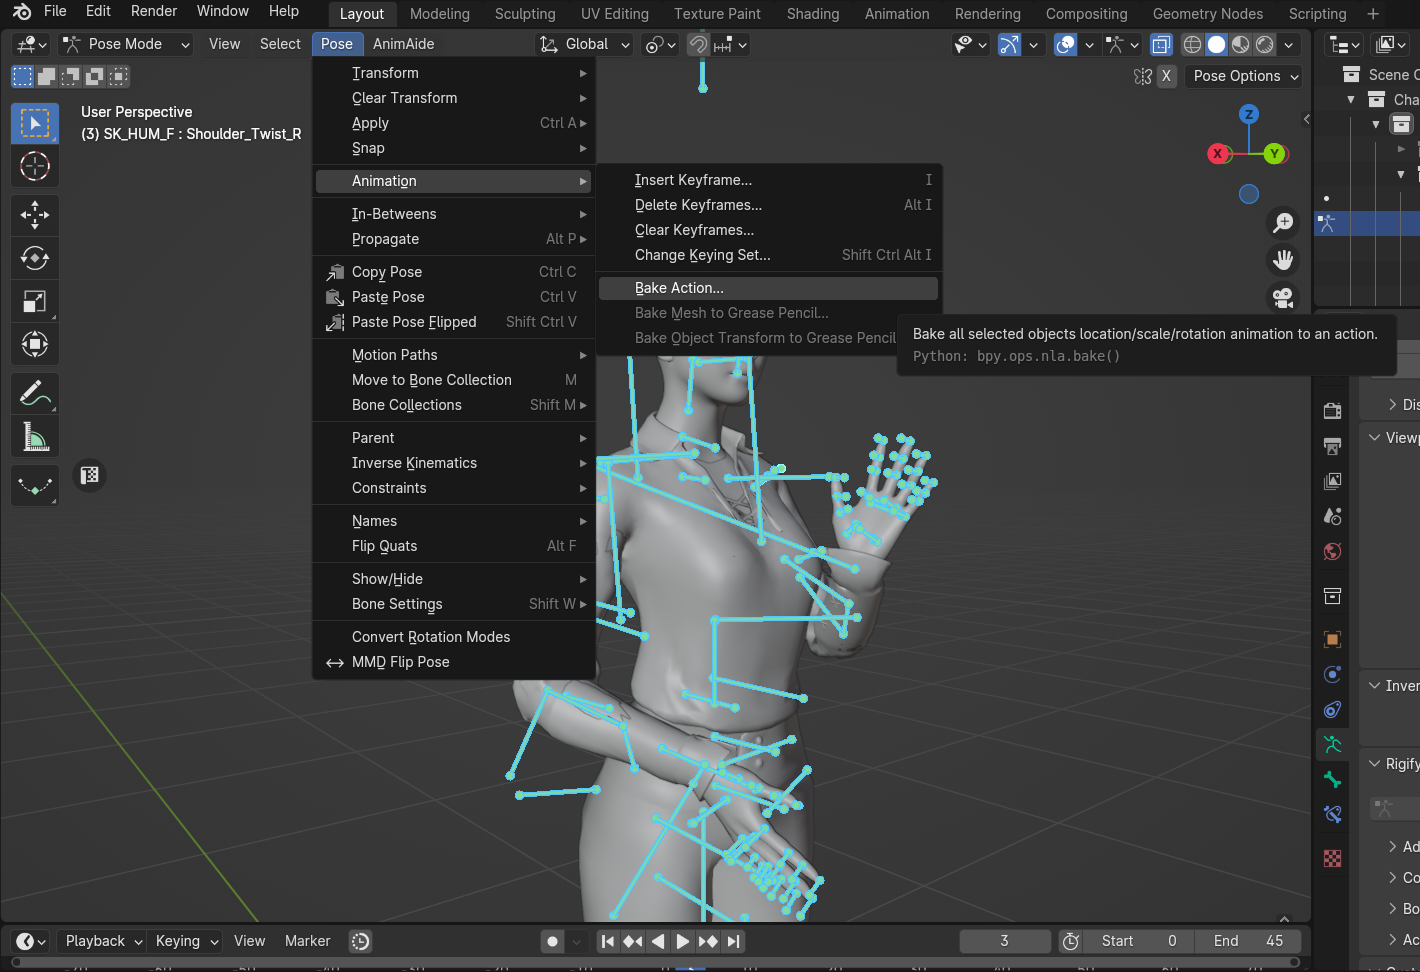
When exporting it’s important to remember that you only want to export the skeleton rig, not the control rig or any of the meshes. For that reason it’s also important to remember that while you do your animating on the control rig, the skeleton does not receive any keyframes, it’s being constrained (puppeteered) by the control rig. To bake keyframes on the skeleton, you need to Bake the Action on it before exporting. (This is also explained in tutorial video on the template.)
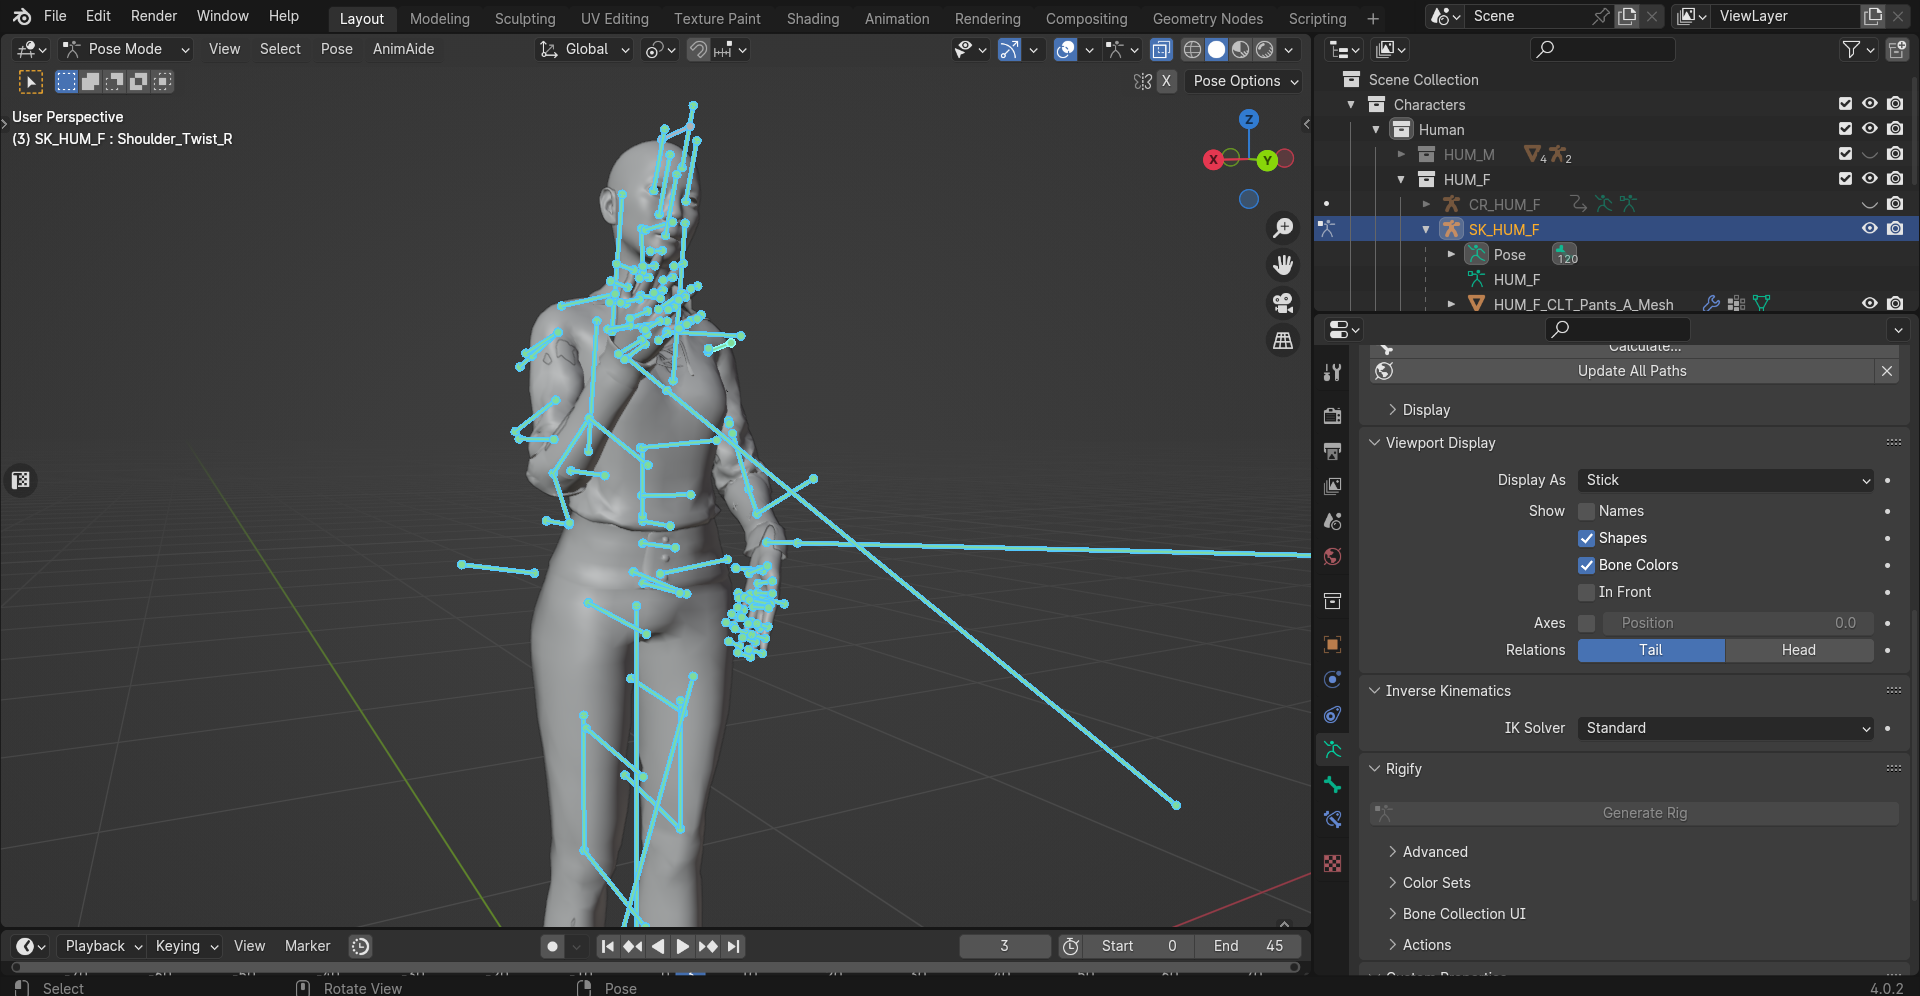
To bake the animation on the skeleton, select it in Object Mode, go into Pose Mode and select all bones in the skeleton rig.
Go into Pose > Animation > Bake Action and bake it with the following settings in the popup (set the end frame to what your end frame is):
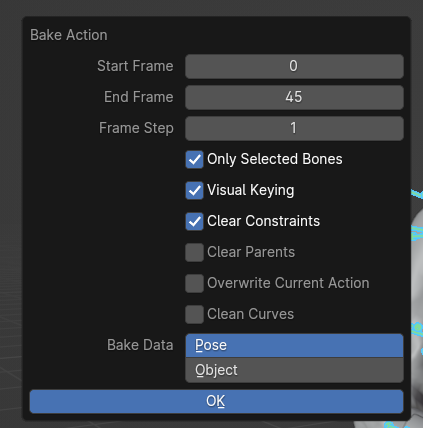
(Keep in mind that clearing constraints will disconnect the skeleton from the control rig, and moving the control rig will no longer move the skeleton along with it. You can keep that option unchecked if you'd like your skeleton to stay connected to the control rig.)
After the action is baked, your skeleton will now have its own keyframes on the timeline when selected.
Your animation should be ready for export then.
¶ Exporting the animation and converting it to gr2
Select your skeleton rig (in Object Mode or Pose Mode) and export as .GR2 (File > Export > DOS2/BG3 via GLTF)
In the pop up window you’ll see options on the right-hand side. Make sure “Selected Objects” is checked to export only the selected armature.
Give your file a name (at the bottom) and save it somewhere you’ll remember by clicking the “Export glTF/GR2” button.
¶ 1.4. Bonus: Using the head control rig
The head control rig setup works similarly to the body: there is a control rig that has a puppeteering function and is where you’ll do your animating. There is also the skeleton rig that is imported from the game (in the case of the provided .blend file, HUM_F_NKD_Head_B), and in the end you’d bake the action on it, use the offset script on it, and export it out, exactly like with the skeleton rig for the body.
Upon opening the .blend file with the head control rig, you will see the following:
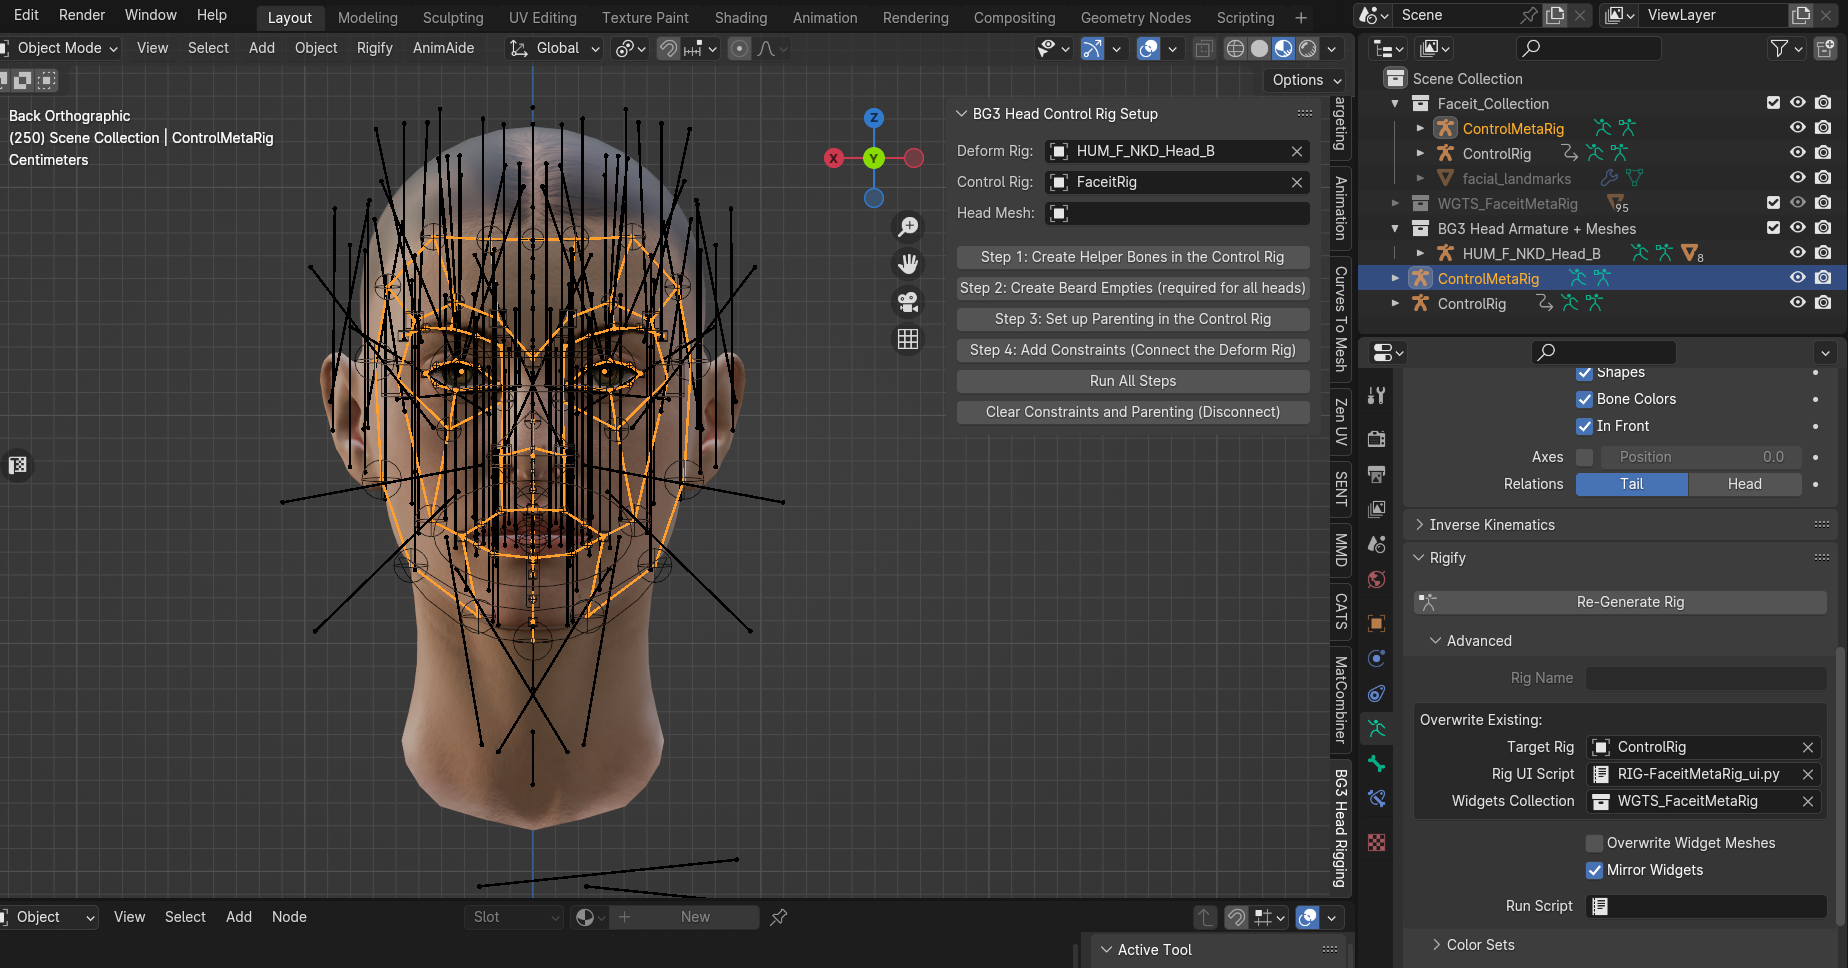
Your Deform rig is the one that your meshes are weighted to, i.e. the actual head armature from the game, in this case “HUM_F_NKD_Head_B”
Your Control rig is “ControlRig”. The Metarig for it is “ControlMetaRig”, and its only function is to make edits to the Control rig and duplicate/regenerate it for another head. This setup with the Metarig is Rigify-based (Rigify is a free add-on included in Blender to generate humanoid rigs), so editing the rig should be available to any user.
¶ How to set up the control rig on another head:
- Go into Edit > Preferences > Add-ons, and enable the Rigify addon. Also install and enable the setup addon provided in the optional files on Nexus.
2. In Blender, import the skeleton for your head (a GR2 file with the _Base suffix, e.g. HEL_F_NKD_Head_Shadowheart_Base) with the importer addon via GLTF.
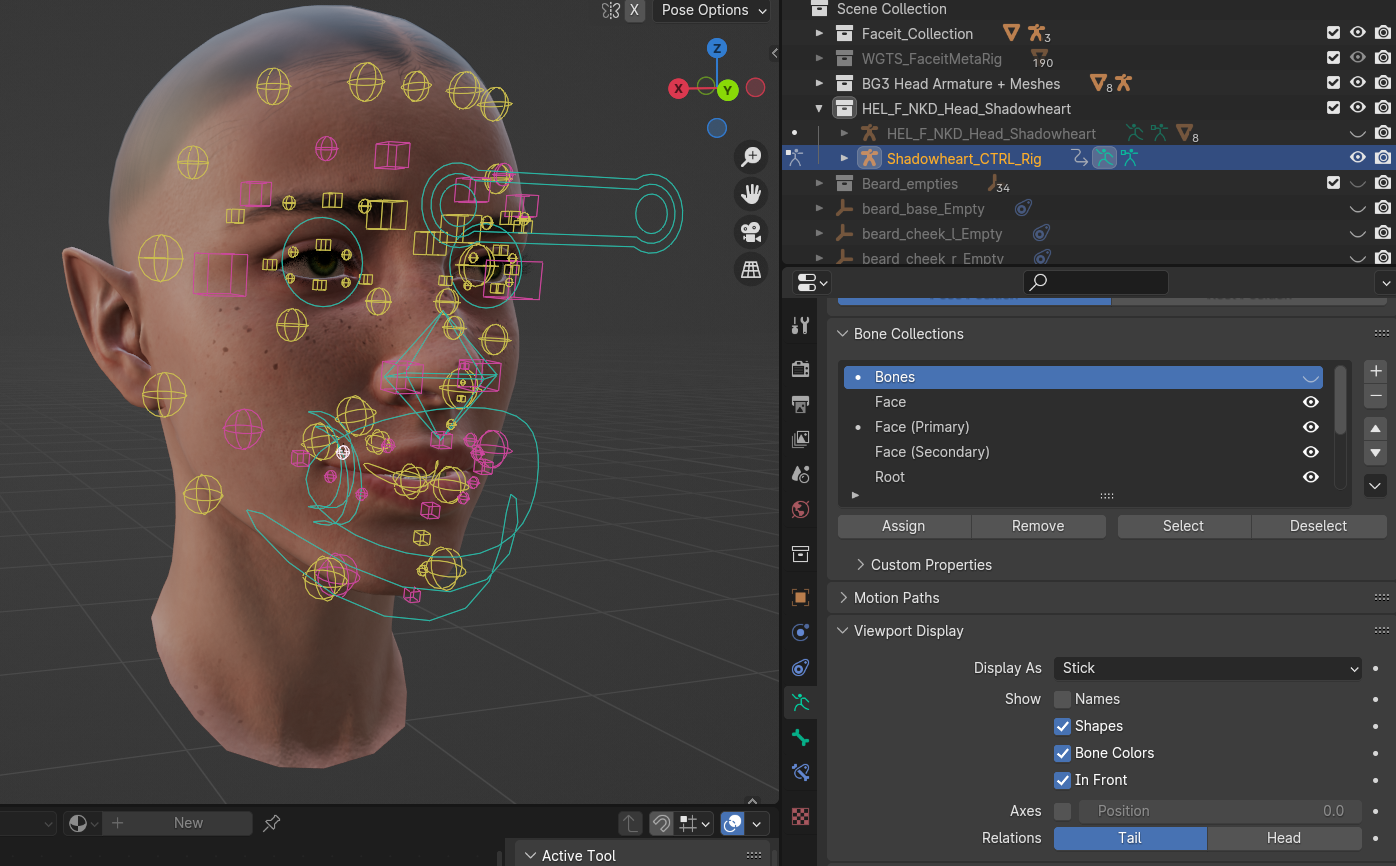
In this example we will use Shadowheart’s head as the new head to set the rig up on (everything else hidden for convenience). The Deform rig in this case would be her BG3 Head skeleton.
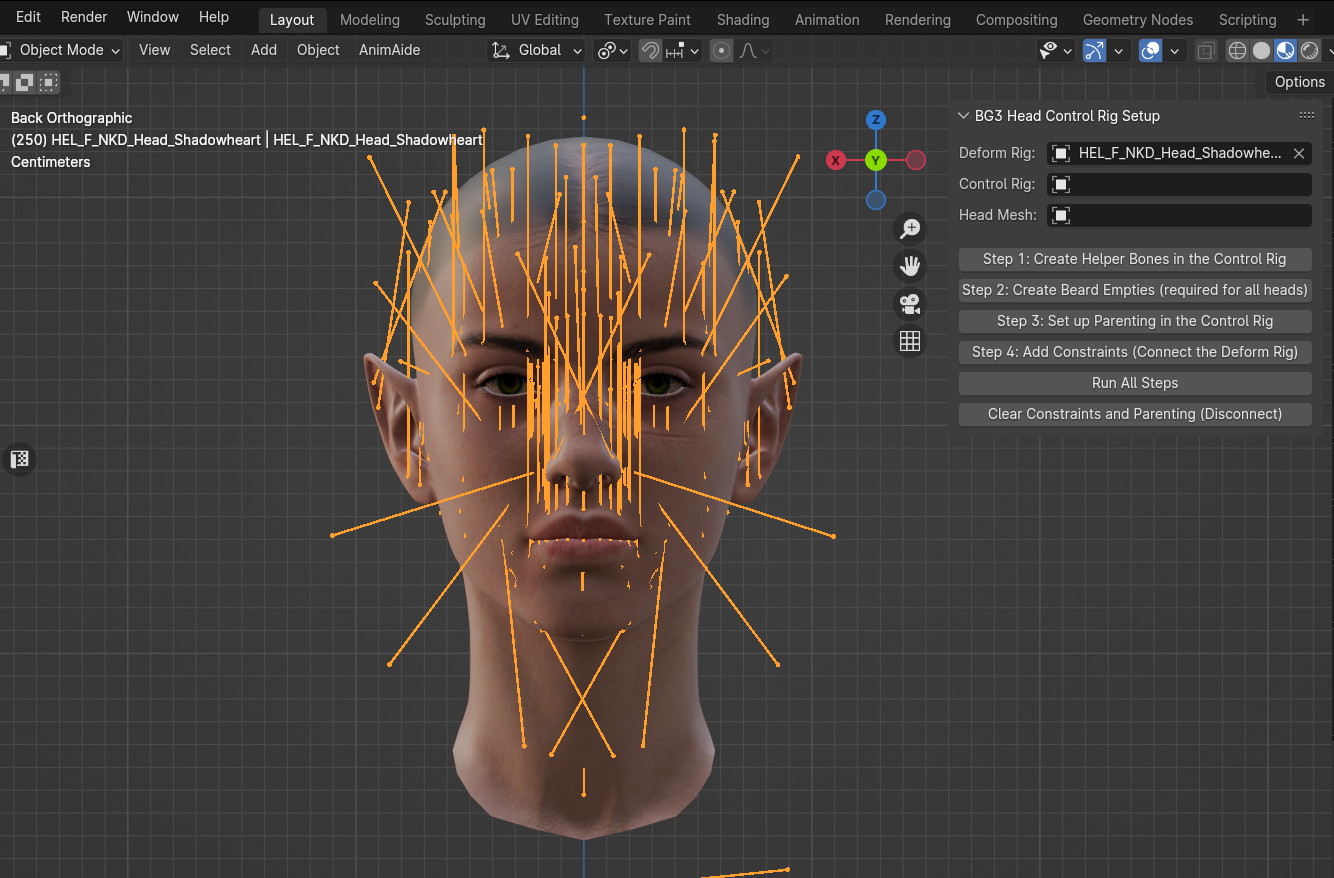
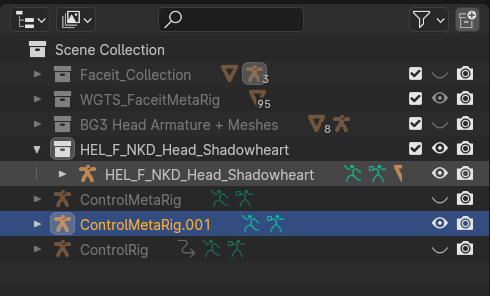
To generate and fit a new control rig to Shadowheart’s head, first we must duplicate the MetaRig.
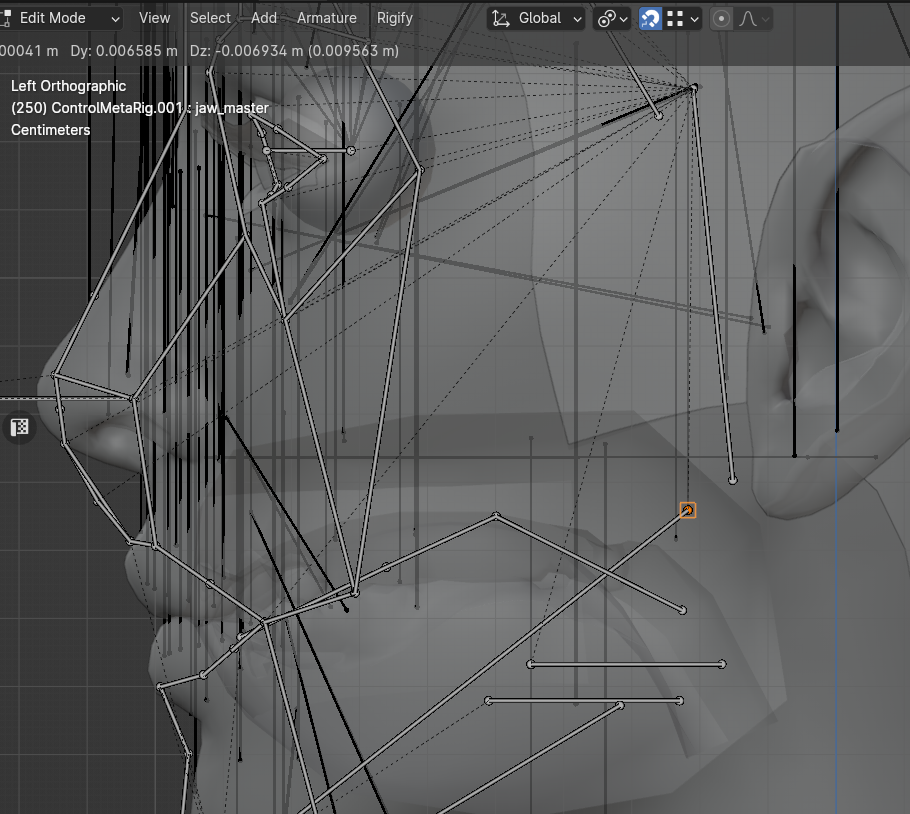
Select the MetaRig in Object Mode, then go into Edit Mode and position all the bones and joints to fit your head. The amount of work this will require will vary with how different your head of choice is from the head in the provided blend file. For a more thorough video on how to position the MetaRig bones for Rigify, see this YouTube video.
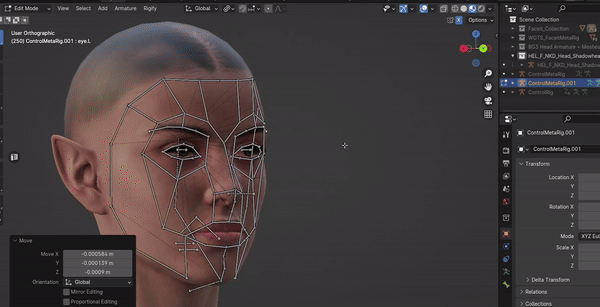
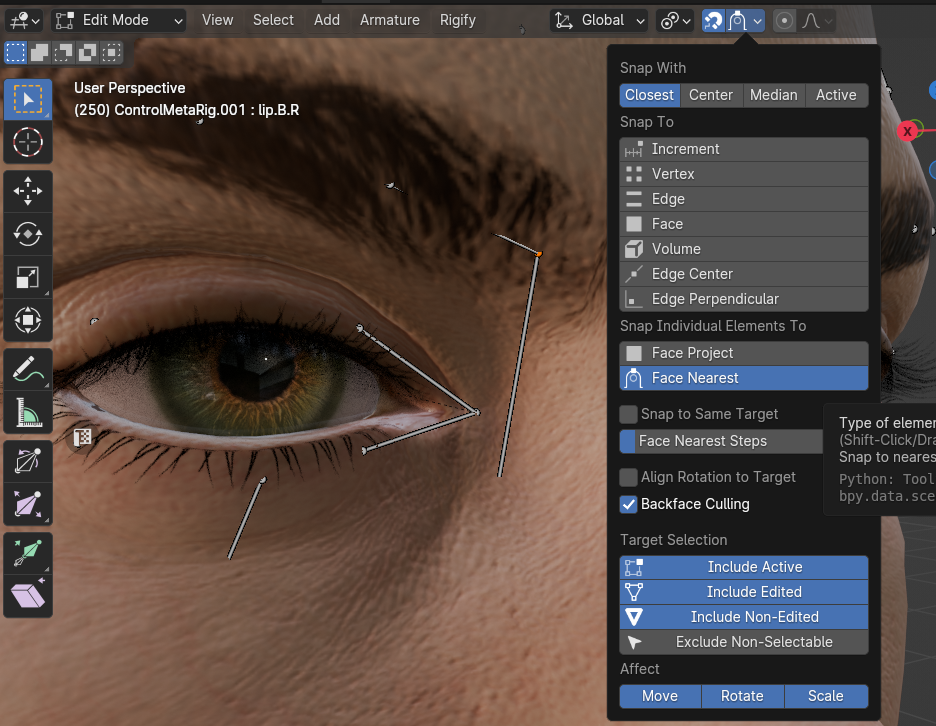
Make sure to box select the joints connecting the head and the tail of connecting bones, in order not to accidentally disconnect them (to not accidentally do that with center joints, it's best to temporarily disable X-symmetry for those). It's best to use snapping to Face Nearest (increase the Face Nearest Steps to around ~8 at least), so that the bones/joints snap to the head faces and are thus positioned somewhere around skin level:
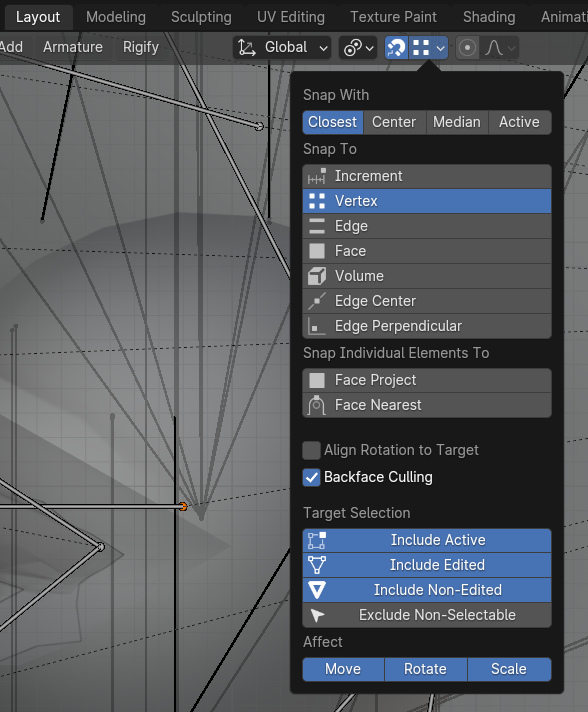
For best alignment and rotation of eyeballs/jaw, snap the heads of the eye/jaw_master bones in the MetaRig to the corresponding bones in the head's Deform Rig. To do this, unhide both the MetaRig and the Deform Rig, enable X-ray view, X-symmetry and Vertex snapping, and snap the head of the MetaRig eye bones to the head of the Deform eye bones:
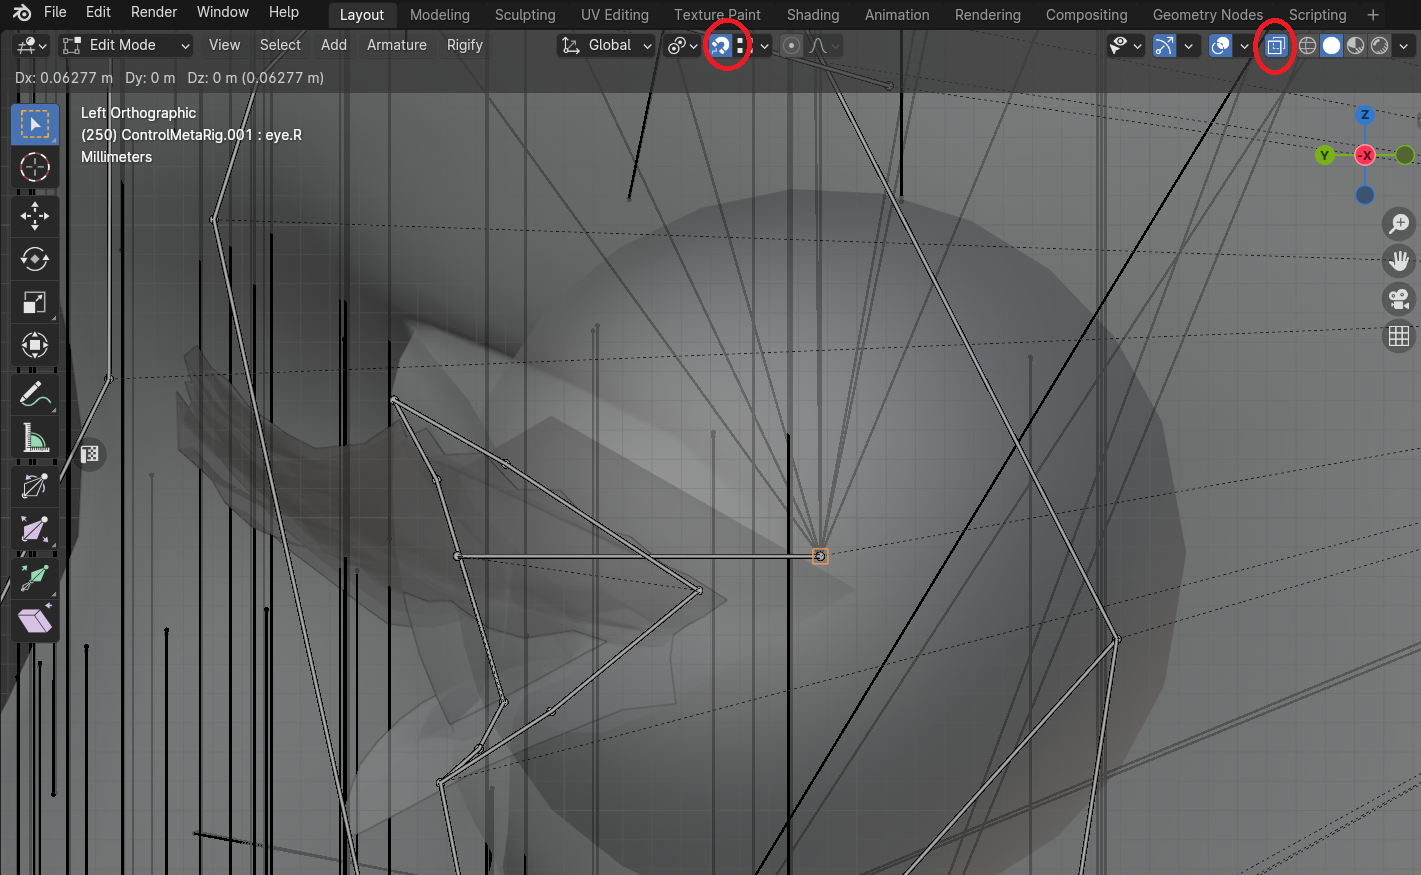
Likewise, snap the MetaRig jaw_master bone to the jaw bone in the Deform Rig:
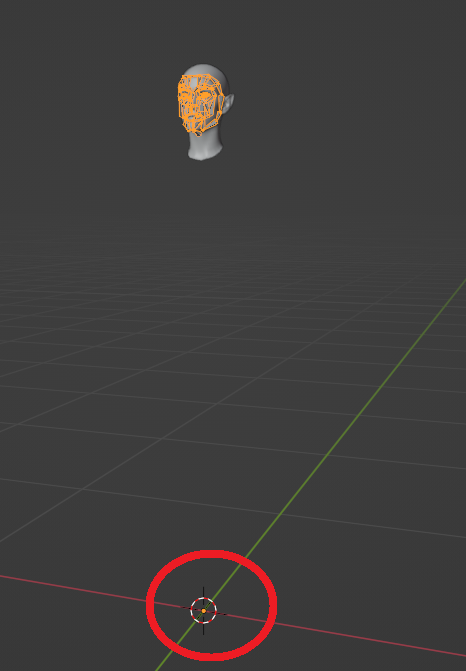
Important: when done, make sure that the origin point of your MetaRig is at the world Origin. If it’s not, you can quickly move it back there by going Shift S > Cursor to World Origin, and then Object > Set Origin > Origin to 3D Cursor.
After you’re done with positioning the MetaRig bones, go to the Armature Data Properties tab, and under Rigify click “Generate Rig” (clear the Target Rig field if you want to generate a new separate Control Rig for your new head, and optionally put in a Rig Name).
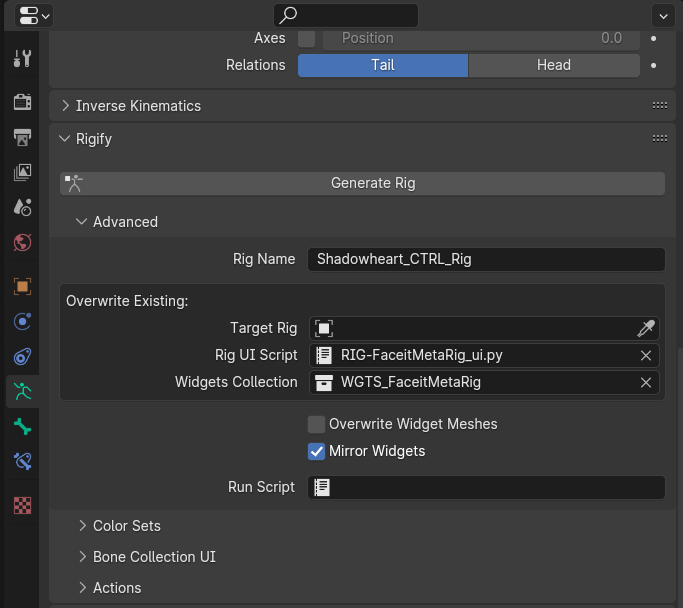
This will generate a new Control Rig for your head of choice. This Control rig can then be set in the addon tab of the rig setup addon, along with the head mesh. You can now hide the MetaRig. (Keep the Deform and Control rigs visible in the viewport for running the setup.)
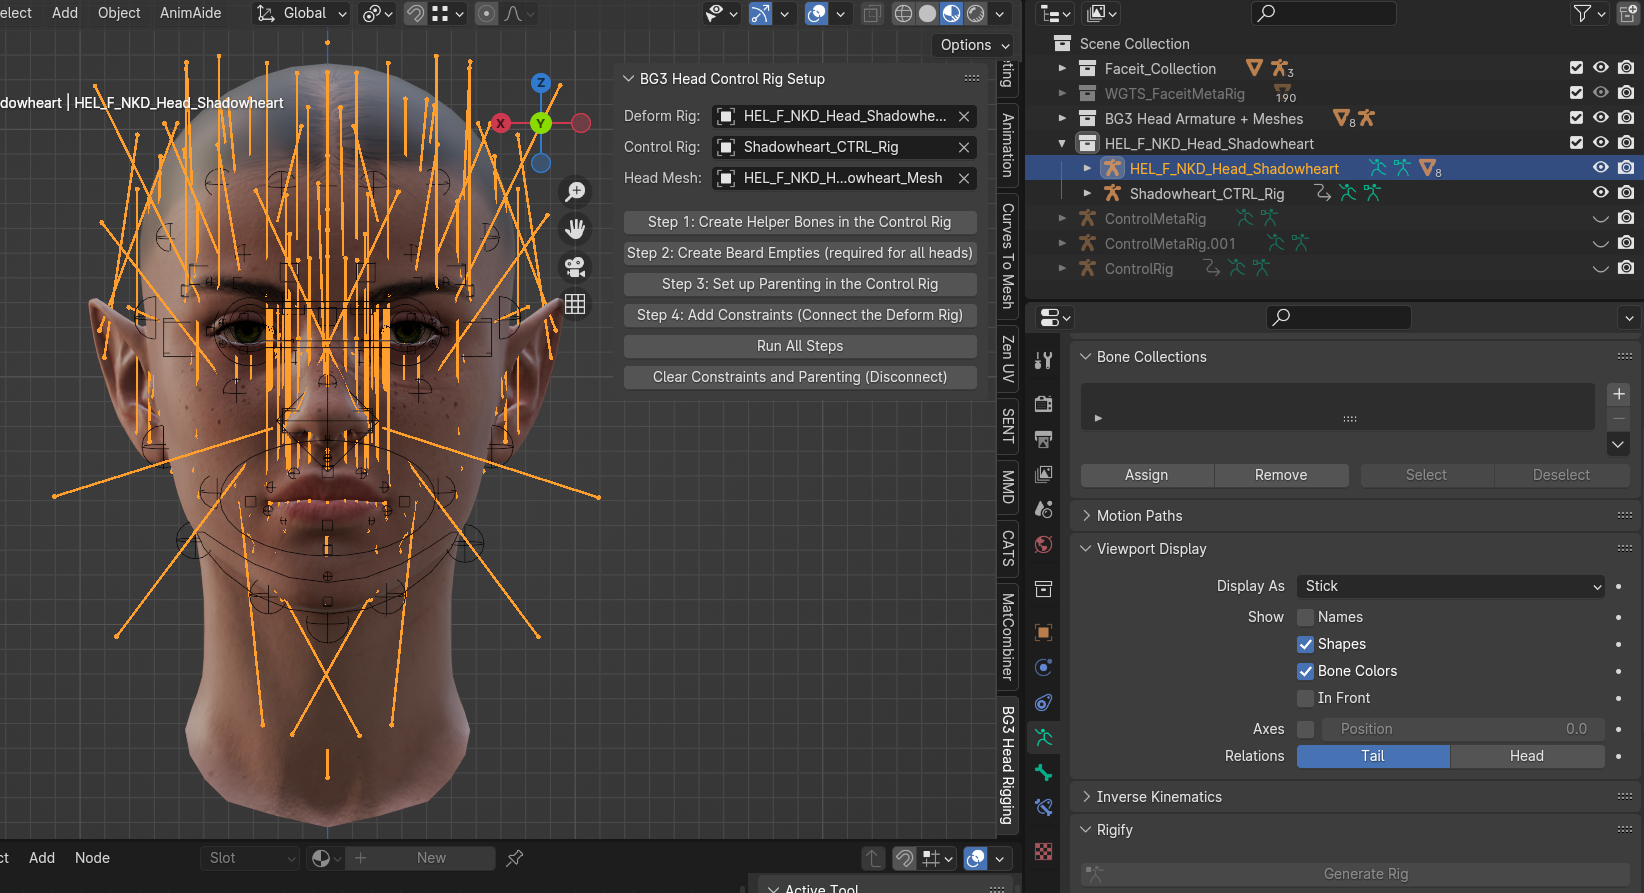
After the Control and Deform Rigs (and the mesh) are set in the addon, you can connect them by clicking “Run All Steps”. Ensure that both Rigs are visible in the viewport. This will set up constraints on the Deform rig to follow the corresponding bones in the Control Rig.
After the setup is complete, you can hide everything but your meshes and the Control Rig.
You can now animate the Control Rig in Pose Mode as you would with the body rig, and afterwards bake the animation on the head skeleton (Deform Rig).
If you are running each step separately, it is not recommended to skip the step to set up the beard empties/sockets, even for feminine heads/heads without beard meshes, since they all have beard bones. This will also ensure that any animation remapped from them in-game will play correctly on masculine heads with beards.